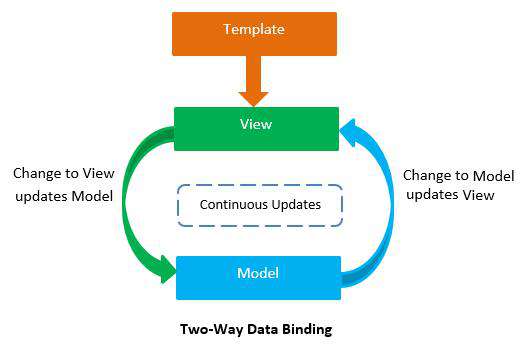
本文是 Vue 3.0 进阶系列 的第三篇文章,在阅读本文前,建议你先阅读 Vue 3.0 指令的本质是什么 和 Vue 3.0 $emit 之后发生了什么 这两篇文章。在看具体示例前,阿宝哥先来简单介绍一下双向绑定,它由两个单向绑定组成:
- 模型 —> 视图数据绑定;
- 视图 —> 模型事件绑定。
在 Vue 中 :value 实现了 模型到视图 的数据绑定,@event 实现了 视图到模型 的事件绑定:
<input :value="searchText" @input="searchText = $event.target.value" />
而在表单中,通过使用内置的 v-model 指令,我们可以轻松地实现双向绑定,比如 <input v-model="searchText" />。介绍完上面的内容,接下来阿宝哥将以一个简单的示例为切入点,带大家一起一步步揭开双向绑定背后的秘密。
<div id="app">
   <input v-model="searchText" />
   <p>搜索的内容:{{searchText}}</p>
</div>
<script>
   const { createApp } = Vue
   const app = createApp({
     data() {
       return {
         searchText: "阿宝哥"
       }
     }
   })
   app.mount('#app')
</script>
在以上示例中,我们在 input 搜索输入框中应用了 v-model 指令,当输入框的内容发生变化时,p 标签中内容会同步更新。

要揭开 v-model 指令背后的秘密,我们可以利用 Vue 3 Template Explorer 在线工具,来看一下模板编译后的结果:
<input v-model="searchText" />

const _Vue = Vue
return function render(_ctx, _cache, $props, $setup, $data, $options) {
  with (_ctx) {
    const { vModelText: _vModelText, createVNode: _createVNode,
      withDirectives: _withDirectives, openBlock: _openBlock, createBlock: _createBlock } = _Vue

    return _withDirectives((_openBlock(), _createBlock("input", {
      "onUpdate:modelValue": $event => (searchText = $event)
    }, null, 8 /* PROPS */, ["onUpdate:modelValue"])),
    [
      [_vModelText, searchText]
    ])
  }
}
在 <input v-model="searchText" /> 模板生成的渲染函数中,我们看到了 Vue 3.0 进阶之指令探秘 文章中介绍的 withDirectives 函数,该函数用于把指令信息添加到 VNode 对象上,它被定义在 runtime-core/src/directives.ts 文件中:
// packages/runtime-core/src/directives.ts
export function withDirectives<T extends VNode>(
  vnode: T,
  directives: DirectiveArguments
): T {
  const internalInstance = currentRenderingInstance
  // 省略部分代码
  const instance = internalInstance.proxy
  const bindings: DirectiveBinding[] = vnode.dirs || (vnode.dirs = [])
  for (let i = 0; i < directives.length; i++) {
    let [dir, value, arg, modifiers = EMPTY_OBJ] = directives[i]
    // 在 mounted 和 updated 时,触发相同行为,而不关系其他的钩子函数
    if (isFunction(dir)) { // 处理函数类型指令
      dir = {
        mounted: dir,
        updated: dir
      } as ObjectDirective
    }
    bindings.push({ // 把指令信息保存到vnode.dirs数组中
      dir, instance, value,
      oldValue: void 0, arg, modifiers
    })
  }
  return vnode
}
除此之外,在模板生成的渲染函数中,我们看到了 vModelText 指令,通过它的名称,我们猜测该指令与模型相关,所以我们先来分析 vModelText 指令。
一、vModelText 指令
vModelText 指令是 ObjectDirective 类型的指令,该指令中定义了 3 个钩子函数:
created:在绑定元素的属性或事件监听器被应用之前调用。mounted:在绑定元素的父组件被挂载后调用。beforeUpdate:在更新包含组件的 VNode 之前调用。
// packages/runtime-dom/src/directives/vModel.ts
type ModelDirective<T> = ObjectDirective<T & { _assign: AssignerFn }>

export const vModelText: ModelDirective<
  HTMLInputElement | HTMLTextAreaElement
> = {
  created(el, { modifiers: { lazy, trim, number } }, vnode) {
    // ...
  },
  mounted(el, { value }) {
    // ..
  },
  beforeUpdate(el, { value, modifiers: { trim, number } }, vnode) {
    // ..
  }
}
接下来,阿宝哥将逐一分析每个钩子函数,这里先从 created 钩子函数开始。
1.1 created 钩子
// packages/runtime-dom/src/directives/vModel.ts
export const vModelText: ModelDirective<
  HTMLInputElement | HTMLTextAreaElement
> = {
  created(el, { modifiers: { lazy, trim, number } }, vnode) {
    el._assign = getModelAssigner(vnode)
    const castToNumber = number || el.type === 'number' // 是否转为数值类型
    // 若使用 lazy 修饰符,则在 change 事件触发后将输入框的值与数据进行同步
    addEventListener(el, lazy ? 'change' : 'input', e => {
      if ((e.target as any).composing) return // 组合输入进行中
      let domValue: string | number = el.value
      if (trim) { // 自动过滤用户输入的首尾空白字符
        domValue = domValue.trim()
      } else if (castToNumber) { // 自动将用户的输入值转为数值类型
        domValue = toNumber(domValue)
      }
      el._assign(domValue) // 更新模型
    })
    if (trim) {
      addEventListener(el, 'change', () => {
        el.value = el.value.trim()
      })
    }
    if (!lazy) {
      addEventListener(el, 'compositionstart', onCompositionStart)
      addEventListener(el, 'compositionend', onCompositionEnd)
      // Safari < 10.2 & UIWebView doesn't fire compositionend when
      // switching focus before confirming composition choice
      // this also fixes the issue where some browsers e.g. iOS Chrome
      // fires "change" instead of "input" on autocomplete.
      addEventListener(el, 'change', onCompositionEnd)
    }
  },
}
对于 created 方法来说,它会通过解构的方式获取 v-model 指令上添加的修饰符,在 v-model 上可以添加 .lazy、.number 和 .trim 修饰符。这里我们简单介绍一下 3 种修饰符的作用:
-
.lazy修饰符:在默认情况下,v-model在每次input事件触发后将输入框的值与数据进行同步。你可以添加lazy修饰符,从而转为在change事件之后进行同步。<!-- 在 change 时而非 input 时更新 --> <input v-model.lazy="msg" /> -
.number修饰符:如果想自动将用户的输入值转为数值类型,可以给v-model添加number修饰符。这通常很有用,因为即使在type="number"时,HTML 输入元素的值也总会返回字符串。如果这个值无法被parseFloat()解析,则会返回原始的值。<input v-model.number="age" type="number" /> -
.trim修饰符:如果要自动过滤用户输入的首尾空白字符,可以给v-model添加trim修饰符。<input v-model.trim="msg" />
而在 created 方法内部,会通过 getModelAssigner 函数获取 ModelAssigner,从而用于更新模型对象。
// packages/runtime-dom/src/directives/vModel.ts
const getModelAssigner = (vnode: VNode): AssignerFn => {
  const fn = vnode.props!['onUpdate:modelValue']
  return isArray(fn) ? value => invokeArrayFns(fn, value) : fn
}
对于我们的示例来说,通过 getModelAssigner 函数获取的 ModelAssigner 对象是 $event => (searchText = $event) 函数。在获取 ModelAssigner 对象之后,我们就可以更新模型的值了。created 方法中的其他代码相对比较简单,阿宝哥就不详细介绍了。这里我们来介绍一下 compositionstart 和 compositionend 事件。
中文、日文、韩文等需要借助输入法组合输入,即使是英文,也可以利用组合输入进行选词等操作。在一些实际场景中,我们希望等用户组合输入完的一段文字才进行对应操作,而不是每输入一个字母,就执行相关操作。比如,在关键字搜索场景中,等用户完整输入 阿宝哥 之后再执行搜索操作,而不是输入字母 a 之后就开始搜索。要实现这个功能,我们就需要借助 compositionstart 和 compositionend 事件。另外,需要注意的是,compositionstart 事件发生在 input 事件之前,因此利用它可以优化中文输入的体验。
了解完 compositionstart(组合输入开始) 和 compositionend (组合输入结束)事件,我们再来看一下 onCompositionStart 和 onCompositionEnd 这两个事件处理器:
function onCompositionStart(e: Event) {
  ;(e.target as any).composing = true
}

function onCompositionEnd(e: Event) {
  const target = e.target as any
  if (target.composing) {
    target.composing = false
    trigger(target, 'input')
  }
}

// 触发元素上的指定事件
function trigger(el: HTMLElement, type: string) {
  const e = document.createEvent('HTMLEvents')
  e.initEvent(type, true, true)
  el.dispatchEvent(e)
}
当组合输入时,在 onCompositionStart 事件处理器中,会 e.target 对象上添加 composing 属性并设置该属性的值为 true。而在 change 事件或 input 事件回调函数中,如果发现 e.target 对象的 composing 属性为 true 则会直接返回。当组合输入完成后,在 onCompositionEnd 事件处理器中,会把 target.composing 的值设置为 false 并手动触发 input 事件:
// packages/runtime-dom/src/directives/vModel.ts
export const vModelText: ModelDirective<
  HTMLInputElement | HTMLTextAreaElement
> = {
  created(el, { modifiers: { lazy, trim, number } }, vnode) {
    // 省略部分代码
    addEventListener(el, lazy ? 'change' : 'input', e => {
      if ((e.target as any).composing) return
   		// ...
    })
  },
}
好的,created 钩子函数就分析到这里,接下来我们来分析 mounted 钩子。
1.2 mounted 钩子
// packages/runtime-dom/src/directives/vModel.ts
export const vModelText: ModelDirective<
  HTMLInputElement | HTMLTextAreaElement
> = {
  // set value on mounted so it's after min/max for type="range"
  mounted(el, { value }) {
    el.value = value == null ? '' : value
  },
}
mounted 钩子的逻辑很简单,如果 value 值为 null 时,把元素的值设置为空字符串,否则直接使用 value 的值。
1.3 beforeUpdate 钩子
// packages/runtime-dom/src/directives/vModel.ts
export const vModelText: ModelDirective<
  HTMLInputElement | HTMLTextAreaElement
> = {
  beforeUpdate(el, { value, modifiers: { trim, number } }, vnode) {
    el._assign = getModelAssigner(vnode)
    // avoid clearing unresolved text. #2302
    if ((el as any).composing) return
    if (document.activeElement === el) {
      if (trim && el.value.trim() === value) {
        return
      }
      if ((number || el.type === 'number') && toNumber(el.value) === value) {
        return
      }
    }
    const newValue = value == null ? '' : value
    if (el.value !== newValue) { // 新旧值不相等时,执行更新操作
      el.value = newValue
    }
  }
}
相信使用过 Vue 的小伙伴都知道,v-model 指令不仅可以应用在 input 和 textarea 元素上,在复选框(Checkbox)、单选框(Radio)和选择框(Select)上也可以使用 v-model 指令。不过需要注意的是,虽然这些元素上都是使用 v-model 指令,但实际上对于复选框、单选框和选择框来说,它们是由不同的指令来完成对应的功能。这里我们以单选框为例,来看一下应用 v-model 指令后,模板编译的结果:
<input type="radio" value="One" v-model="picked" />

const _Vue = Vue
return function render(_ctx, _cache, $props, $setup, $data, $options) {
  with (_ctx) {
    const { vModelRadio: _vModelRadio, createVNode: _createVNode,
      withDirectives: _withDirectives, openBlock: _openBlock, createBlock: _createBlock } = _Vue

    return _withDirectives((_openBlock(), _createBlock("input", {
      type: "radio",
      value: "One",
      "onUpdate:modelValue": $event => (picked = $event)
    }, null, 8 /* PROPS */, ["onUpdate:modelValue"])), [
      [_vModelRadio, picked]
    ])
  }
}
由以上代码可知,在单选框应用 v-model 指令后,双向绑定的功能会交给 vModelRadio 指令来实现。除了 vModelRadio 之外,还有 vModelSelect 和 vModelCheckbox 指令,它们被定义在 runtime-dom/src/directives/vModel.ts 文件中,感兴趣的小伙伴可以自行研究一下。
其实 v-model 本质上是语法糖。它负责监听用户的输入事件来更新数据,并在某些场景下进行一些特殊处理。需要注意的是 v-model 会忽略所有表单元素的 value、checked、selected attribute 的初始值而总是将当前活动实例的数据作为数据来源。你应该通过在组件的 data 选项中声明初始值。
此外,v-model 在内部为不同的输入元素使用不同的 property 并抛出不同的事件:
- text 和 textarea 元素使用
valueproperty 和input事件; - checkbox 和 radio 元素使用
checkproperty 和change事件; - select 元素将
value作为 prop 并将change作为事件。
这里你已经知道,可以用 v-model 指令在表单 <input>、<textarea> 及 <select> 元素上创建双向数据绑定。但如果你也想在组件上使用 v-model 指令来创建双向数据绑定,那应该如何实现呢?
二、在组件上使用 v-model
假设你想定义一个 custom-input 组件并在该组件上使用 v-model 指令来实现双向绑定,在实现该功能前,我们先利用 Vue 3 Template Explorer 在线工具,看一下模板编译后的结果:
<custom-input v-model="searchText"></custom-input>

const _Vue = Vue
return function render(_ctx, _cache, $props, $setup, $data, $options) {
  with (_ctx) {
    const { resolveComponent: _resolveComponent, createVNode: _createVNode,
      openBlock: _openBlock, createBlock: _createBlock } = _Vue

    const _component_custom_input = _resolveComponent("custom-input")
    return (_openBlock(), _createBlock(_component_custom_input, {
      modelValue: searchText,
      "onUpdate:modelValue": $event => (searchText = $event)
    }, null, 8 /* PROPS */, ["modelValue", "onUpdate:modelValue"]))
  }
}
通过观察以上的渲染函数,我们可知在 custom-input 组件上应用了 v-model 指令,经过编译器编译之后,会生成一个名为 modelValue 的输入属性和一个名为 update:modelValue 的自定义事件名。如果你对自定义事件内部原理还不清楚的话,可以阅读 Vue 3.0 进阶之自定义事件探秘 这篇文章。了解完这些内容之后,我们就可以开始实现 custom-input 组件了:
<div id="app">
   <custom-input v-model="searchText"></custom-input>
   <p>搜索的内容:{{searchText}}</p>
</div>
<script>
   const { createApp } = Vue
   const app = createApp({
     data() {
       return {
         searchText: "阿宝哥"
       }
     }
    })
   app.component('custom-input', {
     props: ['modelValue'],
     emits: ['update:modelValue'],
     template: `
       <input type="text"
          :value="modelValue"
          @input="$emit('update:modelValue', $event.target.value)"
       >`
   })
   app.mount('#app')
</script>
在自定义组件中实现双向绑定的功能,除了使用自定义事件之外,还可以使用计算属性的功能来定义 getter 和 setter。这里阿宝哥就不展开介绍了,感兴趣的小伙伴可以阅读 Vue 3 官网 - 组件基础 的相关内容。
三、阿宝哥有话说
3.1 如何修改 v-model 默认的 prop 名和事件名?
默认情况下,组件上的 v-model 使用 modelValue 作为 prop 和 update:modelValue 作为事件。我们可以通过向 v-model 指令传递参数来修改这些名称:
<custom-input v-model:name="searchText"></custom-input>
以上的模板,经过编译器编译后的结果如下:
const _Vue = Vue
return function render(_ctx, _cache, $props, $setup, $data, $options) {
  with (_ctx) {
    const { resolveComponent: _resolveComponent, createVNode: _createVNode,
      openBlock: _openBlock, createBlock: _createBlock } = _Vue

    const _component_custom_input = _resolveComponent("custom-input")
    return (_openBlock(), _createBlock(_component_custom_input, {
      name: searchText,
      "onUpdate:name": $event => (searchText = $event)
    }, null, 8 /* PROPS */, ["name", "onUpdate:name"]))
  }
}
通过观察生成的渲染函数,我们可知自定义 custom-input 组件接收一个 name 输入属性并含有一个名为 update:name 的自定义事件:
app.component('custom-input', {
  props: {
    name: String
  },
  emits: ['update:name'],
  template: `
    <input type="text"
      :value="name"
      @input="$emit('update:name', $event.target.value)">
  `
})
至于自定义的事件名为什么是 "onUpdate:name" 这种形式,你可以从 Vue 3.0 进阶之自定义事件探秘 这篇文章中介绍的 emit 函数中找到对应的答案。
3.2 能否在组件上使用多个 v-model 指令?
在某些场景下,我们是希望在组件上使用多个 v-model 指令,每个指令与不同的数据做绑定。比如一个 user-name 组件,该组件允许用户输入 firstName 和 lastName。该组件期望的使用方式如下:
<user-name
  v-model:first-name="firstName"
  v-model:last-name="lastName"
></user-name>
同样,我们使用 Vue 3 Template Explorer 在线工具,先来看一下以上模板编译后的结果:
const _Vue = Vue
return function render(_ctx, _cache, $props, $setup, $data, $options) {
  with (_ctx) {
    const { resolveComponent: _resolveComponent, createVNode: _createVNode,
      openBlock: _openBlock, createBlock: _createBlock } = _Vue

    const _component_user_name = _resolveComponent("user-name")
    return (_openBlock(), _createBlock(_component_user_name, {
      "first-name": firstName,
      "onUpdate:first-name": $event => (firstName = $event),
      "last-name": lastName,
      "onUpdate:last-name": $event => (lastName = $event)
    }, null, 8 /* PROPS */, ["first-name", "onUpdate:first-name", "last-name", "onUpdate:last-name"]))
  }
}
通过观察以上的输出结果,我们可知 v-model:first-name 和 v-model:last-name 都会生成对应的 prop 属性和自定义事件。HTML 中的 attribute 名是大小写不敏感的,所以浏览器会把所有大写字符解释为小写字符。这意味着当你使用 DOM 中的模板时,camelCase (驼峰命名法)的 prop 名需要使用其等价的 kebab-case(短横线分隔命名)命名。比如:
<!-- kebab-case in HTML -->
<blog-post post-></blog-post>

app.component('blog-post', {
  props: ['postTitle'],
  template: '<h3>{{ postTitle }}</h3>'
})
反之,对于 first-name 和 last-name 属性名来说,在定义 user-name 组件时,我们将使用 firstName 和 lastName 驼峰命名方式。
 <div id="app">
    <user-name
       v-model:first-name="firstName"
       v-model:last-name="lastName">
    </user-name>
    Your name: {{firstName}} {{lastName}}
</div>
<script>
   const { createApp } = Vue
   const app = createApp({
     data() {
       return {
         firstName: "",
         lastName: ""
       }
     }
   })
   app.component('user-name', {
     props: {
       firstName: String,
       lastName: String
     },
     emits: ['update:firstName', 'update:lastName'],
     template: `
       <input
          type="text"
          :value="firstName"
          @input="$emit('update:firstName', $event.target.value)">
       <input
          type="text"
          :value="lastName"
          @input="$emit('update:lastName', $event.target.value)">
      `
   })
   app.mount('#app')
</script>
在以上的代码中,user-name 组件使用的自定义属性和事件名都是驼峰的形式。很明显与模板编译后生成的命名格式不一致,那么以上的 user-name 组件可以正常工作么?答案是可以的,这是因为对于自定义事件来说,在 emit 函数内部会通过 hyphenate 函数,把事件名从 camelCase(驼峰命名法)的形式转换为 kebab-case(短横线分隔命名)的形式,即 hyphenate(event):
// packages/runtime-core/src/componentEmits.ts
export function emit(
  instance: ComponentInternalInstance,
  event: string,
  ...rawArgs: any[]
) {
  // 省略部分代码
  // for v-model update:xxx events, also trigger kebab-case equivalent
  // for props passed via kebab-case
  if (!handler && isModelListener) {
    handlerName = toHandlerKey(hyphenate(event))
    handler = props[handlerName]
  }

  if (handler) {
    callWithAsyncErrorHandling(
      handler,
      instance,
      ErrorCodes.COMPONENT_EVENT_HANDLER,
      args
    )
  }
}
而 hyphenate 函数的实现也很简单,具体如下所示:
// packages/shared/src/index.ts
const hyphenateRE = /\B([A-Z])/g

// cacheStringFunction 函数提供了缓存功能
export const hyphenate = cacheStringFunction((str: string) =>
  str.replace(hyphenateRE, '-$1').toLowerCase()
)
3.3 如何为 v-model 添加自定义修饰符?
在前面阿宝哥已经介绍了 v-model 的内置修饰符:.trim、.number 和 .lazy。但在某些场景下,你可能希望自定义修饰符。在介绍如何自定义修饰符前,我们再次利用 Vue 3 Template Explorer 在线工具,看一下 v-model 使用内置修饰符后,模板编译的结果:
<custom-input v-model.lazy.number="searchText"></custom-input>

const _Vue = Vue
return function render(_ctx, _cache, $props, $setup, $data, $options) {
  with (_ctx) {
    const { resolveComponent: _resolveComponent, createVNode: _createVNode,
      openBlock: _openBlock, createBlock: _createBlock } = _Vue

    const _component_custom_input = _resolveComponent("custom-input")
    return (_openBlock(), _createBlock(_component_custom_input, {
      modelValue: searchText,
      "onUpdate:modelValue": $event => (searchText = $event),
      modelModifiers: { lazy: true, number: true }
    }, null, 8 /* PROPS */, ["modelValue", "onUpdate:modelValue"]))
  }
}
通过观察生成的渲染函数,我们可以看到 v-model 上添加的 .lazy 和 .number 修饰符,被编译到 modelModifiers prop 属性中。假设我们要为自定义一个 capitalize 修饰符 ,该修饰符的作用是将 v-model 绑定字符串的第一个字母转成大写:
<custom-input v-model.capitalize="searchText"></custom-input>

const _Vue = Vue
return function render(_ctx, _cache, $props, $setup, $data, $options) {
  with (_ctx) {
    const { resolveComponent: _resolveComponent, createVNode: _createVNode,
      openBlock: _openBlock, createBlock: _createBlock } = _Vue

    const _component_custom_input = _resolveComponent("custom-input")
    return (_openBlock(), _createBlock(_component_custom_input, {
      modelValue: searchText,
      "onUpdate:modelValue": $event => (searchText = $event),
      modelModifiers: { capitalize: true }
    }, null, 8 /* PROPS */, ["modelValue", "onUpdate:modelValue"]))
  }
}
很明显 v-model 上的 .capitalize 修饰符,也被编译到 modelModifiers prop 属性中。了解完这些,我们就可以实现上述的修饰符,具体如下所示:
<div id="app">
   <custom-input v-model.capitalize="searchText"></custom-input>
   <p>搜索的内容:{{searchText}}</p>
</div>
<script>
   const { createApp } = Vue
   const app = createApp({
     data() {
       return {
         searchText: ""
       }
     }
   })
   app.component('custom-input', {
     props: {
       modelValue: String,
       modelModifiers: {
         default: () => ({})
       }
     },
     emits: ['update:modelValue'],
     methods: {
       emitValue(e) {
         let value = e.target.value
         if (this.modelModifiers.capitalize) {
           value = value.charAt(0).toUpperCase() + value.slice(1)
         }
         this.$emit('update:modelValue', value)
       }
     },
     template: `<input
       type="text"
       :value="modelValue"
       @input="emitValue">`
   })
  app.mount('#app')
</script>
本文阿宝哥主要介绍了双向绑定的概念和 Vue 3 中双向绑定背后的原理。为了让大家能够更深入地掌握 v-model 的相关知识,阿宝哥从源码的角度分析了 vModelText 指令的内部实现。此外,阿宝哥还介绍了在组件中如何使用多个 v-model 指令及如何为 v-model 添加自定义修饰符。
Vue 3.0 进阶系列的文章还在持续更新,目前已更新到第九篇,想一起学习 Vue 3.0 的小伙伴可以添加阿宝哥微信 —— semlinker。
四、参考资源
- Vue 3 官网 - 自定义指令
- Vue 3 官网 - 自定义事件
常见问题FAQ
- 免费下载或者VIP会员专享资源能否直接商用?
- 本站所有资源版权均属于原作者所有,这里所提供资源均只能用于参考学习用,请勿直接商用。若由于商用引起版权纠纷,一切责任均由使用者承担。更多说明请参考 VIP介绍。
- 提示下载完但解压或打开不了?
- 找不到素材资源介绍文章里的示例图片?
- 模板不会安装或需要功能定制以及二次开发?


发表评论
还没有评论,快来抢沙发吧!