本文主要介绍在 Nuxt 中使用 GSAP 和 vue-scrollmagic 插件实现较为复杂的页面滚动交互动效。
预览
CodeSandbox: Nuxt 开发笔记 - 3 滚动交互动效
文档
GSAP 官网,vue-scrollmagic,ScrollMagic 官网
安装
vue-scrollmagic
详细安装步骤请见:vue-scrollmagic,
下面只是笔者的使用方式,仅供参考。
# 安装 vue-scrollmagic 时会自动安装 ScrollMagic
$ yarn add vue-scrollmagic
GSAP
详细安装步骤请见:GSAP
下面只是笔者的使用方式,仅供参考。
-
注册登录后进入 Dashboard 页面,这里提供 GSAP 压缩包 和 Token 两种方式
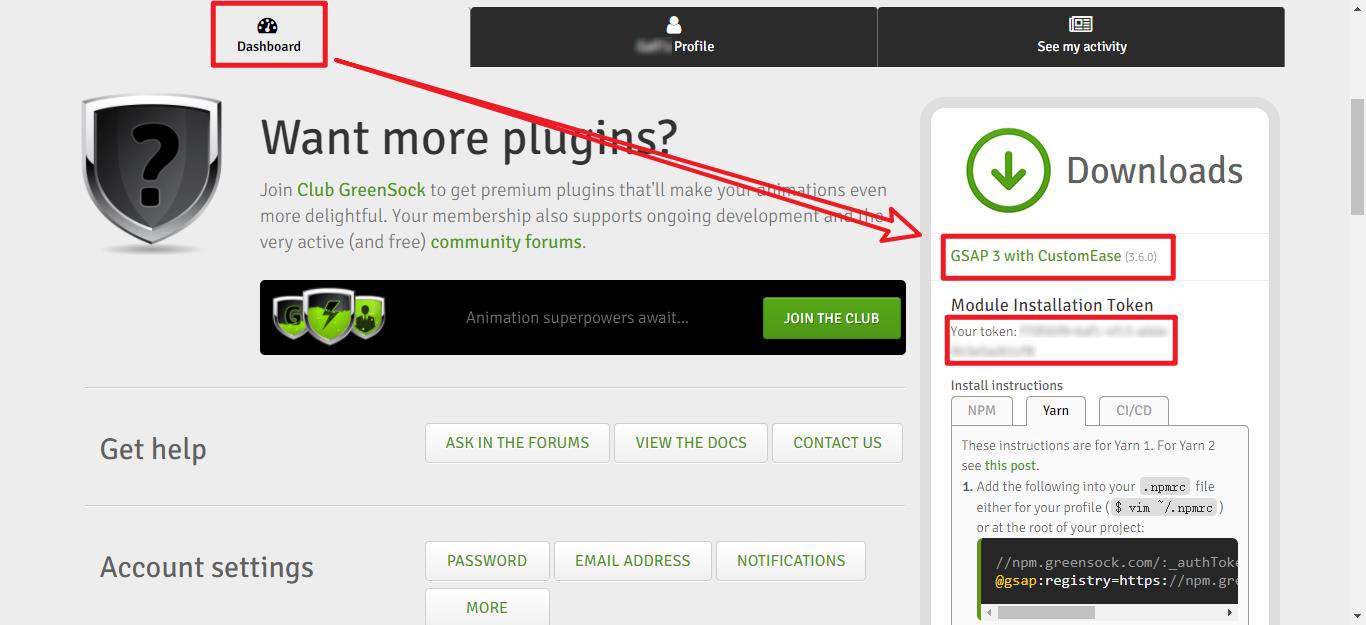
-
通过
.npmrc文件安装(个人推荐)在项目根目录新建
.npmrc文件(笔者在 GitHub 中提供了自用的.npmrc文件,仅供个人学习使用,切勿他用)//npm.greensock.com/:_authToken=<token> @gsap:registry=https://npm.greensock.com打开终端
# <package> 有以下选项 business, shockingly, simply, or member # 在官网 Dashboard 页面(上图)的右边栏中有标明,一般默认是 member。 $ yarn add gsap@npm:@gsap/<package> -
通过
gsap-bonus.tgz文件安装在下载的压缩包里找到该文件,将其放到项目根目录下

打开终端
$ yarn add ./gsap-bonus.tgz -
步骤 2、3 选择一种即可,二者安装后的
package.json文件中有一些差异"gsap": "npm:@gsap/member" / "gsap": "file:gsap-bonus.tgz"
配置
详细配置步骤请见:vue-scrollmagic
下面只是笔者的使用方式,仅供参考。
-
在
plugins文件夹中新建vue-scrollmagic.js文件import Vue from "vue"; import VueScrollmagic from "vue-scrollmagic"; Vue.use(VueScrollmagic); -
修改根目录中的
nuxt.config.js文件plugins: [ { src: "@/plugins/vue-scrollmagic.js", ssr: false } ],
使用
-
在
components文件夹中创建ScrollMagicBasic.vue组件<template> <div> <div :class="`scroll-scene item-${scene.id}`" v-for="scene in sceneData" :key="scene.id"> <h1>{{ scene.title }}</h1> </div> </div> </template> <script> export default { name: "ScrollMagicBasic", props: { sceneData: { type: Array, default: () => { return []; } } }, mounted() { const that = this; that.scrollGsap(); }, methods: { scrollGsap() { const that = this; const slides = document.querySelectorAll(".scroll-scene"); for (let i = 0; i < slides.length; i++) { that.$scrollmagic.addScene( that.$scrollmagic .scene({ triggerElement: slides[i], triggerHook: "onLeave", duration: "100%" }) .setPin(slides[i], { pushFollowers: false }) // .addIndicators() // 调试 ); } } } }; </script> <style> .scroll-scene { height: 100vh; display: flex; flex-direction: column; align-items: center; justify-content: center; } </style> -
在
pages文件夹中的index.vue文件中使用该组件<template> <div> <div class="demo"> <ScrollMagicBasic :sceneData="basicSceneData" /> </div> </div> </template> <script> import ScrollMagicBasic from "@/components/ScrollMagicBasic"; export default { data() { return { basicSceneData: [ { id: 0, title: "scene item-0", }, { id: 1, title: "scene item-1", }, { id: 2, title: "scene item-2", }, { id: 3, title: "scene item-3", } ] } }, components: { ScrollMagicBasic } } </script> <style> .demo { position: relative; overflow: hidden; background-color: white; } .item-0 { background-color: teal; } .item-1 { background-color: thistle; } .item-2 { background-color: tomato; } .item-3 { background-color: turquoise; } </style> -
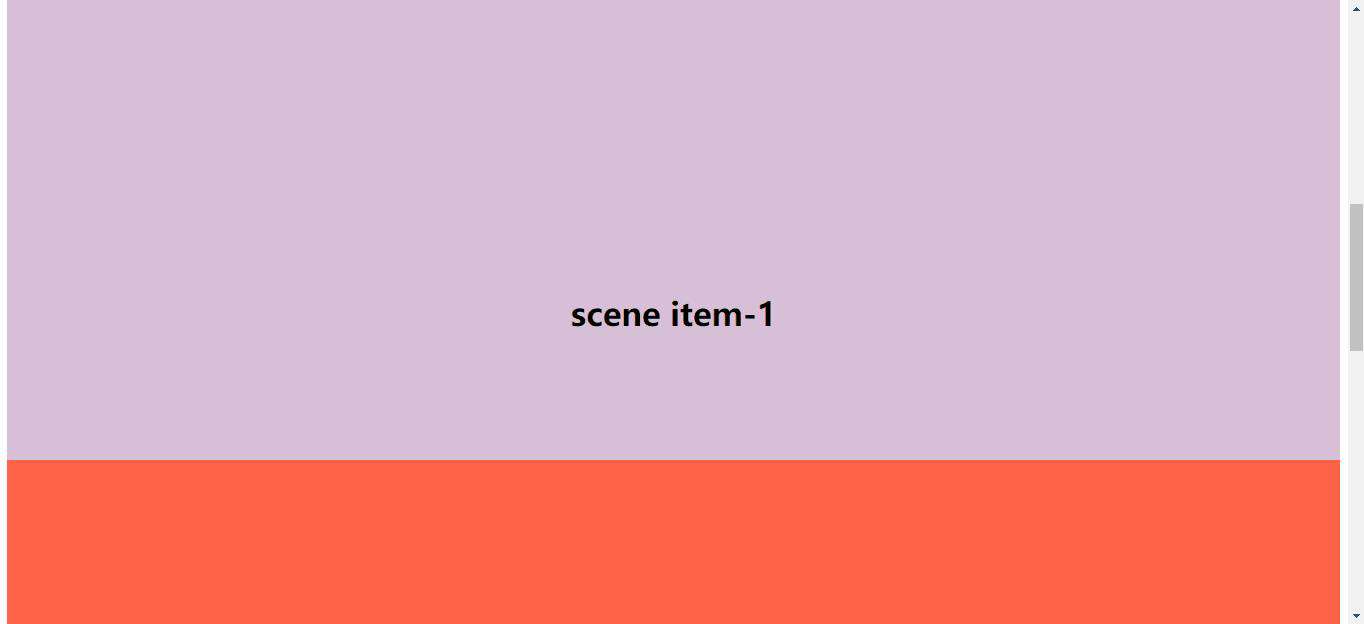
效果预览(仅使用 vue-scrollmagic 实现的简单的滚动效果)
-
在
components文件夹中创建ScrollMagicAdvanced.vue组件<template> <div> <div class="pin-wrap"> <div class="scroll-wrap"> <div :class="`scroll-part item-${scene.id}`" v-for="scene in sceneData" :key="scene.id"> <h1>{{ scene.title }}</h1> </div> </div> </div> </div> </template> <script> export default { name: "ScrollMagicAdvanced", props: { sceneData: { type: Array, default: () => { return []; } } }, mounted() { const that = this; that.scrollGsap(); }, methods: { scrollGsap() { const that = this; var tl = new TimelineMax({ onUpdate: updatePercentage }); tl.to(".scroll-wrap", 1, {x: "-12.5%"}); tl.to(".scroll-wrap", 1, {x: "-25%"}); tl.to(".scroll-wrap", 1, {x: "-37.5%"}); tl.to(".scroll-wrap", 1, {x: "-50%"}); const scene = that.$scrollmagic .scene({ triggerElement: ".pin-wrap", triggerHook: "onLeave", duration: "400%" }) .setPin(".pin-wrap") .setTween(tl); // .addIndicators(); // 调试 that.$scrollmagic.addScene(scene); function updatePercentage() { tl.progress(); } } } }; </script> <style> .pin-wrap { width: 100%; height: 100vh; overflow: hidden; -webkit-perspective: 1000; perspective: 1000; } .scroll-wrap { width: 200%; height: 100vh; } .scroll-part { width: 12.5%; height: 100vh; float: left; display: flex; flex-direction: column; align-items: center; justify-content: center; } </style> -
在
pages文件夹中的index.vue文件中使用该组件<template> <div> <div class="demo"> <ScrollMagicAdvanced :sceneData="advancedSceneData"> </ScrollMagicAdvanced> </div> </div> </template> <script> import ScrollMagicAdvanced from "@/components/ScrollMagicAdvanced"; export default { data() { return { advancedSceneData: [{ id: 0, title: "part item-0", }, { id: 1, title: "part item-1", }, { id: 2, title: "part item-2", }, { id: 3, title: "part item-3", }, { id: 4, title: "part item-4", }, { id: 5, title: "part item-5", }, { id: 6, title: "part item-6", }, { id: 7, title: "part item-7", } ] } }, components: { ScrollMagicBasic, ScrollMagicAdvanced } } </script> <style> .demo { position: relative; overflow: hidden; background-color: white; } .item-0 { background-color: teal; } .item-1 { background-color: thistle; } .item-2 { background-color: tomato; } .item-3 { background-color: turquoise; } .item-4 { background-color: violet; } .item-5 { background-color: wheat; } .item-6 { background-color: yellow; } .item-7 { background-color: yellowgreen; } </style> -
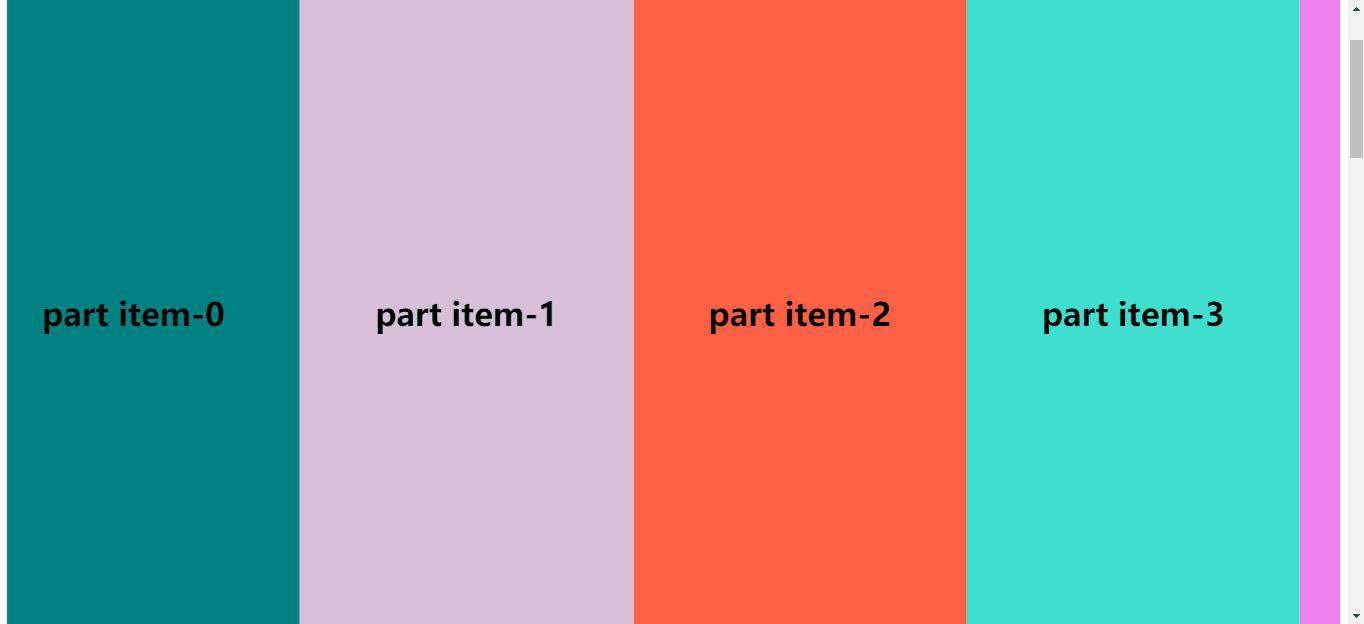
效果预览(vue-scrollmagic 搭配 gsap 实现的复杂的滚动效果)
-
更多效果请前参见 ScrollMagic 官网 提供的官方案例
源码
GitHub:Nuxt 开发笔记 - 3 滚动交互动效
常见问题FAQ
- 免费下载或者VIP会员专享资源能否直接商用?
- 本站所有资源版权均属于原作者所有,这里所提供资源均只能用于参考学习用,请勿直接商用。若由于商用引起版权纠纷,一切责任均由使用者承担。更多说明请参考 VIP介绍。
- 提示下载完但解压或打开不了?
- 找不到素材资源介绍文章里的示例图片?
- 模板不会安装或需要功能定制以及二次开发?


发表评论
还没有评论,快来抢沙发吧!