在vue和react项目中切换,老弄混一些语法,最近在用vue3开发后台管理模板时,学习了一下用jsx来写vue项目,对写过react项目的我来说感觉很香!
对比了element-plus和antd-vue两个ui库,使用antd-vue的话可能更贴近react的ui库antd,这里使用element-plus创建环境。后文中也会提到一些使用antd-vue的跳坑点。
瞅一眼demo,就一眼:
import { defineComponent, reactive } from 'vue';

export default defineComponent({
  setup() {
    const data = reactive({
      time: 123123
    });
    return () => <div>{ data.time }</div>;
  }
});
创建开发环境
vite都2.x了,当然用它创建项目。文档地址:vitejs.dev/。
# 创建项目
yarn create @vitejs/app

# 进入项目
cd vite-project

# 按照依赖
yarn
配置别名
tsconfig.json
{
  "compilerOptions": {
    "target": "esnext",
    "module": "esnext",
    "strict": true,
    "jsx": "preserve",
    "importHelpers": true,
    "moduleResolution": "node",
    "experimentalDecorators": true,
    "skipLibCheck": true,
    "esModuleInterop": true,
    "allowSyntheticDefaultImports": true,
    "sourceMap": true,
    "baseUrl": ".",
    "paths": {
      "@/*": ["src/*"]
    },
    "lib": ["esnext", "dom", "dom.iterable", "scripthost"]
  },
  "include": [
    "src/**/*.ts",
    "src/**/*.tsx",
    "src/**/*.vue",
    "tests/**/*.ts",
    "tests/**/*.tsx"
  ],
  "exclude": ["node_modules"]
}
vite.config.ts
import { defineConfig } from 'vite';
import vue from '@vitejs/plugin-vue'
import path from 'path';

export default defineConfig({
  ...
  alias: {
    '@': path.resolve(__dirname, './src')
  }
  ...
});
一定记得添加@types/node
yarn add -D @types/node
添加eslint及prettier
一方面规范代码风格,二可以提示一些语法错误。
yarn add -D eslint eslint-plugin-vue prettier eslint-config-prettier eslint-plugin-prettier @typescript-eslint/parser @typescript-eslint/eslint-plugin
在package.json中添加(让根目录文件更少一些)
...
"eslintConfig": {
  "root": true,
  "env": {
    "node": true
  },
  "extends": [
    "plugin:vue/vue3-recommended",
    "plugin:@typescript-eslint/recommended",
    "plugin:prettier/recommended",
    "prettier/@typescript-eslint"
  ],
  "parserOptions": {
    "ecmaVersion": 2020
  },
  "rules": {}
},
"prettier": {
  "singleQuote": true,
  "trailingComma": "none",
  "semi": true,
  "printWidth": 90,
  "proseWrap": "never",
  "endOfLine": "auto"
}
...
/.eslintignore 按需添加
.vscode/
.idea/
node_modules/
dist/
src/assets/

local_
/.prettierignore 同上
如果安装了eslint和prettier插件,就会正确的提示错误信息了
pre-commit
提交前格式化代码
yarn add -D husky lint-staged
再在package.json中添加
...
"husky": {
  "hooks": {
    "pre-commit": "lint-staged"
  }
},
"lint-staged": {
  "src/**/*.{ts,tsx}": ["eslint --fix", "prettier"]
}
...
接入jsx
根据vite文档提示,我们首先需要安装@vitejs/plugin-vue-jsx,@vitejs/plugin-vue-jsx,它让jsx组件支持HMR。
yarn add -D @vitejs/plugin-vue-jsx
// vite.config.ts
import path from 'path';
import { defineConfig } from 'vite';
import vue from '@vitejs/plugin-vue';
import vueJsx from '@vitejs/plugin-vue-jsx';

export default defineConfig({
  alias: {
    '@': path.resolve(__dirname, './src')
  },
  plugins: [vue(), vueJsx()]
});
然后还需要@vue/babel-plugin-jsx来支持我们使用jsx,@vue/babel-plugin-jsx。
yarn add -D @vue/babel-plugin-jsx
// package.json
...
"babel": {
  "plugins": [
    "@vue/babel-plugin-jsx"
  ]
}
...
添加vuex
yarn add vuex@next
添加相应的文件及内容
/src/store/index.ts
import { InjectionKey } from 'vue';
import { createStore, Store } from 'vuex';

import setting, { SettingStateType } from './modules/setting';

export interface StateType {
  setting: SettingStateType;
}

export const key: InjectionKey<Store<StateType>> = Symbol();

export default createStore({
  state: {},
  mutations: {},
  actions: {},
  modules: {
    setting,
  },
});
/src/store/modules/setting.ts
export interface SettingStateType {
  projectName: string;
}

const state: SettingStateType = {
  projectName: 'vue3-env'
};

const mutations = {
  changeName(state: SettingStateType, payload: SettingStateType): void {
    state.projectName = payload.projectName;
  }
};

const actions = {};

export default {
  namespaced: true,
  state,
  mutations,
  actions
};
修改main.ts
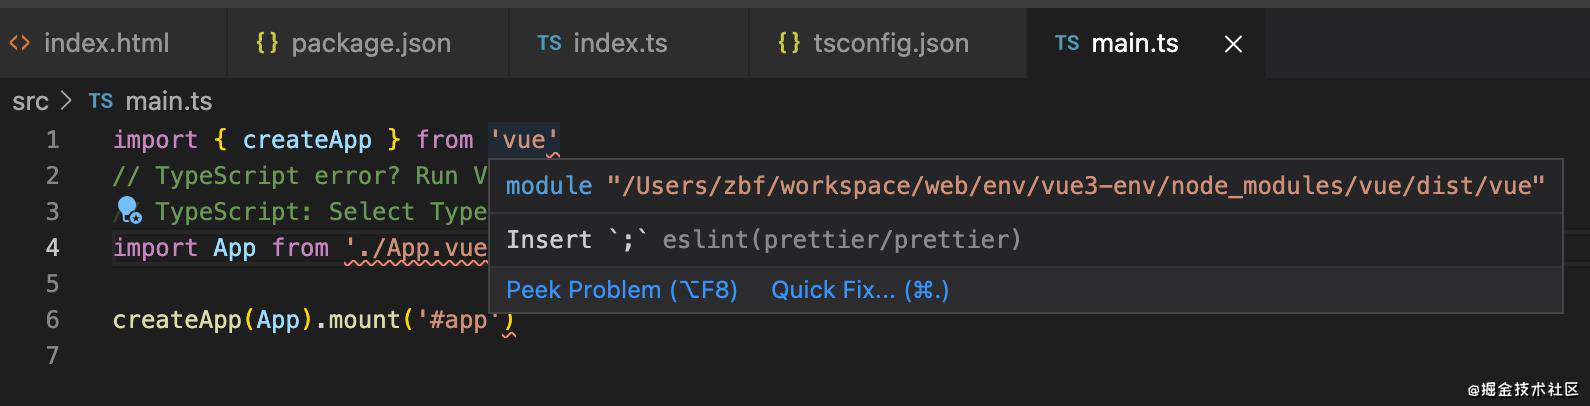
import { createApp } from 'vue';
import App from './App';
import store, { key } from './store';

createApp(App).use(store, key).mount('#app');
添加vue-router
yarn add vue-router@next
/src/router/index.ts
import {
createRouter,
createWebHistory,
RouteRecordRaw,
RouteLocationNormalized
} from 'vue-router';
type AdminRouteRecordRaw = RouteRecordRaw & {
meta?: {
title?: string;
};
children?: Array<AdminRouteRecordRaw>;
[propName: string]: any;
};
// vue-router子路由path不需要添加/
const routes: Array<AdminRouteRecordRaw> = [
{
path: '/',
redirect: '/index'
},
{
path: '/index',
name: 'Index',
meta: { title: '首页' },
component: () => import('@/views/Home')
},
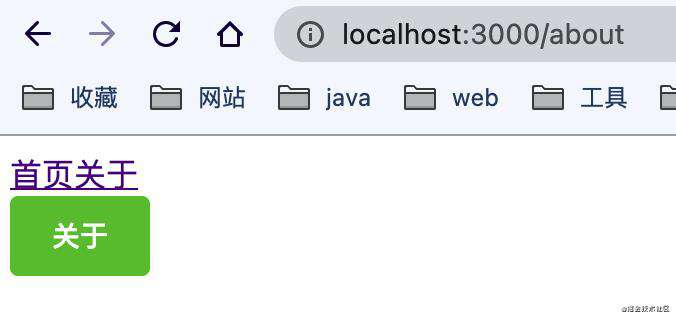
{
path: '/about',
name: 'About',
meta: { title: '关于' },
component: () => import('@/views/About')
}
];
const router = createRouter({
history: createWebHistory(process.env.BASE_URL),
routes
});
router.beforeEach((to: RouteLocationNormalized, _, next) => {
document.title = `Vue3-env ${to.meta?.title || ''}`;
next();
});
export { AdminRouteRecordRaw, routes };
export default router;
/src/App.tsx
import { defineComponent } from 'vue';
import { RouterLink } from 'vue-router';

export default defineComponent({
  render() {
    return (
      <>
        <header>
          <RouterLink to="/">首页</RouterLink>
          <RouterLink to="/about">关于</RouterLink>
        </header>
        <main>
          <router-view />
        </main>
      </>
    );
  }
});
/src/views/Home/index.tsx
import { defineComponent } from 'vue';

export default defineComponent({
  setup() {
    return () => <div>首页</div>;
  }
});
/src/virw/About/index.tsx
import { defineComponent } from 'vue';

export default defineComponent({
  setup() {
    return () => <div>关于</div>;
  }
});
修改main.ts
import { createApp } from 'vue';
import App from './App';
import store, { key } from './store';
import router from '@/router';

createApp(App).use(store, key).use(router).mount('#app');
使用element-plus
当前版本:1.0.2-beta.31
yarn add element-plus
原则上使用按需引入,这将获得更多的组件属性提示。vite支持ui组件按需引入,但不支持样式引入。
由于目前"babel-plugin-component": "1.1.1"在vite中没有很好的支持,而vite的插件vite-plugin-import目前不支持2.x版本的vite,vite-plugin-imp则插件可以完成正常的组件样式引入,而某些弹窗组件则就不行了。所以,这里将全部样式在main.ts中导入。
/src/main.ts
...
import 'element-plus/lib/theme-chalk/index.css';
...
/src/views/Home/index.tsx
import { defineComponent } from 'vue';
import { ElButton } from 'element-plus';

export default defineComponent({
  setup() {
    return () => (
      <div>
        <ElButton type="success">关于</ElButton>
      </div>
    );
  }
});
效果:
mock
需要借助插件完成
yarn add -D mockjs vite-plugin-mock @types/mockjs
vite.config.ts
import path from 'path';
import { ConfigEnv, UserConfigExport } from 'vite';
import vue from '@vitejs/plugin-vue';
import vueJsx from '@vitejs/plugin-vue-jsx';
import { viteMockServe } from 'vite-plugin-mock';

export default ({ command }: ConfigEnv): UserConfigExport => {
  return {
    alias: {
      '@': path.resolve(__dirname, './src')
    },
    plugins: [
      vue(),
      vueJsx(),
      viteMockServe({
        ignore: /^_/,
        mockPath: 'mock',
        watchFiles: true, // 修改更新
        localEnabled: command === 'serve'
      })
    ],
    css: {
      modules: {
        localsConvention: 'camelCase' // 默认只支持驼峰,修改为同事支持横线和驼峰
      }
    }
  };
};
/mock/index.ts
import { MockMethod } from 'vite-plugin-mock';

export default [
  {
    url: '/api/get',
    method: 'get',
    response: ({ query }) => {
      console.log(query);

      return {
        code: 0,
        data: {
          name: 'vben'
        }
      };
    }
  },
  {
    url: '/api/post',
    method: 'post',
    timeout: 2000,
    response: {
      code: 0,
      data: {
        name: 'vben'
      }
    }
  }
] as MockMethod[];
检测是否有效http://localhost:3000/api/get
使用注意项
这里先指出我踩过的一些坑。后面有新发现会慢慢补充。
样式及图片
vite支持模块样式,和cra一样,以*.module.scss命名即可。下面是小小demo:
import { defineComponent } from 'vue';

import style from './index.module.scss';

export default defineComponent({
  setup() {
    return () => <div class={style['home-title']}>首页</div>;
  }
});
.home-title {
  color: #fff;
}
为了支持我们这样写,需要做一下努力:
- 修改vite.config.ts,vite默认只支持驼峰(
style.homeTitle)
...
css: {
  modules: {
    localsConvention: 'camelCase' // 默认只支持驼峰,修改为同事支持横线和驼峰
  }
}
...
- ts会说没有index.module.scss这个模块导出,需要添加type描述:
/src/type/proj.d.ts
declare module '*.module.scss';
同理,可添加图片描述
declare module '*.svg';
declare module '*.png';
declare module '*.jpg';
declare module '*.jpeg';
declare module '*.gif';
declare module '*.bmp';
declare module '*.tiff';
事件绑定
vue模板语法是@click类似,而jsx中@click替换为onClick,其他的可以依葫芦画瓢。
props及数据插入
vue模板中{{ id }}插入数据已经替换为{ id },props绑定也从:id="id"变为id={id}
因为jsx的原因,现在几乎和开发react项目了相近了。
插槽问题
jsx中我们已经不能正常使用#xxx的方式向目标组件传递内容了,而是使用一下两种方式:
-
vSlot属性,在目标组件上使用该属性,并以对象的方式将插槽内容传递下去。例如:
<ElSubmenu vSlot={{ title: (<span>哈哈</span>) }}>这里是默认插槽,也是children属性</ElSubmenu>。 -
如果ui组件在支持的情况下,可以直接将插槽内容赋值给该组件的某属性。例如:
<ElSubmenu title={ <span>哈哈</span> }>这里是默认插槽,也是children属性</ElSubmenu>,可惜的是目前element-plus并不支持。antd-vue是支持,例如Input组件支持prefix,因为该ui库就是使用jsx开发的。
如果想有更好的jsx体验,目前ant-design-vue是不错的选择。
element-plus onClick不存在
开发时可能会遇到ElButton组件等出现onClick不存在的问题,这是因为ele那边的d.ts不够完善的原因,目前人家建议我们自行解决,解决办法:在@vue/runtime-core module中添加对应属性,同理解决vSlot的问题
/src/type/ele.d.ts
import { VNodeChild } from '@vue/runtime-core';
import { HTMLAttributes } from '@vue/runtime-dom';

export type JsxNode = VNodeChild | JSX.Element;

export interface SlotDirective {
  [name: string]: () => JsxNode;
}

type JsxComponentCustomProps = {
  vModel?: unknown;
  vModels?: unknown[];
  vCustom?: unknown[];
  vShow?: boolean;
  vHtml?: JsxNode;
  vSlots?: SlotDirective;
} & Omit<HTMLAttributes, 'innerHTML'> & {
    innerHTML?: JsxNode;
  };

declare module '@vue/runtime-core' {
  interface ComponentCustomProps extends JsxComponentCustomProps {
    onClick?: () => any;
    vSlots?: {
      [eleName: string]: JSX.Element;
    };
    // [eleName: string]: any;
  }
}
这段描述是在github上看到的,做一点小修改,原地址忘记保存,见谅。
ant-design-vue 服务端icon配置
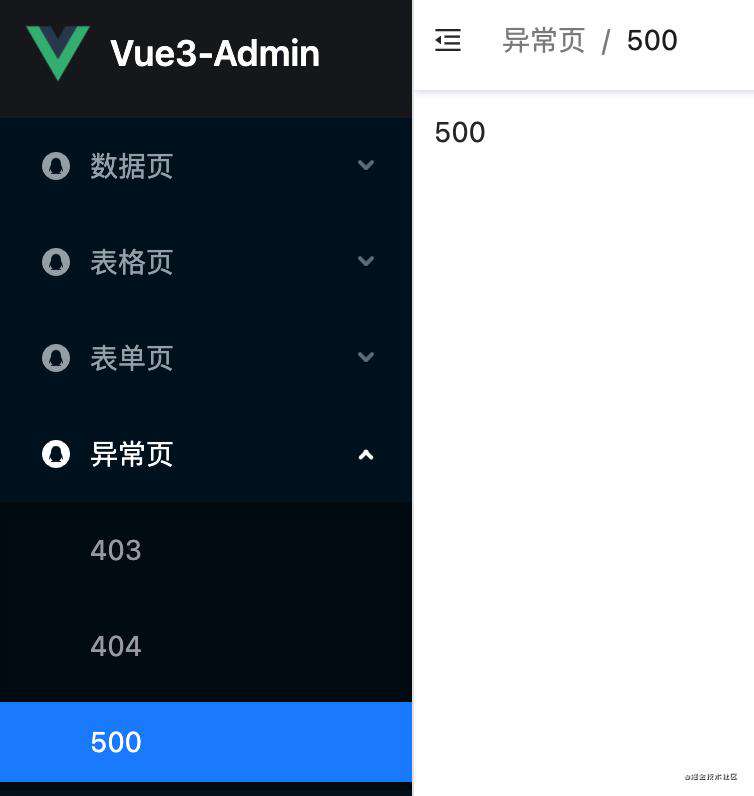
这一项一般出现在开发admin项目时,配置左侧菜单,像下面这样:
ant-design现在react ui库和vue ui库都将icon剔出去了,单独引入一个依赖来使用icon,按需加载,的确方便,可是,现在要实现在数据库中配置菜单对应的icon,然后在获取路由配置的时候拿过来显示,方法就只有两种:
- 将
@ant-design/icons-vue的所有组件导入,再做一个枚举,在服务端配置组件名称,渲染时根据组件名称匹配组件,像这样:
key-element文件
import { WifiOutlined, WomanOutlined } from '@ant-design/icons-vue'

export default {
  WifiOutlined: <WifiOutlined />,
  WomanOutlined: <WomanOutlined />
}
使用
const router = [{path: '/index',meta: { title: '首页', icon: 'WifiOutlined' },}]
// render
<div>{ keyElement[routerItem.meta.icon] }</div>
这样不科学,icon太多。下面的方法得以优化。
- 原理差不多,也是将全部导入,但是不是自己手动导入:
import { h } from 'vue';
// 导入所有组件
import * as Icon from '@ant-design/icons-vue';

// 已获取到的配置
const router = [{path: '/index',meta: { title: '首页', icon: 'WifiOutlined' },}]

// render
<div>{ h(Icon[router.meta.icon]) }</div>
不出意外使用了ts会提示以下错误:
这里需要给meta.icon指明类型:
import Icon from '@ant-design/icons-vue/lib/icons';

export interface MenuType {
  path: string;
  children?: Array<MenuType>;
  meta?: {
    icon?: keyof typeof Icon;
  }
  // 其他类型
  // ...
}

const router: MenuType[] = [{path: '/index',meta: { title: '首页', icon: 'WifiOutlined' }}]
vue3的h方法和react的creatElemet方法类似。
目前就这么多,想到了再补充。
菜单的内容在项目vue3-admin中的体现,目前正在龟速开发中(时间太少,不敢熬夜,怕死)。
我家猫可爱么?有些内容是它写的哦,虽然我给它删掉了,哈哈哈。

常见问题FAQ
- 免费下载或者VIP会员专享资源能否直接商用?
- 本站所有资源版权均属于原作者所有,这里所提供资源均只能用于参考学习用,请勿直接商用。若由于商用引起版权纠纷,一切责任均由使用者承担。更多说明请参考 VIP介绍。
- 提示下载完但解压或打开不了?
- 找不到素材资源介绍文章里的示例图片?
- 模板不会安装或需要功能定制以及二次开发?


发表评论
还没有评论,快来抢沙发吧!