尤大的 Vue3.0 已经发布有一阵子了,已经很成熟了。
而且 Element Plus + Vite 也出了一段时间了,是时候该上手体验分享一波了。
主要是要熟练一下 Vue3,好准备用 Vue3 重构一下自己的网站项目: blog-vue-typescript ,计划是过年期间会着手重构这个项目,年后会上线。

1. 初化化项目
全局安装 vite-app
npm i -g vite-app
创建项目
yarn create vite-app <project-name>

# 或者
npm init vite-app <project-name>
进入项目,安装依赖
cd <project-name>

yarn # 或 npm i
运行项目
yarn dev
打开浏览器 http://localhost:3000 查看
2. 引入TypeScript
加入 ts 依赖
yarn add --dev typescript
在 项目根目录下创建 TypeScript 的配置文件 tsconfig.json
{
  "compilerOptions": {
    // 允许从没有设置默认导出的模块中默认导入。这并不影响代码的输出,仅为了类型检查。
    "allowSyntheticDefaultImports": true,

    // 解析非相对模块名的基准目录
    "baseUrl": ".",

    "esModuleInterop": true,

    // 从 tslib 导入辅助工具函数(比如 __extends, __rest等)
    "importHelpers": true,

    // 指定生成哪个模块系统代码
    "module": "esnext",

    // 决定如何处理模块。
    "moduleResolution": "node",

    // 启用所有严格类型检查选项。
    // 启用 --strict相当于启用 --noImplicitAny, --noImplicitThis, --alwaysStrict,
    // --strictNullChecks和 --strictFunctionTypes和--strictPropertyInitialization。
    "strict": true,

    // 生成相应的 .map文件。
    "sourceMap": true,

    // 忽略所有的声明文件( *.d.ts)的类型检查。
    "skipLibCheck": true,

    // 指定ECMAScript目标版本
    "target": "esnext",

    // 要包含的类型声明文件名列表
    "types": [

    ],

    "isolatedModules": true,

    // 模块名到基于 baseUrl的路径映射的列表。
    "paths": {
      "@/*": [
        "src/*"
      ]
    },
    // 编译过程中需要引入的库文件的列表。
    "lib": [
      "ESNext",
      "DOM",
      "DOM.Iterable",
      "ScriptHost"
    ]
  },
  "include": [
    "src/**/*.ts",
    "src/**/*.tsx",
    "src/**/*.vue",
    "tests/**/*.ts",
    "tests/**/*.tsx"
  ],
  "exclude": [
    "node_modules"
  ]
}
在 src 目录下新加 shim.d.ts 文件
/* eslint-disable */
import type { DefineComponent } from 'vue'

declare module '*.vue' {
  const component: DefineComponent<{}, {}, any>
  export default component
}
把 main.js 修改成 main.ts
在根目录,打开 Index.html
<script type="module" src="/src/main.js"></script>
修改为:
<script type="module" src="/src/main.ts"></script>
3. 引入 eslint
安装 eslint prettier 依赖
@typescript-eslint/parser @typescr ipt-eslint/eslint-plugin 为 eslint 对 typescript 支持。
yarn add --dev eslint prettier eslint-config-prettier eslint-plugin-prettier eslint-plugin-vue @typescript-eslint/parser @typescr ipt-eslint/eslint-plugin
在根目录下建立 eslint 配置文件: .eslintrc.js
module.exports = {
  parser: 'vue-eslint-parser',
  parserOptions: {
    parser: '@typescript-eslint/parser',
    ecmaVersion: 2020,
    sourceType: 'module',
    ecmaFeatures: {
      jsx: true
    }
  },
  extends: [
    'plugin:vue/vue3-recommended',
    'plugin:@typescript-eslint/recommended',
    'prettier/@typescript-eslint',
    'plugin:prettier/recommended'
  ],
  rules: {
    '@typescript-eslint/ban-ts-ignore': 'off',
    '@typescript-eslint/explicit-function-return-type': 'off',
    '@typescript-eslint/no-explicit-any': 'off',
    '@typescript-eslint/no-var-requires': 'off',
    '@typescript-eslint/no-empty-function': 'off',
    'vue/custom-event-name-casing': 'off',
    'no-use-before-define': 'off',
    // 'no-use-before-define': [
    //   'error',
    //   {
    //     functions: false,
    //     classes: true,
    //   },
    // ],
    '@typescript-eslint/no-use-before-define': 'off',
    // '@typescript-eslint/no-use-before-define': [
    //   'error',
    //   {
    //     functions: false,
    //     classes: true,
    //   },
    // ],
    '@typescript-eslint/ban-ts-comment': 'off',
    '@typescript-eslint/ban-types': 'off',
    '@typescript-eslint/no-non-null-assertion': 'off',
    '@typescript-eslint/explicit-module-boundary-types': 'off',
    '@typescript-eslint/no-unused-vars': [
      'error',
      {
        argsIgnorePattern: '^h$',
        varsIgnorePattern: '^h$'
      }
    ],
    'no-unused-vars': [
      'error',
      {
        argsIgnorePattern: '^h$',
        varsIgnorePattern: '^h$'
      }
    ],
    'space-before-function-paren': 'off',
    quotes: ['error', 'single'],
    'comma-dangle': ['error', 'never']
  }
};
建立 prettier.config.js
module.exports = {
  printWidth: 100,
  tabWidth: 2,
  useTabs: false,
  semi: false, // 未尾逗号
  vueIndentScriptAndStyle: true,
  singleQuote: true, // 单引号
  quoteProps: 'as-needed',
  bracketSpacing: true,
  trailingComma: 'none', // 未尾分号
  jsxBracketSameLine: false,
  jsxSingleQuote: false,
  arrowParens: 'always',
  insertPragma: false,
  requirePragma: false,
  proseWrap: 'never',
  htmlWhitespaceSensitivity: 'strict',
  endOfLine: 'lf'
}
4. vue-router、vuex
yarn add vue-router@next vuex@next
4.1 vuex
在根目录下创建 store/index.ts
import { InjectionKey } from 'vue'
import { createStore, Store } from 'vuex'

export interface State {
  count: number
}

export const key: InjectionKey<Store<State>> = Symbol()

export const store = createStore<State>({
  state() {
    return {
      count: 0
    }
  },
  mutations: {
    increment(state) {
      state.count++
    }
  }
})
main.ts 修改
import { createApp } from 'vue'
import { store, key } from './store'
import App from './App'
import './index.css'

const app = createApp(App)

app.use(store, key)

app.mount('#app')
components/HelloWord.vue 修改
<template>
  <h1>{{ msg }}</h1>
  <button @click="inCrement"> count is: </button>
  <p>{{ count }}</p>
</template>

<script>
  import { defineComponent, computed } from 'vue'
  import { useStore } from 'vuex'
  import { key } from '../store'

  export default defineComponent({
    name: 'HelloWorld',
    props: {
      msg: {
        type: String,
        default: ''
      }
    },
    setup() {
      const store = useStore(key)

      const count = computed(() => store.state.count)

      return {
        count,
        inCrement: () => store.commit('increment')
      }
    }
  })
</script>
4.2 vue-router
在 src 目录下建立 router/index.ts,内容如下:
import { createRouter, createWebHistory, RouteRecordRaw } from "vue-router";
import HelloWorld from "../components/HelloWorld.vue";

const routes: Array<RouteRecordRaw> = [
    {
        path: "/",
        name: "HelloWorld",
        component: HelloWorld,
    },
    {
        path: "/about",
        name: "About",
        // route level code-splitting
        // this generates a separate chunk (about.[hash].js) for this route
        // which is lazy-loaded when the route is visited.
        component: () =>
            import(/* webpackChunkName: "About" */ "../components/About.vue")
    }
];

const router = createRouter({
    history: createWebHistory(process.env.BASE_URL),
    routes,
});

export default router;
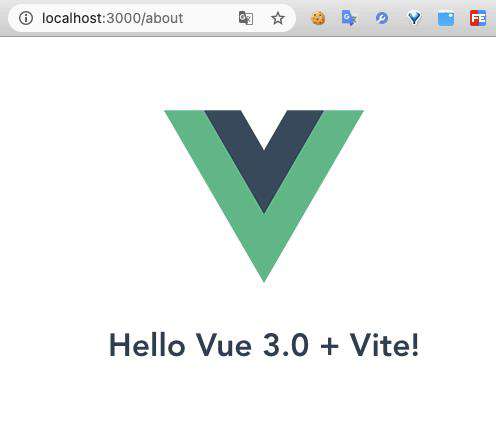
再新建一个 components/About.vue 文件,内容如下:
<template>
  <img

    src="../assets/logo.png"
  />
  <h1>{{ msg }}</h1>
</template>

<script lang="ts">
import { defineComponent } from 'vue'

export default defineComponent({
  name: 'About',
  data() {
    return {
      msg: 'Hello Vue 3.0 + Vite!'
    }
  },
  setup() {}
})
</script>
再修改 main.ts
import { createApp } from 'vue'
import { store, key } from './store'
import router from "./router";
import App from './App'
import './index.css'

const app = createApp(App)

app.use(store, key)
app.use(router)
app.mount('#app')
再访问 http://localhost:3000/
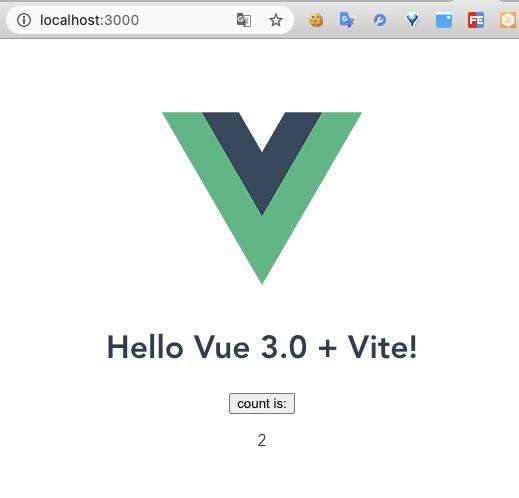
和 http://localhost:3000/about 即可
5. 加入 Element Plus
5.1 安装 element-plus
全局安装
npm install element-plus --save
5.2 引入 Element Plus
你可以引入整个 Element Plus,或是根据需要仅引入部分组件。我们先介绍如何引入完整的 Element。
完整引入
在 main.js 中写入以下内容:
import { createApp } from 'vue'
import ElementPlus from 'element-plus';
import router from "./router";
import 'element-plus/lib/theme-chalk/index.css';
import App from './App.vue';
import './index.css'

const app = createApp(App)
app.use(ElementPlus)
app.use(router)
app.mount('#app')
以上代码便完成了 Element Plus 的引入。需要注意的是,样式文件需要单独引入。
按需引入
借助 babel-plugin-component,我们可以只引入需要的组件,以达到减小项目体积的目的。
首先,安装 babel-plugin-component:
npm install babel-plugin-component -D
然后,将 .babelrc 修改为:
{
  "plugins": [
    [
      "component",
      {
        "libraryName": "element-plus",
        "styleLibraryName": "theme-chalk"
      }
    ]
  ]
}
接下来,如果你只希望引入部分组件,比如 Button 和 Select,那么需要在 main.js 中写入以下内容:
import { createApp } from 'vue'
import { store, key } from './store';
import router from "./router";
import { ElButton, ElSelect } from 'element-plus';
import App from './App.vue';
import './index.css'

const app = createApp(App)
app.component(ElButton.name, ElButton);
app.component(ElSelect.name, ElSelect);

/* or
 * app.use(ElButton)
 * app.use(ElSelect)
 */

app.use(store, key)
app.use(router)
app.mount('#app')
app.mount('#app')
更详细的安装方法请看 快速上手。
5.3 全局配置
在引入 Element Plus 时,可以传入一个全局配置对象。
该对象目前支持 size 与 zIndex 字段。size 用于改变组件的默认尺寸,zIndex 设置弹框的初始 z-index(默认值:2000)。按照引入 Element Plus 的方式,具体操作如下:
完整引入 Element:
import { createApp } from 'vue'
import ElementPlus from 'element-plus';
import App from './App.vue';

const app = createApp(App)
app.use(ElementPlus, { size: 'small', zIndex: 3000 });
按需引入 Element:
import { createApp } from 'vue'
import { ElButton } from 'element-plus';
import App from './App.vue';

const app = createApp(App)
app.config.globalProperties.$ELEMENT = option
app.use(ElButton);
按照以上设置,项目中所有拥有 size 属性的组件的默认尺寸均为 'small',弹框的初始 z-index 为 3000。
最后

至此,一个基于 Vue3 全家桶 + Vite + TypeScript + Eslint + Element Plus 的开发环境已经搭建完毕,现在就可以编写代码了。
各个组件的使用方法请参阅它们各自的文档。
不得不说 Vue3 + Element Plus + Vite + TypeScript 是真的香!
推荐一个 Vue3 相关的资料汇总: Vue3 的学习教程汇总、源码解释项目、支持的 UI 组件库、优质实战项目,相信你会挖到矿哦!
Vue3 中文文档,国内 CDN 加速版:
Element Plus 官网:
作为 2021 第 2 篇原创技术文章,质量应该还可以吧,1 月的 KPI 完成,哈哈哈 ?
猫哥的年终总结在这里:前端工程师的 2020 年终总结 - 乾坤未定,你我皆黑马,希望能带给你一点启发,也看看猫哥的脸都被打歪的 ?
参考文章:vue3 + vite + typescript + eslint + jest 项目配置实践
推荐阅读
- TypeScript 中提升幸福感的 10 个高级技巧
常见问题FAQ
- 免费下载或者VIP会员专享资源能否直接商用?
- 本站所有资源版权均属于原作者所有,这里所提供资源均只能用于参考学习用,请勿直接商用。若由于商用引起版权纠纷,一切责任均由使用者承担。更多说明请参考 VIP介绍。
- 提示下载完但解压或打开不了?
- 找不到素材资源介绍文章里的示例图片?
- 模板不会安装或需要功能定制以及二次开发?


发表评论
还没有评论,快来抢沙发吧!