我遇到一个场景,该场景需要在React 应用中实现“使用Github登录”功能。虽然这听起来很简单,但在尝试做这件事时,你可能会遇到一些麻烦。因此,本文的目的是提供一个指南,帮助你在你的应用程序中实现这样的功能。让我们现在就开始吧!
步骤1:在Github上创建OAuth应用
按照此处提供的步骤登录到你的Github帐户并创建OAuth应用。注意:对于本例,在创建OAuth应用时,如果你在本地运行应用,可以将主页URL设置为http://localhost:3000/,将授权回调URL设置为http://localhost:3000/login。在根目录下创建一个 .env 文件,并设置这些变量:
REACT_APP_CLIENT_ID=你的Client ID
REACT_APP_CLIENT_SECRET=你的Client Secret
REACT_APP_REDIRECT_URI=http://localhost:3000/login
步骤2:创建React应用
继续使用你的首选来创建你的react应用程序,在这个例子中,我们将使用Create-React-App。如果你使用这种模式,你必须删除index.css、App.css、App.test.js和serviceWorker.js等文件。编辑index.js,确保它看起来像这样:
import React from 'react';
import ReactDOM from 'react-dom';
import App from './App';

ReactDOM.render(<App />, document.getElementById('root'));
另外,编辑App.js,确保它看起来像这样:
import React, { createContext, useReducer } from 'react';
import { BrowserRouter as Router, Route, Switch } from "react-router-dom";
import Home from "./components/Home";
import Login from "./components/Login";
import { initialState, reducer } from "./store/reducer";


export const AuthContext = createContext();

function App() {
  const [state, dispatch] = useReducer(reducer, initialState);

  return (
    <AuthContext.Provider
      value={{
        state,
        dispatch
      }}
    >
    <Router>
      <Switch>
        <Route path="/login" component={Login}/>
        <Route path="/" component={Home}/>
      </Switch>
    </Router>
    </AuthContext.Provider>
  );
}

export default App;
在App.js文件中,导入2个组件(Home.js 和 Login.js )。要创建这2个组件,进入src文件夹,创建一个名为component的文件夹,里面有2个文件(Home.js和Login.js)。在根文件夹中,你可以在下面运行此命令来创建它们。
mkdir -p src/components && cd src/components && touch Home.js Login.js
接下来,你会观察到,我们从store导入了状态和reducer,继续并设置一个简单的store,它将保持应用程序状态。要做到这一点,导航到src文件夹中,并创建一个名为store的文件夹,在它里面创建一个名为reducer的子文件夹,并在reducer文件夹里面创建一个index.js文件。在根目录下,你可以运行下面这个命令来创建它们。
mkdir -p src/store/reducer && cd src/store/reducer && touch index.js
Store中index.js文件的内容应如下所示。
export const initialState = {
  isLoggedIn: JSON.parse(localStorage.getItem("isLoggedIn")) || false,
  user: JSON.parse(localStorage.getItem("user")) || null,
  client_id: process.env.REACT_APP_CLIENT_ID,
  redirect_uri: process.env.REACT_APP_REDIRECT_URI,
  client_secret: process.env.REACT_APP_CLIENT_SECRET,
  proxy_url: process.env.REACT_APP_PROXY_URL
};

export const reducer = (state, action) => {
  switch (action.type) {
    case "LOGIN": {
      localStorage.setItem("isLoggedIn", JSON.stringify(action.payload.isLoggedIn))
      localStorage.setItem("user", JSON.stringify(action.payload.user))
      console.log(action.payload.isLoggedIn)
      return {
        ...state,
        isLoggedIn: action.payload.isLoggedIn,
        user: action.payload.user
      };
    }
    case "LOGOUT": {
      localStorage.clear()
      return {
        ...state,
        isLoggedIn: false,
        user: null
      };
    }
    default:
      return state;
  }
};
它包含InitialState对象和一个reducer函数,该函数包含派发的动作以突变状态。
这时,我们就可以在我们的组件上下功夫了。让我们在Login.js上工作,这将是一个简单的组件,它有一个按钮,可以触发Github API的登录请求。
import React, { useState, useEffect, useContext } from "react";
import { Redirect } from "react-router-dom";
import Styled from "styled-components";
import GithubIcon from "mdi-react/GithubIcon";
import { AuthContext } from "../App";
export default function Login() {
const { state, dispatch } = useContext(AuthContext);
const [data, setData] = useState({ errorMessage: "", isLoading: false });
const { client_id, redirect_uri } = state;
useEffect(() => {
// After requesting Github access, Github redirects back to your app with a code parameter
const url = window.location.href;
const hasCode = url.includes("?code=");
// If Github API returns the code parameter
if (hasCode) {
const newUrl = url.split("?code=");
window.history.pushState({}, null, newUrl[0]);
setData({ ...data, isLoading: true });
const requestData = {
client_id: state.client_id,
redirect_uri: state.redirect_uri,
client_secret: state.client_secret,
code: newUrl[1]
};
const proxy_url = state.proxy_url;
// Use code parameter and other parameters to make POST request to proxy_server
fetch(proxy_url, {
method: "POST",
body: JSON.stringify(requestData)
})
.then(response => response.json())
.then(data => {
dispatch({
type: "LOGIN",
payload: { user: data, isLoggedIn: true }
});
})
.catch(error => {
setData({
isLoading: false,
errorMessage: "Sorry! Login failed"
});
});
}
}, [state, dispatch, data]);
if (state.isLoggedIn) {
return <Redirect to="/" />;
}
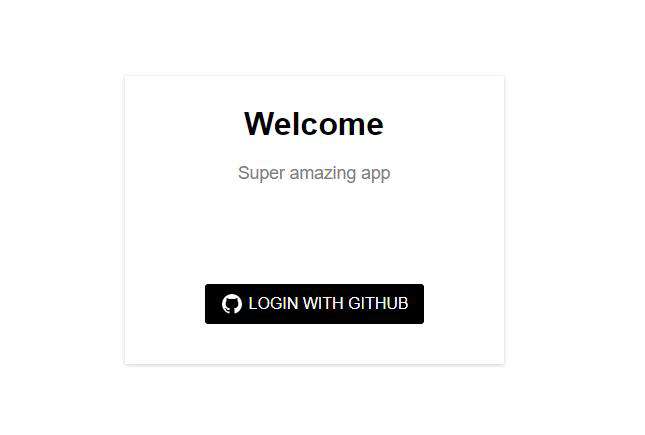
return (
<Wrapper>
<section className="container">
<div>
<h1>Welcome</h1>
<span>Super amazing app</span>
<span>{data.errorMessage}</span>
<div className="login-container">
{data.isLoading ? (
<div className="loader-container">
<div className="loader"></div>
</div>
) : (
<>
{
// Link to request GitHub access
}
<a
className="login-link"
href={`https://github.com/login/oauth/authorize?scope=user&client_id=${client_id}&redirect_uri=${redirect_uri}`}
onClick={() => {
setData({ ...data, errorMessage: "" });
}}
>
<GithubIcon />
<span>Login with GitHub</span>
</a>
</>
)}
</div>
</div>
</section>
</Wrapper>
);
}
const Wrapper = Styled.section`
.container {
display: flex;
justify-content: center;
align-items: center;
height: 100vh;
font-family: Arial;
> div:nth-child(1) {
display: flex;
flex-direction: column;
justify-content: center;
align-items: center;
box-shadow: 0 1px 4px 0 rgba(0, 0, 0, 0.2);
transition: 0.3s;
width: 25%;
height: 45%;
> h1 {
font-size: 2rem;
margin-bottom: 20px;
}
> span:nth-child(2) {
font-size: 1.1rem;
color: #808080;
margin-bottom: 70px;
}
> span:nth-child(3) {
margin: 10px 0 20px;
color: red;
}
.login-container {
background-color: #000;
width: 70%;
border-radius: 3px;
color: #fff;
display: flex;
align-items: center;
justify-content: center;
> .login-link {
text-decoration: none;
color: #fff;
text-transform: uppercase;
cursor: default;
display: flex;
align-items: center;
height: 40px;
> span:nth-child(2) {
margin-left: 5px;
}
}
.loader-container {
display: flex;
justify-content: center;
align-items: center;
height: 40px;
}
.loader {
border: 4px solid #f3f3f3;
border-top: 4px solid #3498db;
border-radius: 50%;
width: 12px;
height: 12px;
animation: spin 2s linear infinite;
}
@keyframes spin {
0% {
transform: rotate(0deg);
}
100% {
transform: rotate(360deg);
}
}
}
}
}
`;
在Login.js组件内部,请注意以下重要事项:
- 我们导入并利用AuthContext使Store中的全局状态和操作可在此组件中使用。
- 当用户点击“用Github登录”按钮时,会向Github API提出请求,对我们的应用进行授权。如果成功的话,Github就会重定向回我们的应用(授权回调URL),并在URL中加入“code”。
- 我们利用useEffect hook侦听此“code”何时可用。然后我们从url中收集它,使用code和其他数据,如:client_id,redirect_uri,client_secret,继续通过我们的proxy server(代理服务器)向Github APIs发出请求(一个简单的快递应用,帮助我们绕过CORS错误)。下一步,我将详细讨论代理服务器。
- 如果通过代理服务器的认证返回有效的响应,我们就会调度“LOGIN”事件,在我们的存储中设置用户数据和isLoggedIn有效载荷。
让我们更新Home.js组件以显示一些用户数据,例如(头像,姓名,关注者人数等)
import React, { useContext } from "react";
import { Redirect } from "react-router-dom";
import Styled from "styled-components";
import { AuthContext } from "../App";


export default function Home() {
  const { state, dispatch } = useContext(AuthContext);

  if (!state.isLoggedIn) {
    return <Redirect to="/login" />;
  }

  const { avatar_url, name, public_repos, followers, following } = state.user

  const handleLogout = () => {
    dispatch({
      type: "LOGOUT"
    });
  }

  return (
    <Wrapper>
      <div className="container">
        <button onClick={()=> handleLogout()}>Logout</button>
        <div>
          <div className="content">
            <img src={avatar_url} />
            <span>{name}</span>
            <span>{public_repos} Repos</span>
            <span>{followers} Followers</span>
            <span>{following} Following</span>
          </div>
        </div>
      </div>
    </Wrapper>
  );
}

const Wrapper = Styled.section`
.container{
  display: flex;
  flex-direction: column;
  height: 100vh;
  font-family: Arial;
  button{
    all: unset;
    width: 100px;
    height: 35px;
    margin: 10px 10px 0 0;
    align-self: flex-end;
    background-color: #0041C2;
    color: #fff;
    text-align: center;
    border-radius: 3px;
    border: 1px solid #0041C2;
    &:hover{
      background-color: #fff;
      color: #0041C2;
    }
  }
  >div{
    height: 100%;
    width: 100%;
    display: flex;
    font-size: 18px;
    justify-content: center;
    align-items: center;
    .content{
      display: flex;
      flex-direction: column;
      padding: 20px 100px;
      box-shadow: 0 1px 4px 0 rgba(0, 0, 0, 0.2);
      width: auto;

      img{
        height: 150px;
        width: 150px;
        border-radius: 50%;
      }

      >span:nth-child(2){
        margin-top: 20px;
        font-weight: bold;
      }

      >span:not(:nth-child(2)){
        margin-top: 8px;
        font-size: 14px;
      }

    }
  }
}
`;
步骤3:创建代理服务器
最后一步是创建代理服务器,以帮助我们绕过CORS错误。它将是一个简单的express应用程序,我们将在header中启用“Access-Control-Allow-Origin”。我们将使用它来转发请求和接收来自Github API的响应,并将所需的响应发送回客户端(我们的React应用程序)。将这些变量添加到**.env**文件中:
REACT_APP_PROXY_URL=http://localhost:5000/authenticate
SERVER_PORT=5000
在根文件夹中,创建一个名为server的文件夹,并在其中创建一个index.js文件。
const express = require("express");
const bodyParser = require("body-parser");
const FormData = require("form-data");
const fetch = require("node-fetch");
const { client_id, redirect_uri, client_secret } = require("./config");

const config = require("./config");

const app = express();

app.use(bodyParser.json());
app.use(bodyParser.json({ type: "text/*" }));
app.use(bodyParser.urlencoded({ extended: false }));

// Enabled Access-Control-Allow-Origin", "*" in the header so as to by-pass the CORS error.
app.use((req, res, next) => {
  res.header("Access-Control-Allow-Origin", "*");
  next();
});

app.post("/authenticate", (req, res) => {
  const { code } = req.body;

  const data = new FormData();
  data.append("client_id", client_id);
  data.append("client_secret", client_secret);
  data.append("code", code);
  data.append("redirect_uri", redirect_uri);

  // Request to exchange code for an access token
  fetch(`https://github.com/login/oauth/access_token`, {
    method: "POST",
    body: data,
  })
    .then((response) => response.text())
    .then((paramsString) => {
      let params = new URLSearchParams(paramsString);
      const access_token = params.get("access_token");

      // Request to return data of a user that has been authenticated
      return fetch(`https://api.github.com/user`, {
        headers: {
          Authorization: `token ${access_token}`,
        },
      });
    })
    .then((response) => response.json())
    .then((response) => {
      return res.status(200).json(response);
    })
    .catch((error) => {
      return res.status(400).json(error);
    });
});

const PORT = process.env.SERVER_PORT || 5000;
app.listen(PORT, () => console.log(`Listening on ${PORT}`));
附加链接:
- developer.github.com/apps/buildi…
- www.graphql.college/implementin…
源码
如果你按照上面列出的几个步骤进行操作,则可以在应用程序中无缝集成“使用Github登录”功能。
在此处获取源代码:Github
来源:blog.zhangbing.site
原文:levelup.gitconnected.com
作者:Princewill Iroka
常见问题FAQ
- 免费下载或者VIP会员专享资源能否直接商用?
- 本站所有资源版权均属于原作者所有,这里所提供资源均只能用于参考学习用,请勿直接商用。若由于商用引起版权纠纷,一切责任均由使用者承担。更多说明请参考 VIP介绍。
- 提示下载完但解压或打开不了?
- 找不到素材资源介绍文章里的示例图片?
- 模板不会安装或需要功能定制以及二次开发?


发表评论
还没有评论,快来抢沙发吧!