起因
说起来,图床应用这东西,在github上有很多,但是大多都是基于一些云厂商免费的静态存储服务来实现的,比如七牛云的静态存储,考虑到这些云厂商的赚钱欲望,所以我并不放心将他们作为图床的服务提供商。
也有支持github的,比如picgo,不过涉及到personal token,我也不是很放心将自己的token写入到一个开源项目的桌面应用里。而且picgo导出的github图片链接是以 githubusercontent.com 为host的链接,众所周知,该域名在中国很多地区都被DNS污染了,只有通过改host或是科学上网进行访问,所以结论是,picgo基于github导出的图片链接,在国内等于没用。
那有没有一种方式,既能让图片链接不被DNS污染或是被墙掉,又不会涉及到开发者personal token,影响账户安全呢?
于是,就有了picpic。picpic是我在做一个另一个大型的开源项目的过程中抽空实现的,初始版本只用了两天就写出来了,但是我本人自认为是一个合格和还不错的product maker,并不愿意产出一个使用繁琐,功能残缺的半成品给别人使用——关键是自己用的也不爽。
我做产品,核心观点就是,做出来的东西自己愿不愿意用,用起来有没有感受到“美”,是不是能够沉静在产品中去感受它,这很重要,正是因为我从没将自己定位成一个前端,或是node开发,而是product maker,终极理想就是artist,就是做艺术,内心始终有一个想法:你不是在写代码,你是在画一幅画,你享受这个过程,如果能够让别人享受到“结果”,那是再好不过了。
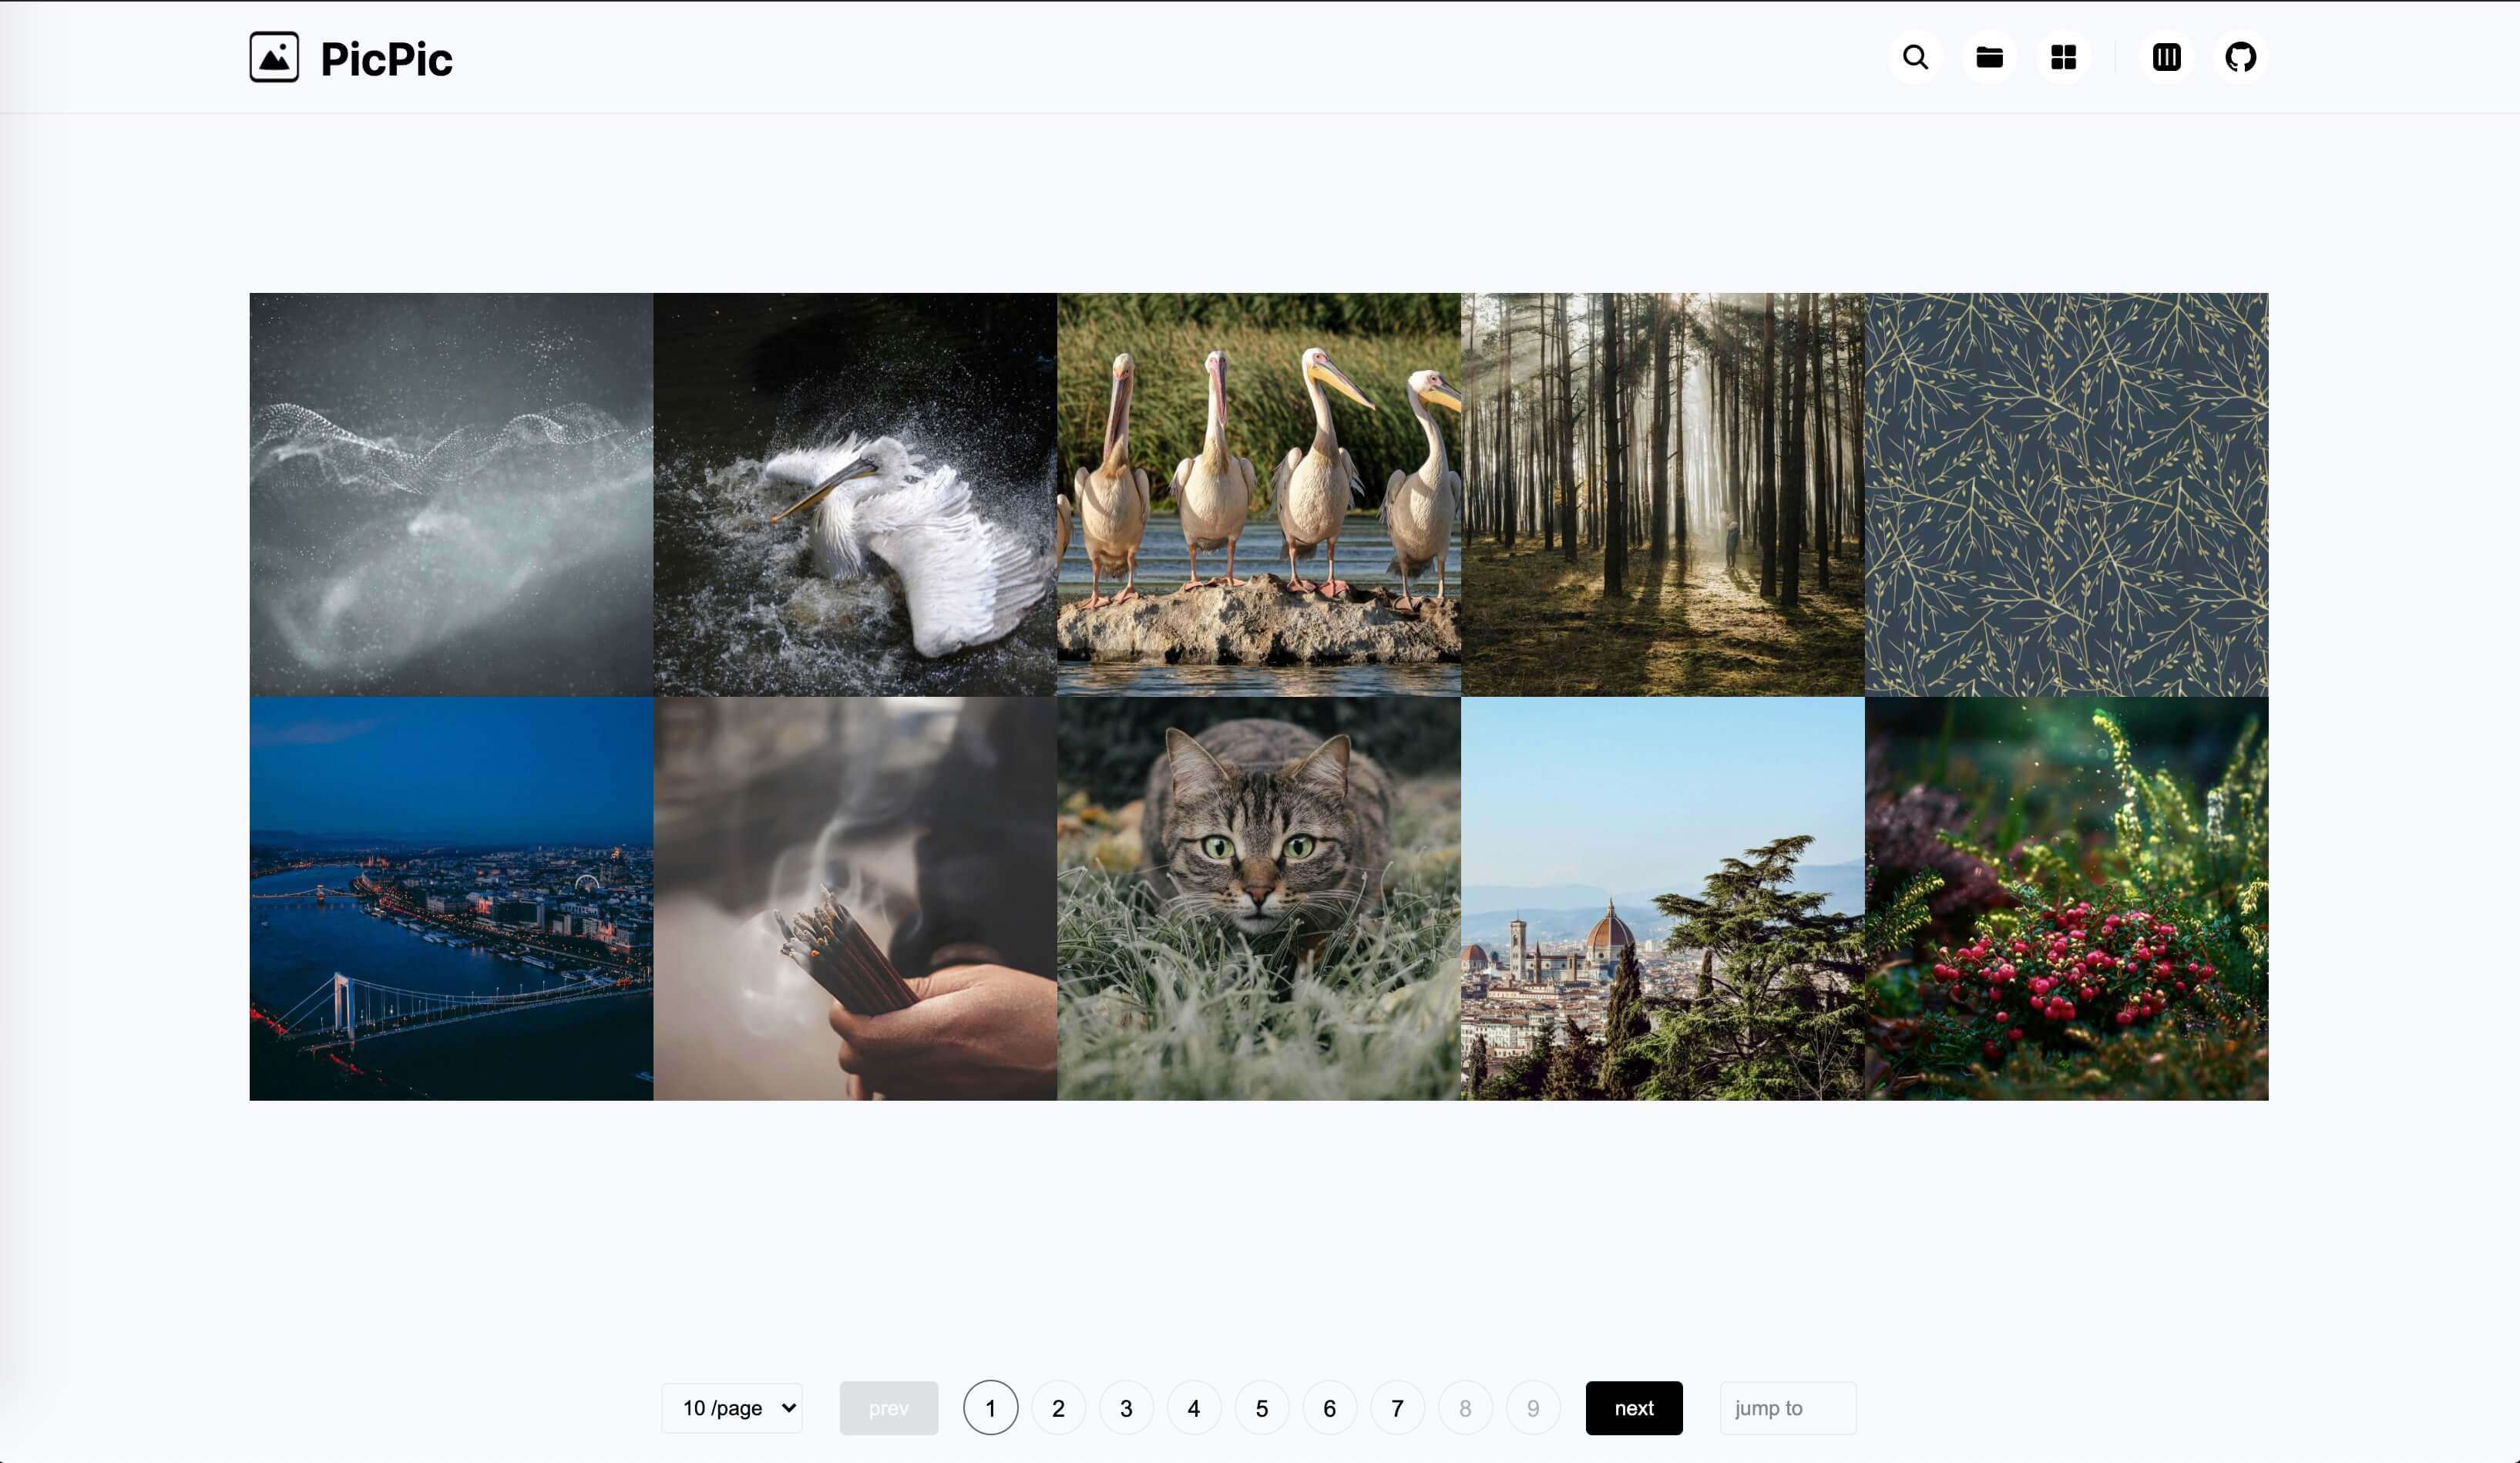
所以就有了它:
DEMO地址:https://matrixage.github.io/picpic_example/
项目地址:https://github.com/MatrixAges/picpic
基于离线版本,脱离了webpack的vue.js构建的单页面应用,原理就是通过node把图片数据预编译并写入到window对象中,然后通过chunk进行分片,提供翻页功能,至于文件夹模式,则是通过node把assets文件夹下的文件结构预编译成树形数据,写入到window对象,然后给页面中的js进行调用。
几经打磨,最后我把它做成了cli,你只需要npm i @matrixage/picpic,即可使用。
下面讲讲,我是如何通过node和vue构建这样一个单页面应用的。
没有webpack的web应用
使用github actions也有一段时间了,在经历过很多次构建之后,我观察到了一个现象:那就是80%的时间都是webpack花掉的,关键是一些很简单的项目,因为webpack,还是会有一个比较长的安装npm包的时间,那这对于一个图床应用来说,是致命的。
所以我决定摆脱webpack,使用离线版本的vue.min.js来构建应用,将部署时间控制在30s以内,做到提交图片,即刻可用。
<!-- source.html -->

<script src='./libs/js/vue.min.js'></script>
<script src='./libs/js/lodash.chunk.js'></script>
<script src='./libs/js/lodash.throttle.js'></script>
<script src='./libs/js/clipboard.js'></script>
<script src='./index.js'></script>
使用XHR和CustomEvent进行组件化开发
在html顶部引入include.js,改文件的作用是在文档加载完成之后将include标签中的地址通过同步的XHR,请求到组件的html内容,然后写入到页面中。
// include.js

getFileContent: function (url){
    var o = new XMLHttpRequest()

	o.open('get', url, false)
	o.send(null)

	return o.responseText
}
接着通过自定义事件发出通知:
// include.js

var evt = new CustomEvent('included', {
	bubbles: true,
	cancelable: false
})

window.onload = function (){
    new Include().replaceIncludeElements()

    document.dispatchEvent(evt);
}
在其他脚本中接收通知:
// index.js

document.addEventListener('included', function (){...})
通过node预编译组件
仅仅是使用include是不够的,组件的js和css代码同样要分离出来,这样才有意义,于是node出场,其实你理解的webpack,不过时穿上绅士马甲的node编译脚本,本质上还是预编译。
所以不用webpack,我们直溯本源,手写预编译代码。在picpic项目根目录新建一个build文件夹,其中的文件就是预编译要用的代码。
// build/index.js

const fs = require('fs-extra')
const globby = require('globby')
const inject = require('./inject')
const paths = require('./utils/paths')

const main = async () => {
	if (!fs.existsSync(paths.dist)) {
		fs.mkdirSync(paths.dist)
	} else {
		fs.removeSync(paths.dist)
		fs.mkdirSync(paths.dist)
      }

	fs.writeFileSync(`${paths.dist}/index.html`, await inject())
	fs.copySync(paths.assets, paths.dist)
	fs.copySync(paths.getPath('../../src'), paths.dist)
	fs.removeSync(`${paths.dist}/source.html`)

	const less = await globby(`${paths.dist}/**/*.less`)

      less.map(item => fs.removeSync(item))

	console.log('---------- picpic build success! ---------- \n')
}

try {
	main()
} catch (error) {
	console.log('---------- picpic build error! ---------- \n')
	console.error(error)
}
这里的inject就是注入组件和数据之后的html,接下来展示一下如何进行组件注入。
// build/inject/index.js

const fs = require('fs-extra')
const injectData = require('./injectData')
const injectStyles = require('./injectStyles')
const injectTemplates = require('./injectTemplates')
const injectJs = require('./injectJs')
const paths = require('../utils/paths')

function Inject (){
	this.html = ''

	this.getSource = () => {
		this.html = fs.readFileSync(paths.getPath('../../src/source.html')).toString()

		return new Promise(resolve => resolve(this.html))
	}

	this.injectData = async () => {
		this.html = await injectData(this.html)

		return new Promise(resolve => resolve(this.html))
	}

	this.injectStyles = async () => {
		this.html = await injectStyles(this.html)

		return new Promise(resolve => resolve(this.html))
	}

	this.injectTemplates = async () => {
		this.html = await injectTemplates(this.html)

		return new Promise(resolve => resolve(this.html))
	}
}

const inject = async () => {
	return await new Inject()
		.getSource()
		.then(res => injectData(res))
		.then(res => injectStyles(res))
		.then(res => injectTemplates(res))
		.then(res => injectJs(res))
}

module.exports = inject
通过返回this的方法进行链式调用,比一层一层用方法包裹优雅很多,有没有感受到代码之美,嘻嘻。
injectStyles injectTemplates injectJs这三种方法异曲同工,原理特简单,就是字符串替换,不过这里要注意空格,少一个都匹配不到。
// build/inject/injectStyles.js

const globby = require('globby')
const paths = require('../utils/paths')

module.exports = async str => {
	const paths_source = await globby([ `${paths.getPath('../../src/components/**/*.css')}` ])
	const paths_target = []

	paths_source.map(item =>
		paths_target.push(item.replace('src', '.').split('/').slice(-4).join('/'))
      )

	const items = paths_target.map(item => '@import ' + "'" + item + "'" + ';' + '\n')

	return str.replace(
		`
      <style></style>
`,
		`
      <style>
            ${items.reduce((total, item) => (total += item), '')}
      </style>
`
	)
}
在页面中,三种占位符分别用于注入组件相关的文件:
<!-- source.html -->

<!-- 注入样式导入代码 -->
<style></style>

<!-- 注入模版导入代码 -->
<template-slot></template-slot>

<!-- 注入脚本导入代码 -->
<script id="component_scripts"></script>
注入之后的结果为:
<!-- dist/index.html -->

<!-- 注入样式导入代码 -->
<style>
@import './components/Detail/index.css';
@import './components/Empty/index.css';
@import './components/FolderSelect/index.css';
@import './components/Header/index.css';
@import './components/ImgItems/index.css';
@import './components/Msg/index.css';
@import './components/Pagination/index.css';
</style>

<!-- 注入模版导入代码 -->
<include src="./components/Detail/index.html"></include>
<include src="./components/Empty/index.html"></include>
<include src="./components/FolderSelect/index.html"></include>
<include src="./components/Header/index.html"></include>
<include src="./components/ImgItems/index.html"></include>
<include src="./components/Msg/index.html"></include>
<include src="./components/Pagination/index.html"></include>

<!-- 注入脚本导入代码 -->
<script src="./components/Detail/index.js"></script>
<script src="./components/Empty/index.js"></script>
<script src="./components/FolderSelect/index.js"></script>
<script src="./components/Header/index.js"></script>
<script src="./components/ImgItems/index.js"></script>
<script src="./components/Msg/index.js"></script>
<script src="./components/Pagination/index.js"></script>
不要诟病组件文件夹大写,我是react的拥趸,如果不是因为web-component强制使用-分割符小写,所有的组件我都希望大写,因为辨识度比前者高很多。
通过node预编译目录数据
主要是通过dree到处树形数据,通过imageinfo获取图片长宽,然后再进行数据裁剪,把需要的数据进行组装后导出。代码多且杂,这里仅结果,有兴趣的可以去github看代码。
{
    "name":"assets",
    "type":"directory",
    "size":"1.14MB",
    "children":[
        {
            "name":"projects",
            "type":"directory",
            "size":"1.14MB",
            "children":[
                {
                    "name":"picpic",
                    "type":"directory",
                    "size":"1.14MB",
                    "children":[
                        {
                            "name":"choose_gh_pages.jpg",
                            "type":"file",
                            "extension":"jpg",
                            "size":"61.1KB",
                            "dimension":"2020x940",
                            "path":"projects/picpic/choose_gh_pages.jpg"
                        },
                        {
                            "name":"folder_hover_status.jpg",
                            "type":"file",
                            "extension":"jpg",
                            "size":"116.74KB",
                            "dimension":"956x1896",
                            "path":"projects/picpic/folder_hover_status.jpg"
                        }
                    ]
                }
            ]
        }
    ]
}
然后写入到html中:
// build/inject/injectData.js

const { getFileTree } = require('../utils')

module.exports = async str => {
	const tree = await getFileTree()

	return str.replace(
		`
      <head>
            <title>PicPic</title>
      </head>
`,
		`
      <head>
            <title>PicPic</title>
            <script>
                  window.img_paths=${JSON.stringify(tree)}
            </script>
      </head>
`
	)
}
做成命令行工具
仅仅做成上面那样使用起来,还需要别人clone你的仓库,后续升级麻烦,而且编译源文件什么的都暴露出来了,看起来脏的不行,所以不仅要产品本身美,使用方式也需要简单优雅。
在 package.json 中添加如下字段,发布包之后,当别人在 npm i @matrixage/picpic 时会生成命令行工具文件:
"bin": {
    "picpic": "./bin/index.js"
}
编写命令行工具代码:
// bin/index.js

#!/usr/bin/env node

const fs = require('fs-extra')
const path = require('path')
const child_process = require('child_process')
const pkg = require(`${process.cwd()}/package.json`)

const main = () => {
	const args = process.argv[2]
	const root = process.cwd()
	const getPath = p => path.join(__dirname, p)

	switch (args) {
		case 'init':
			pkg['scripts']['build'] = 'picpic build'

			fs.writeFileSync('./package.json', JSON.stringify(pkg, null, 2).concat('\n'))
			if (!fs.existsSync(`${root}/assets`)) fs.mkdirSync(`${root}/assets`)
			if (!fs.existsSync(`${root}/.github`)) fs.mkdirSync(`${root}/.github`)
			if (!fs.existsSync(`${root}/.gitignore`)) fs.writeFileSync(`${root}/.gitignore`,`/dist \n/node_modules \n.DS_Store`)
			fs.copySync(getPath('../.github'), `${root}/.github`)

			console.log('---------- picpic init success! ---------- \n')
			break
		case 'build':
			child_process.execSync(`node ${getPath('../build/index.js')}`)
			break
		default:
			break
	}
}

try {
	main()

	process.exit(0)
} catch (e) {
	console.error(e)

	process.exit(1)
}
当用户 npm i @matrixage/picpic 之后,在 package.json 的 scripts 字段中加入 "init": "picpic init" ,然后执行npm run init,项目根目录会生成 .github assets 文件夹以及 .gitignore 文件。
这个时候用户只需要把图片移动到assets文件夹中,支持在assets中新建任意不超过12层的文件夹。然后提交到github,github action将自动进行构建,然后把构建出的dist文件夹推送到仓库的gh-pages上,如果没有开启gh-pages请自行开启。
至此,全部构建流程讲解完毕。这个过程,写预编译代码其实是最简单,麻烦的是:
- 如何构建美的应用?
- 如何让用户简单且优雅地使用?
回首我做过的所有项目,花在逻辑上的时间其实是最少的,写逻辑是跟机器对话,机器嘛,就那几句话,记住就行了。而画界面,做交互,是在跟人,首先就是跟自己进行对话,了解自己内心深处的想法,然后就是跟用户进行对话,其实你把用户当成千千万万个我,那你就能感受到,你的idea,该如何生长,你的画,该是何模样。
总之,以人为本。
DEMO地址:https://matrixage.github.io/picpic_example/
项目地址:https://github.com/MatrixAges/picpic
注意,在github的readme文件中使用username.github.io/repo/~这样的链接,github会将之自动转化为camo.githubusercontent.com该host下的图片链接,该链接被DNS污染了,如要预览,请在host中加入如下DNS解析:
199.232.96.133 raw.githubusercontent.com
199.232.96.133 camo.githubusercontent.com
如果你发现访问github很慢,那是因为本地服务商在进行DNS网络过滤,加入如下host跳过服务商网络过滤:
140.82.112.3 github.com
如果你的仓库的主分支是master而不是main,请自行修改构建脚本依赖分支为master,在.github/workflows/ci.yml中。
常见问题FAQ
- 免费下载或者VIP会员专享资源能否直接商用?
- 本站所有资源版权均属于原作者所有,这里所提供资源均只能用于参考学习用,请勿直接商用。若由于商用引起版权纠纷,一切责任均由使用者承担。更多说明请参考 VIP介绍。
- 提示下载完但解压或打开不了?
- 找不到素材资源介绍文章里的示例图片?
- 模板不会安装或需要功能定制以及二次开发?


发表评论
还没有评论,快来抢沙发吧!