进度条是一个非常常见的功能,实现起来也不难,一般我们都会用 div 来实现。
作为一个这么常见的需求, whatwg 肯定是不会没有原生组件提供(虽然有我们也不一定会用),那么就让我们来康康有哪些有意思的进度条实现方式。
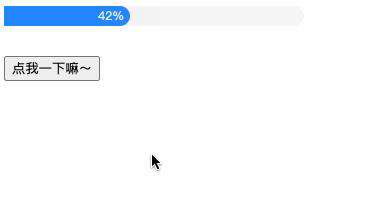
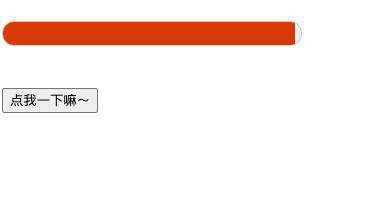
常规版 — div 一波流
这是比较常规的实现方式,先看效果:
源码如下:
<style>
  .progress1 {
    height: 20px;
    width: 300px;
    background-color: #f5f5f5;
    border-bottom-right-radius: 10px;
    border-top-right-radius: 10px;
  }
  .progress1::before {
    counter-reset: progress var(--percent, 0);
    content: counter(progress) '%\2002';
    display: block;
    height: 20px;
    line-height: 20px;
    width: calc(300px * var(--percent, 0) / 100);
    font-size: 12px;
    color: #fff;
    background-color: #2486ff;
    text-align: right;
    white-space: nowrap;
    overflow: hidden;
    border-bottom-right-radius: 10px;
    border-top-right-radius: 10px;
  }
  .btn {
    margin-top: 30px;
  }
</style>
<div id="progress1" class="progress1"></div>
<button id="btn" class="btn">点我一下嘛~</button>
<script>
  'use strict';
  let startTimestamp = (new Date()).getTime();
  let currentPercentage = 0;
  let maxPercentage = 100;
  let countDelay = 100;
  let timer = null;
  let start = false;
  const percentageChange = () => {
    const currentTimestamp = (new Date()).getTime();
    if (currentTimestamp - startTimestamp >= countDelay) {
      currentPercentage++;
      startTimestamp = (new Date()).getTime();
      progress1.style = `--percent: ${currentPercentage}`;
    };
    if (currentPercentage < maxPercentage) {
      timer = window.requestAnimationFrame(percentageChange);
    } else {
      window.cancelAnimationFrame(timer);
    };
  };
  const clickHander = () => {
    if (!start) {
      start = true;
      percentageChange();
    };
  };
  btn.addEventListener('click', clickHander);
</script>
这种方法的核心就是以当前盒子为容器,以 ::before 为内容填充。用 <div> 的好处就是实现简单,兼容性强,拓展性高,但是美中不足的是标签语义化不强。
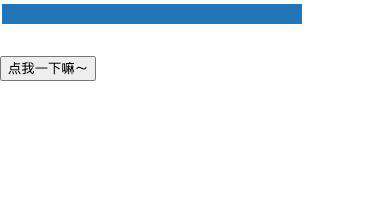
进阶版 — input type="range"
<input /> 是一个非常实用的替换元素,不同的 type 可以做不同的事情。第二种就是用 <input type="range" /> 来实现的。首先我们来看看效果:
源码如下:
<style>
  .progress2[type='range'] {
    display: block;
    font: inherit;
    height: 20px;
    width: 300px;
    pointer-events: none;
    background-color: linear-gradient(to right, #2376b7 100%, #FFF 0%);
  }
  .progress2[type='range'],
  .progress2[type='range']::-webkit-slider-thumb {
    -webkit-appearance: none;
  };
  .progress2[type='range']::-webkit-slider-runnable-track {
    border: none;
    border-bottom-right-radius: 10px;
    border-top-right-radius: 10px;
    height: 20px;
    width: 300px;
  }
  .btn {
    margin-top: 30px;
  }
</style>
<input id="progress2" class="progress2" type='range' step="1" min="0" max="100" value="0"/>
<button id="btn" class="btn">点我一下嘛~</button>
<script>
  'use strict';
  let startTimestamp = (new Date()).getTime();
  let currentPercentage = 0;
  let maxPercentage = 100;
  let countDelay = 100;
  let timer = null;
  let start = false;
  let percentageGap = 10;
  const percentageChange = () => {
    const currentTimestamp = (new Date()).getTime();
    if (currentTimestamp - startTimestamp >= countDelay) {
      currentPercentage++;
      startTimestamp = (new Date()).getTime();
      progress2.value = currentPercentage;
      progress2.style.background = `linear-gradient(to right, #2376b7 ${currentPercentage}%, #FFF 0%`;
    };
    if (currentPercentage < maxPercentage) {
      timer = window.requestAnimationFrame(percentageChange);
    } else {
      window.cancelAnimationFrame(timer);
    };
  };
  const clickHander = () => {
    if (!start) {
      start = true;
      percentageChange();
    };
  };
  btn.addEventListener('click', clickHander);
</script>
写完这个 demo 才发现,<input type="range" /> 并不适合做这个功能。。一个是实现困难,这个 type 组件的每个元件都可以单独修改样式,但是效果并不是很好。
另一个是因为 range 有专属语意 —— 范围,所以它更适合做下面这种事:
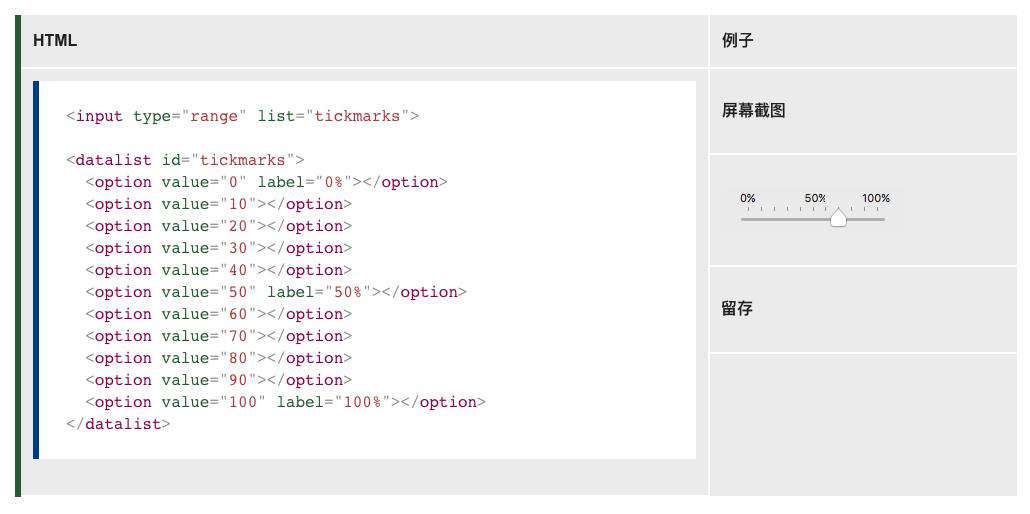
以上demo来自:https://developer.mozilla.org/en-US/docs/Web/HTML/Element/input/range
高级版 — progress 鸭
当然,上述两种方式都是模拟进度条,实际上我们并不需要模拟,因为 whatwg 有为我们提供原生的进度条标签 —— <progress> 。
我们先看效果:
实现如下:
<style>
  .progress3 {
    height: 20px;
    width: 300px;
    -webkit-appearance: none;
    display: block;
  }
  .progress3::-webkit-progress-value {
    background: linear-gradient(
      -45deg,
      transparent 33%,
      rgba(0, 0, 0, .1) 33%,
      rgba(0,0, 0, .1) 66%,
      transparent 66%
    ),
      linear-gradient(
        to top,
        rgba(255, 255, 255, .25),
        rgba(0, 0, 0, .25)
      ),
      linear-gradient(
        to left,
        #09c,
        #f44);
    border-radius: 2px;
    background-size: 35px 20px, 100% 100%, 100% 100%;
  }
  .btn {
    margin-top: 30px;
  }
</style>
<progress id="progress3" class="progress3" max="100" value="0"></progress>
<button id="btn" class="btn">点我一下嘛~</button>
<script>
  'use strict';
  let startTimestamp = (new Date()).getTime();
  let currentPercentage = 0;
  let maxPercentage = 100;
  let countDelay = 100;
  let timer = null;
  let start = false;
  const percentageChange = () => {
    const currentTimestamp = (new Date()).getTime();
    if (currentTimestamp - startTimestamp >= countDelay) {
      currentPercentage++;
      startTimestamp = (new Date()).getTime();
      progress3.setAttribute('value', currentPercentage);
    };
    if (currentPercentage < maxPercentage) {
      timer = window.requestAnimationFrame(percentageChange);
    } else {
      window.cancelAnimationFrame(timer);
    };
  };
  const clickHander = () => {
    if (!start) {
      start = true;
      percentageChange();
    };
  };
  btn.addEventListener('click', clickHander);
</script>
虽然有原生的进度条标签,但是规范里并没有规定它的具体表现,所以各个浏览器厂商完全可以按照自己的喜好去定制,样式完全不可控,所以标签虽好。。可用性却不强,有点可惜。
终极版 — meter 赛高
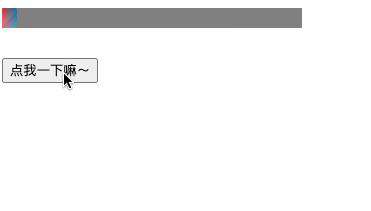
当然,能够实现进度条功能的标签,除了上面所说的,还有 <meter> 标签。先看效果:
代码如下:
<style>
  .progress4 {
    display: block;
    font: inherit;
    height: 50px;
    width: 300px;
    pointer-events: none;
  }
  .btn {
    margin-top: 30px;
  }
</style>
<meter id="progress4" class="progress4" low="60" high="80" min="0" max="100" value="0"></meter>
<button id="btn" class="btn">点我一下嘛~</button>
<script>
  'use strict';
  let startTimestamp = (new Date()).getTime();
  let currentPercentage = 0;
  let maxPercentage = 100;
  let countDelay = 100;
  let timer = null;
  let start = false;
  const percentageChange = () => {
    const currentTimestamp = (new Date()).getTime();
    if (currentTimestamp - startTimestamp >= countDelay) {
      currentPercentage++;
      startTimestamp = (new Date()).getTime();
      progress4.value = currentPercentage;
    };
    if (currentPercentage < maxPercentage) {
      timer = window.requestAnimationFrame(percentageChange);
    } else {
      window.cancelAnimationFrame(timer);
    };
  };
  const clickHander = () => {
    if (!start) {
      start = true;
      percentageChange();
    };
  };
  btn.addEventListener('click', clickHander);
</script>
这个标签可能比较陌生,实际上它跟 <input type="range"> 的语义是一样的,用来显示已知范围的标量值或者分数值。不一样的就是。。。它样式改起来更麻烦。
总结
本文测评了4种实现进度条的方式,得出的结论就是 —— <div> 赛高。。。虽然有的时候想优雅一点追求标签语义化,但是资源不支持,也很尴尬。
嗯,万能的 <div> 。
以上 demo 都可以我的 codepen 上查看:https://codepen.io/krischan77/pen/QPezjB
常见问题FAQ
- 免费下载或者VIP会员专享资源能否直接商用?
- 本站所有资源版权均属于原作者所有,这里所提供资源均只能用于参考学习用,请勿直接商用。若由于商用引起版权纠纷,一切责任均由使用者承担。更多说明请参考 VIP介绍。
- 提示下载完但解压或打开不了?
- 找不到素材资源介绍文章里的示例图片?
- 模板不会安装或需要功能定制以及二次开发?


发表评论
还没有评论,快来抢沙发吧!