序
为什么要自己搭建项目 ?
这个事情起始于前两天给团队写一个脚手架工具,这段时间刚做做完一个系统,是团队第一个正式意义上的全栈项目;团队有自己的前端脚手架,但是没有后端脚手架,所以想着给团队写一个后端脚手架工具,这样团队在开展后续的全栈项目时可以使用脚手架构建项目,避免了重复搭建项目初始架构的大量工作,成员直接编写业务代码即可。
前两天用 JavaScript 完成了脚手架的初版,开发过程中发现没一点代码提示,很不舒服,而且这样的代码不利于后续的迭代和维护。
所以决定用 typescript 重构一遍,但是官方好像没有提供一个合适的脚手架工具,于是就开始自己搭建 typescript 项目;自己搭建最大的好处就是 自主可控,项目中集成了实时编译的开发环境、eslint + prettier 保证代码质量和风格统一、项目构建工具、git 提交信息的规范化,这些都是一个项目最基本和必要的配置。
本来到这里就结束了,但是在后续重构脚手架的过程中发现一个问题,如果每写一个新的 typescript 项目就重复一遍这个搭建流程,比如:今天需要开发一个 npm 包,明天需要开发另外一个脚手架,这好像有点太麻烦了,于是就把整个搭建过程写成了一个脚手架,这样在后续开发的工作中就可以实现一键创建项目,简单、方便、舒爽
从这篇文章中你可以学到什么 ?
- 如何搭建一个基于 typescript 的项目框架
- 在项目中怎么集成 eslint 和 prettier 保证代码质量
- 如何规范化 git 提交信息
- 如何为团队开发自己的脚手架工具(提效)
搭建项目
初始化项目目录
mkdir ts-project && cd ts-project && npm init -y && npm i typescript -D && npx tsc --init
这条命令的意思是在当前目录下创建一个 ts-project 目录,然后进入 ts-project 目录执行 npm init -y 初始话目录产生 package.json 文件,之后运行 npm i typescript -D 在开发环境安装 typescript 包,之后执行 npx tsc --init 生成 tsconfig.json 文件
mkdir src && touch src/index.ts
新建 src 目录作为项目的源码目录(开发目录),并在 src 目录下创建 index.ts 文件作为项目的入口文件
设置 tsconfig.json
如果一个目录下存在 tsconfig.json 文件,那就意味着这个目录是 typescirpt 项目的根目录,tsconfig.json 文件中指定了用来编译项目的根文件和编译选项,使用 tsc --init 生成的 tsconfig.json 文件包含了大量的选项,其中大部分都被注释掉了,一般我们只需要配置如下内容即可:
{
  "compileOnSave": true,
  "compilerOptions": {
    "target": "ES2018",
    "module": "commonjs",
    "moduleResolution": "node",
    "experimentalDecorators": true,
    "emitDecoratorMetadata": true,
    "inlineSourceMap":true,
    "noImplicitThis": true,
    "noUnusedLocals": true,
    "stripInternal": true,
    "pretty": true,
    "declaration": true,
    "outDir": "lib",
    "baseUrl": "./",
    "paths": {
      "*": ["src/*"]
    }
  },
  "exclude": [
    "lib",
    "node_modules"
  ]
}
@types/node
npm i @types/node -D
这个是 node.js 的类型定义包
开发环境实时编译
npm i ts-node-dev -D
在 package.json 的 scripts 中增加如下内容
{
  "scripts": {
    "dev:comment": "启动开发环境",
    "dev": "ts-node-dev --respawn --transpile-only src/index.ts"
  }
}
执行 npm run dev 即可启动开发环境,并且修改文件时可实时编译
代码质量
代码质量对于一个系统的可维护性、可迭代性至关重要,特别是在多人协作一个大型项目中,如果没有把控代码质量的工具,每人一套编码风格,这样的系统在后期的维护难度可想而知,基本上会成为一个难以迭代升级的祖传系统,除了重写别无他法。
因此控制代码质量的工具应运而生,而 ESLint 当属其中的佼佼者,熬死了各路的竞争者;typescript 之前还在使用 TSLint,但在 2019 年 1 月 官方决定全面采用 ESLint 作为代码检查工具。
ESLint
采用社区的开源配置方案 eslint-config-standard,简单直接,足以 hold 住大部分项目了
npx eslint --init
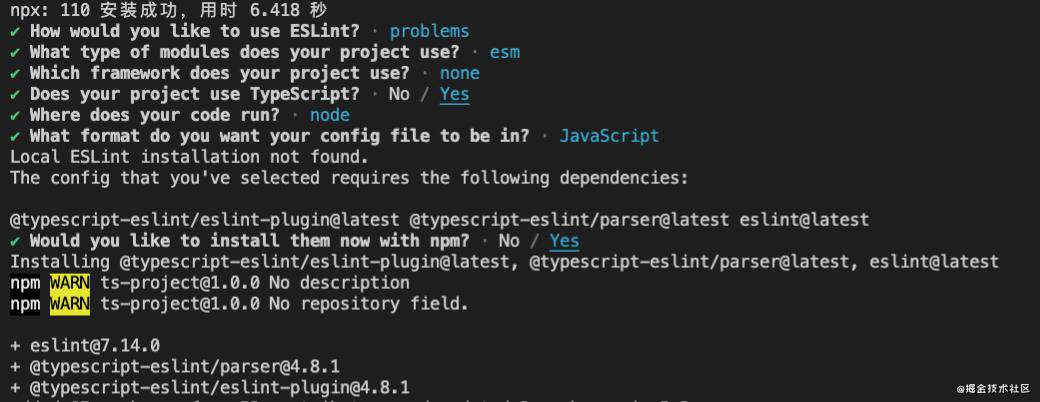
以上流程走完以后在项目根目录会多出来一个 .eslintrc.js 文件,接下来在 package.json 的 scripts 中增加如下配置
{
  "scripts": {
    "eslint:comment": "使用 ESLint 检查并自动修复 src 目录下所有扩展名为 .ts 的文件",
    "eslint": "eslint --fix src --ext .ts"
  }
}
Prettier
Perttier 是一个专注于统一代码格式风格的工具,可能有人会疑惑,ESLint 已经能够规范我们的代码,为什么还需要 Prettier ?简单来说是这样的,ESLint 其实有两种类型规则:
- 格式规则:比如 key-spacing、comma-spacing 等
- 质量规则:比如 最常见的 no-var 等
其中 格式规则 主要是控制代码风格,简单理解就是代码看起来好看、易读,而 质量规则 主要是发现代码中存在的潜在 bug 或者可能会制造 bug 的地方,简单来说更多是从语法层面去考虑,比如现在禁止使用 var 声明变量,而 prettier 则是专注于 格式规则,所以在格式方面我们选用更加专业的 Prettier。
如果你同时使用 ESLint 和 Prettier,且在编辑器中配置了 Sava Auto Fix 时,会让你的一键格式化异常痛苦,因为在 格式规则 上有冲突,所以个人建议或者说不喜欢在编辑器中配置 ESLint 和 Prettier,三个原因:
- 不喜欢编码过程被编辑器因为格式检查问题打断
- 通过 git hook 统一处理格式问题很香
- 习惯好,一般编写的代码不存在格式问题,意思是从自身编码习惯触发从根本上解决问题
接下来就开始安装和配置 Prettier
npm i prettier -D
安装 Prettier 所需的依赖,然后在项目目录增加 .prettierrc.js,推荐配置如下:
module.exports = {
    // 一行最多 80 字符
    printWidth: 80,
    // 使用 2 个空格缩进
    tabWidth: 2,
    // 不使用 tab 缩进,而使用空格
    useTabs: false,
    // 行尾需要有分号
    semi: true,
    // 使用单引号代替双引号
    singleQuote: true,
    // 对象的 key 仅在必要时用引号
    quoteProps: 'as-needed',
    // jsx 不使用单引号,而使用双引号
    jsxSingleQuote: false,
    // 末尾使用逗号
    trailingComma: 'all',
    // 大括号内的首尾需要空格 { foo: bar }
    bracketSpacing: true,
    // jsx 标签的反尖括号需要换行
    jsxBracketSameLine: false,
    // 箭头函数,只有一个参数的时候,也需要括号
    arrowParens: 'always',
    // 每个文件格式化的范围是文件的全部内容
    rangeStart: 0,
    rangeEnd: Infinity,
    // 不需要写文件开头的 @prettier
    requirePragma: false,
    // 不需要自动在文件开头插入 @prettier
    insertPragma: false,
    // 使用默认的折行标准
    proseWrap: 'preserve',
    // 根据显示样式决定 html 要不要折行
    htmlWhitespaceSensitivity: 'css',
    // 换行符使用 lf
    endOfLine: 'lf'
}
在 package.json 的 scripts 中补充如下内容
{
  "scripts": {
    "prettier:comment": "自动格式化 src 目录下的所有 .ts 文件",
    "prettier": "prettier --write \"src/**/*.ts\""
  }
}
如果想在编辑器中配置 ESLint 和 Prettier,具体怎么配 查看 这里,通过 eslint-config-prettier 来解决冲突问题,其作用就是关闭 ESLint 中的格式规则,只使用 Prettier 的格式规则
commitizen
在系统开发中,如果 git 提交说明精准,在后期的协作以及 bug 处理时会变的有据可查,变相的提高了系统的可维护性,而且可以根据规范的提交说明快速生成开发日志,从而方便开发者或用户追踪项目的开发信息和功能特性。commitizen 是一个实现规范提交说明的工具。

使用 commitizen 在项目中生成符合 AngularJS 规范的提交说明,并初始化 cz-conventional-changelog 适配器
npx commitizen init cz-conventional-changelog --save --save-exact
初始化时主要做了三件事:
- 在项目中安装 cz-conventional-changelog 适配器依赖
- 将适配器依赖保存到 package.json 的 devDependencies 对象中
- 在 package.json 中新增 config.commitizen 字段,主要用于配置 cz 工具的适配器路径
内容如下:
{
  "devDependencies": {
    "cz-conventional-changelog": "^3.3.0"
  },
  "config": {
    "commitizen": {
      "path": "./node_modules/cz-conventional-changelog"
    }
  }
}
接下来安装校验工具,负责校验提交信息是否符合规范
npm i @commitlint/cli @commitlint/config-conventional -D
在项目根目录下新建 commitlint.config.js 并设置校验规则
module.exports = {
  extends: ['@commitlint/config-conventional']
};
然后在 package.json 的 scripts 中增加如下内容
{
  "scripts": {
    "commit:comment": "引导设置规范化的提交信息",
    "commit": "cz"
  }
}
接下来,就只能使用规范化的提交信息了,如果不知道规范是什么,可在 git add . 之后执行 npm run commit 代替 git commit,会弹出一个列表,引导你一步步的填充符合规范的提交信息,熟练以后亦可用 git commit
husky 和 lint-staged
npm i husky lint-staged -D
在 package.json 中添加如下内容
{
  "husky": {
    "hooks": {
      "pre-commit": "lint-staged",
      "commit-msg": "commitlint -E HUSKY_GIT_PARAMS"
    }
  },
  "lint-staged": {
    "*.ts": ["npm run eslint", "npm run prettier"]
  }
}
之前设置的 ESLint、Prettier 以及 commitizen 到目前为止都只限于开发者手动执行 npm run xx 才能生效,这可不行,因为这一点都不智能,而且万一开发者忘执行命令了怎么办 ?
这时候就需要 husky 和 lint-staged 出场了,上述配置的原理其实就是监听了 git hook 脚本的执行,在特定的命令执行前(pre-commit) 执行相应的命令(lint-staged)。
构建
因为这个项目主要用于开发一些简单的 typescript 项目,比如项目组需要封装自己的 npm 包,所以就没有集成第三方的构建工具,直接用 typescript 自己的构建能力即可,简单易用,没有学习成本
在 package.json 中添加如下内容
{
  "scripts": {
    "build:comment": "构建",
    "build": "npm run eslint && npm run prettier && rm -rf lib && tsc --build",
  }
}
小结
好了,到这里项目就搭建好了,虽然还有一些可优化和扩展的地方,但是用于开发一个简单的 npm 包或者脚手架的项目来说已经足够了,如有需要可以基于以上内容再进行进一步的补充和扩展,希望大家能从里面得到自己需要的内容。
脚手架
接下来就将上面的整个搭建过程封装成一个脚手架,脚手架的开发就在上面搭建的项目中进行
准备工作
常用工具包
开发一个脚手架,一般都需要一些工具包的支持,项目中使用到了以下工具包:
- commander
- chalk
- shelljs
- inquirer
- clear-console
- ora
- download-git-repo
上面列出的这些基本上就是目前开发一款脚手架常用的工具,接下来安装项目需要用到的工具包:
npm i commander chalk shelljs inquirer clear-console -S
本地调试
在项目根目录下的 pacakge.json 中增加如下内容:
{
  "bin": {
    "ts-cli": "./bin/ts-cli.js"
  }
}
bin 表示命令(ts-cli)的可执行文件的位置,接下来在项目根目录执行 npm link ts-cli,将 package.json 中的属性 bin 的值路径添加全局链接,在命令行中执行 ts-cli 就会执行 ./bin/ts-cli.js 文件
当用户安装带有 bin 字段的包时,如果是全局安装,npm 将会使用符号链接把这些文件链接到/usr/local/node_modules/.bin/(即全局的 node_modules/.bin 中);如果是本地安装,会链接到./node_modules/.bin/。
开发结束可执行 npm unlink ts-cli 去掉 ts-cli 的链接,如果不幸你执行 unlink 命令之后你改变了你的目录名,在 unlink 时会无效,只能手动去全局的 node_modules 中删除对应的软连接
在项目根目录下添加 bin 目录,然后在 bin 目录下新建 ts-cli.js,文件内容如下:
#!/usr/bin/env node

// 将构建目录(lib)下的 index.js 作为脚手架的入口
require('../lib/index')
接下来正式进入开发阶段
开发
这是源码的一个目录结构

/src/index.ts
import { program } from 'commander';
import create from './order/create';

// ts-cli -v、ts-cli --version
// 临时禁用规则,保证这里可以通过 require 方法获取 package.json 中的版本号
/* eslint-disable @typescript-eslint/no-var-requires */
program
  .version(`${require('../package.json').version}`, '-v --version')
  .usage('<command> [options]');

// ts-cli create newPro
program
  .command('create <app-name>')
  .description('Create new project from => ts-cli create yourProjectName')
  .action(async (name: string) => {
    // 创建命令具体做的事情都在这里,name 是你指定的 newPro
    await create(name);
  });

program.parse(process.argv);
/src/order/create.ts
/**
 * create 命令的具体任务
 */

import {
  changePackageInfo,
  end,
  initProjectDir,
  installDevEnviroment,
  installFeature,
  installTSAndInit,
  installTypesNode,
  isFileExist,
  selectFeature,
} from '../utils/create';

// create 命令
export default async function create(projecrName: string): Promise<void> {
  // 判断文件是否已经存在
  isFileExist(projecrName);
  // 选择需要的功能
  const feature = await selectFeature();
  // 初始化项目目录
  initProjectDir(projecrName);
  // 改写项目的 package.json 基本信息,比如 name、description
  changePackageInfo(projecrName);
  // 安装 typescript 并初始化
  installTSAndInit();
  // 安装 @types/node
  installTypesNode();
  // 安装开发环境,支持实时编译
  installDevEnviroment();
  // 安装 feature
  installFeature(feature);
  // 结束
  end(projecrName);
}
/src/utils/create.ts
/**
 * create 命令需要用到的所有方法
 */
import {
  getProjectPath,
  PackageJSON,
  JSON,
  printMsg,
  readJsonFile,
  writeJsonFile,
  clearConsole,
} from '../utils/common';
import { existsSync } from 'fs';
import { prompt } from 'inquirer';
import { blue, cyan, gray, red, yellow } from 'chalk';
import * as shell from 'shelljs';
import * as installFeatureMethod from './installFeature';

/**
 * 验证当前目录下是否已经存在指定文件,如果存在则退出进行
 * @param filename 文件名
 */
export function isFileExist(filename: string): void {
  // 文件路径
  const file = getProjectPath(filename);
  // 验证文件是否已经存在,存在则推出进程
  if (existsSync(file)) {
    printMsg(red(`${file} 已经存在`));
    process.exit(1);
  }
}

/**
 * 交互式命令行,让用户自己选择需要的功能
 * return ['ESLint', 'Prettier', 'CZ']
 */
export async function selectFeature(): Promise<Array<string>> {
  // 清空命令行
  clearConsole();
  // 输出信息
  /* eslint-disable @typescript-eslint/no-var-requires */
  printMsg(blue(`TS CLI v${require('../../package.json').version}`));
  printMsg('Start initializing the project:');
  printMsg('');
  // 选择功能,这里配合 下面的 installFeature 方法 和 ./installFeature.ts 文件为脚手架提供了良好的扩展机制
  // 将来扩展其它功能只需要在 choices 数组中增加配置项,然后在 ./installFeature.ts 文件中增加相应的安装方法即可
  const { feature } = await prompt([
    {
      name: 'feature',
      type: 'checkbox',
      message: 'Check the features needed for your project',
      choices: [
        { name: 'ESLint', value: 'ESLint' },
        { name: 'Prettier', value: 'Prettier' },
        { name: 'CZ', value: 'CZ' },
      ],
    },
  ]);

  return feature as Array<string>;
}

/**
 * 初始化项目目录
 */
export function initProjectDir(projectName: string): void {
  shell.exec(`mkdir ${projectName}`);
  shell.cd(projectName);
  shell.exec('npm init -y');
}

/**
 * 改写项目中 package.json 的 name、description
 */
export function changePackageInfo(projectName: string): void {
  const packageJSON: PackageJSON = readJsonFile<PackageJSON>('./package.json');
  packageJSON.name = packageJSON.description = projectName;
  writeJsonFile<PackageJSON>('./package.json', packageJSON);
}

/**
 * 安装 typescript 并初始化
 */
export function installTSAndInit(): void {
  // 安装 typescript 并执行命令 tsc --init 生成 tsconfig.json
  shell.exec('npm i typescript -D && npx tsc --init');
  // 覆写 tsconfig.json
  const tsconfigJson: JSON = {
    compileOnSave: true,
    compilerOptions: {
      target: 'ES2018',
      module: 'commonjs',
      moduleResolution: 'node',
      experimentalDecorators: true,
      emitDecoratorMetadata: true,
      inlineSourceMap: true,
      noImplicitThis: true,
      noUnusedLocals: true,
      stripInternal: true,
      pretty: true,
      declaration: true,
      outDir: 'lib',
      baseUrl: './',
      paths: {
        '*': ['src/*'],
      },
    },
    exclude: ['lib', 'node_modules'],
  };
  writeJsonFile<JSON>('./tsconfig.json', tsconfigJson);
  // 创建 src 目录和 /src/index.ts
  shell.exec('mkdir src && touch src/index.ts');
}

/**
 * 安装 @types/node
 * 这是 node.js 的类型定义包
 */
export function installTypesNode(): void {
  shell.exec('npm i @types/node -D');
}

/**
 * 安装开发环境,支持实时编译
 */
export function installDevEnviroment(): void {
  shell.exec('npm i ts-node-dev -D');
  /**
   * 在 package.json 的 scripts 中增加如下内容
   * "dev:comment": "启动开发环境",
   * "dev": "ts-node-dev --respawn --transpile-only src/index.ts"
   */
  const packageJson = readJsonFile<PackageJSON>('./package.json');
  packageJson.scripts['dev:comment'] = '启动开发环境';
  packageJson.scripts['dev'] =
    'ts-node-dev --respawn --transpile-only src/index.ts';
  writeJsonFile<PackageJSON>('./package.json', packageJson);
}

/**
 * 安装用户选择的功能
 * @param feature 功能列表
 */
export function installFeature(feature: Array<string>): void {
  feature.forEach((item) => {
    const func = (installFeatureMethod[
      `install${item}`
    ] as unknown) as () => void;
    func();
  });
  // 安装 husky 和 lint-staged
  installHusky(feature);
  // 安装构建工具
  installFeatureMethod.installBuild(feature);
}

/**
 * 安装 husky 和 lint-staged,并根据功能设置相关命令
 * @param feature 用户选择的功能列表
 */
function installHusky(feature: Array<string>): void {
  // feature 副本
  const featureBak = JSON.parse(JSON.stringify(feature));

  // 设置 hook
  const hooks = {};
  // 判断用户是否选择了 CZ,有则设置 hooks
  if (featureBak.includes('CZ')) {
    hooks['commit-msg'] = 'commitlint -E HUSKY_GIT_PARAMS';
  }

  // 设置 lintStaged
  const lintStaged: Array<string> = [];
  if (featureBak.includes('ESLint')) {
    lintStaged.push('eslint');
  }
  if (featureBak.includes('Prettier')) {
    lintStaged.push('prettier');
  }

  installFeatureMethod.installHusky(hooks, lintStaged);
}

/**
 * 整个项目安装结束,给用户提示信息
 */
export function end(projectName: string): void {
  printMsg(`Successfully created project ${yellow(projectName)}`);
  printMsg('Get started with the following commands:');
  printMsg('');
  printMsg(`${gray('$')} ${cyan('cd ' + projectName)}`);
  printMsg(`${gray('$')} ${cyan('npm run dev')}`);
  printMsg('');
}
/src/utils/installFeature.ts
/**
 * 实现各个功能的安装方法
 */
import * as shell from 'shelljs';
import { writeFileSync } from 'fs';
import { PackageJSON, printMsg, readJsonFile, writeJsonFile } from './common';
import { red } from 'chalk';

/**
 * 安装 ESLint
 */
export function installESLint(): void {
  shell.exec(
    'npm i eslint @typescript-eslint/parser @typescript-eslint/eslint-plugin -D',
  );
  // 添加 .eslintrc.js
  const eslintrc = `module.exports = {
  "env": {
    "es2021": true,
    "node": true
  },
  "extends": [
    "eslint:recommended",
    "plugin:@typescript-eslint/recommended"
  ],
  "parser": "@typescript-eslint/parser",
  "parserOptions": {
    "ecmaVersion": 12,
    "sourceType": "module"
  },
  "plugins": [
    "@typescript-eslint"
  ],
  "rules": {
  }
};
  `;
  try {
    writeFileSync('./.eslintrc.js', eslintrc, { encoding: 'utf-8' });
  } catch (err) {
    printMsg(`${red('Failed to write .eslintrc.js file content')}`);
    printMsg(`${red('Please add the following content in .eslintrc.js')}`);
    printMsg(`${red(eslintrc)}`);
  }

  // 改写 package.json
  const packageJson = readJsonFile<PackageJSON>('./package.json');
  packageJson.scripts['eslint:comment'] =
    '使用 ESLint 检查并自动修复 src 目录下所有扩展名为 .ts 的文件';
  packageJson.scripts['eslint'] = 'eslint --fix src --ext .ts';
  writeJsonFile<PackageJSON>('./package.json', packageJson);
}

/**
 * 安装 Prettier
 */
export function installPrettier(): void {
  shell.exec('npm i prettier -D');
  // 添加 .prettierrc.js
  const prettierrc = `module.exports = {
  // 一行最多 80 字符
  printWidth: 80,
  // 使用 2 个空格缩进
  tabWidth: 2,
  // 不使用 tab 缩进,而使用空格
  useTabs: false,
  // 行尾需要有分号
  semi: true,
  // 使用单引号代替双引号
  singleQuote: true,
  // 对象的 key 仅在必要时用引号
  quoteProps: 'as-needed',
  // jsx 不使用单引号,而使用双引号
  jsxSingleQuote: false,
  // 末尾使用逗号
  trailingComma: 'all',
  // 大括号内的首尾需要空格 { foo: bar }
  bracketSpacing: true,
  // jsx 标签的反尖括号需要换行
  jsxBracketSameLine: false,
  // 箭头函数,只有一个参数的时候,也需要括号
  arrowParens: 'always',
  // 每个文件格式化的范围是文件的全部内容
  rangeStart: 0,
  rangeEnd: Infinity,
  // 不需要写文件开头的 @prettier
  requirePragma: false,
  // 不需要自动在文件开头插入 @prettier
  insertPragma: false,
  // 使用默认的折行标准
  proseWrap: 'preserve',
  // 根据显示样式决定 html 要不要折行
  htmlWhitespaceSensitivity: 'css',
  // 换行符使用 lf
  endOfLine: 'lf'
};
  `;
  try {
    writeFileSync('./.prettierrc.js', prettierrc, { encoding: 'utf-8' });
  } catch (err) {
    printMsg(`${red('Failed to write .prettierrc.js file content')}`);
    printMsg(`${red('Please add the following content in .prettierrc.js')}`);
    printMsg(`${red(prettierrc)}`);
  }
  // 改写 package.json
  const packageJson = readJsonFile<PackageJSON>('./package.json');
  packageJson.scripts['prettier:comment'] =
    '自动格式化 src 目录下的所有 .ts 文件';
  packageJson.scripts['prettier'] = 'prettier --write "src/**/*.ts"';
  writeJsonFile<PackageJSON>('./package.json', packageJson);
}

/**
 * 安装 CZ,规范 git 提交信息
 */
export function installCZ(): void {
  shell.exec(
    'npx commitizen init cz-conventional-changelog --save --save-exact',
  );
  shell.exec('npm i @commitlint/cli @commitlint/config-conventional -D');
  // 添加 commitlint.config.js
  const commitlint = `module.exports = {
  extends: ['@commitlint/config-conventional']
};
  `;
  try {
    writeFileSync('./.commitlint.config.js', commitlint, { encoding: 'utf-8' });
  } catch (err) {
    printMsg(`${red('Failed to write commitlint.config.js file content')}`);
    printMsg(
      `${red('Please add the following content in commitlint.config.js')}`,
    );
    printMsg(`${red(commitlint)}`);
  }
  // 改写 package.json
  const packageJson = readJsonFile<PackageJSON>('./package.json');
  packageJson.scripts['commit:comment'] = '引导设置规范化的提交信息';
  packageJson.scripts['commit'] = 'cz';
  writeJsonFile<PackageJSON>('./package.json', packageJson);
}

/**
 * 安装 husky 和 lint-staged,以实现 git commit 时自动化校验
 * @param hooks,需要自动执行的钩子
 * @param lintStaged,需要钩子运行的命令
 */
export function installHusky(
  hooks: { [key: string]: string },
  lintStaged: Array<string>,
): void {
  // 初始化 git 仓库
  shell.exec('git init');
  // 在安装 husky 和 lint-staged
  shell.exec('npm i husky lint-staged -D');
  // 设置 package.json
  const packageJson = readJsonFile<PackageJSON>('./package.json');
  packageJson['husky'] = {
    hooks: {
      'pre-commit': 'lint-staged',
      ...hooks,
    },
  };
  packageJson['lint-staged'] = {
    '*.ts': lintStaged.map((item) => `npm run ${item}`),
  };
  writeJsonFile<PackageJSON>('./package.json', packageJson);
}

/**
 * 安装构建工具,目前主要用于小项目,所以使用 typescript 原生的构建功能即可
 */
export function installBuild(feature: Array<string>): void {
  // 设置 package.json
  const packageJson = readJsonFile<PackageJSON>('./package.json');
  packageJson.scripts['build:comment'] = '构建';
  let order = '';
  if (feature.includes('ESLint')) {
    order += 'npm run eslint';
  }
  if (feature.includes('Prettier')) {
    order += ' && npm run prettier';
  }
  order += ' && rm -rf lib && tsc --build';
  packageJson.scripts['build'] = order;
  writeJsonFile<PackageJSON>('./package.json', packageJson);
}
/src/utils/common.ts
/**
 * 放一些通用的工具方法
 */
import { readFileSync, writeFileSync } from 'fs';
import { resolve } from 'path';
import * as clear from 'clear-console';

export interface PackageJSON {
  name: string;
  version: string;
  description: string;
  scripts: {
    [key: string]: string;
  };
}

export interface JSON {
  [key: string]: unknown;
}

/**
 * 读取指定路径下 json 文件
 * @param filename json 文件的路径
 */
export function readJsonFile<T>(filename: string): T {
  return JSON.parse(readFileSync(filename, { encoding: 'utf-8', flag: 'r' }));
}

/**
 * 覆写指定路径下的 json 文件
 * @param filename json 文件的路径
 * @param content  json 内容
 */
export function writeJsonFile<T>(filename: string, content: T): void {
  writeFileSync(filename, JSON.stringify(content, null, 2));
}

/**
 * 获取项目绝对路径
 * @param projectName 项目名
 */
export function getProjectPath(projectName: string): string {
  return resolve(process.cwd(), projectName);
}

/**
 * 打印信息
 * @param msg 信息
 */
export function printMsg(msg: string): void {
  console.log(msg);
}

/**
 * 清空命令行
 */
export function clearConsole(): void {
  clear();
}
构建
执行 npm run build 进行构建,构建时会进行代码质量和风格的检查,有些问题可以自动修复,有些不行,不行的按照提示手动修复一下即可,然后重新构建
构建完成以后找个测试目录,执行 ts-cli -v 或者 ts-cli --version 查看脚手架的版本?
执行 ts-cli create test 可创建一个名为 test 的 typescript 项目
发布到 npm
准备
修改 package.json 中的如下内容
{
  "name": "@liyongning/ts-cli"
  "main": "./lib/index.js",
  "keywords": ["typescript", "cli", "typescript 脚手架", "ts 脚手架", "ts-cli", "脚手架"],
  "author": "李永宁",
  "files": ["package.json", "README.md", "lib"],
  "repository": {
    "type": "git",
    "url": "https://github.com/liyongning/ts-cli.git"
  },
}
- name: 包名,在包名称前加自己的 npm 账户名,采用 npm scope 的方式,包目录的组织方式和普通包不一样,而且可以有效的避免和他人的包名冲突
- main:表示包的入口位置
- keywords:关键字,方面别人搜索到你的包
- files:告诉 npm,publish 时发布哪些包到 npm 仓库
- repository:项目仓库
npm 的账户名、密码就不用说,必不可少
发布
在项目根目录下增加一个发布脚本 publish.sh
#!/bin/bash

echo '开始构建脚手架'

npm run build

echo '脚手架构建完成,现在发布'

npm publish --access public
接下来开始发布,在项目根目录下一次运行如下命令:
npm login
根据提示依次输入相关信息,然后执行下面的命令完成发布
sh publish.sh
登陆 npm 查看
结束
好了,到这里项目就搭建和脚手架的封装就彻底结束了,虽然还有一些可优化和扩展的地方,但是对于开发一个简单的库或者脚手架的项目来说这个脚手架已经完全够用了
如有需要也可以自行去扩展,因为脚手架内置了不错的扩展性,不论是为已有的 create 命令增加新的功能,还是新增一个命令,都很简单,方便你根据自身需要进行二次开发
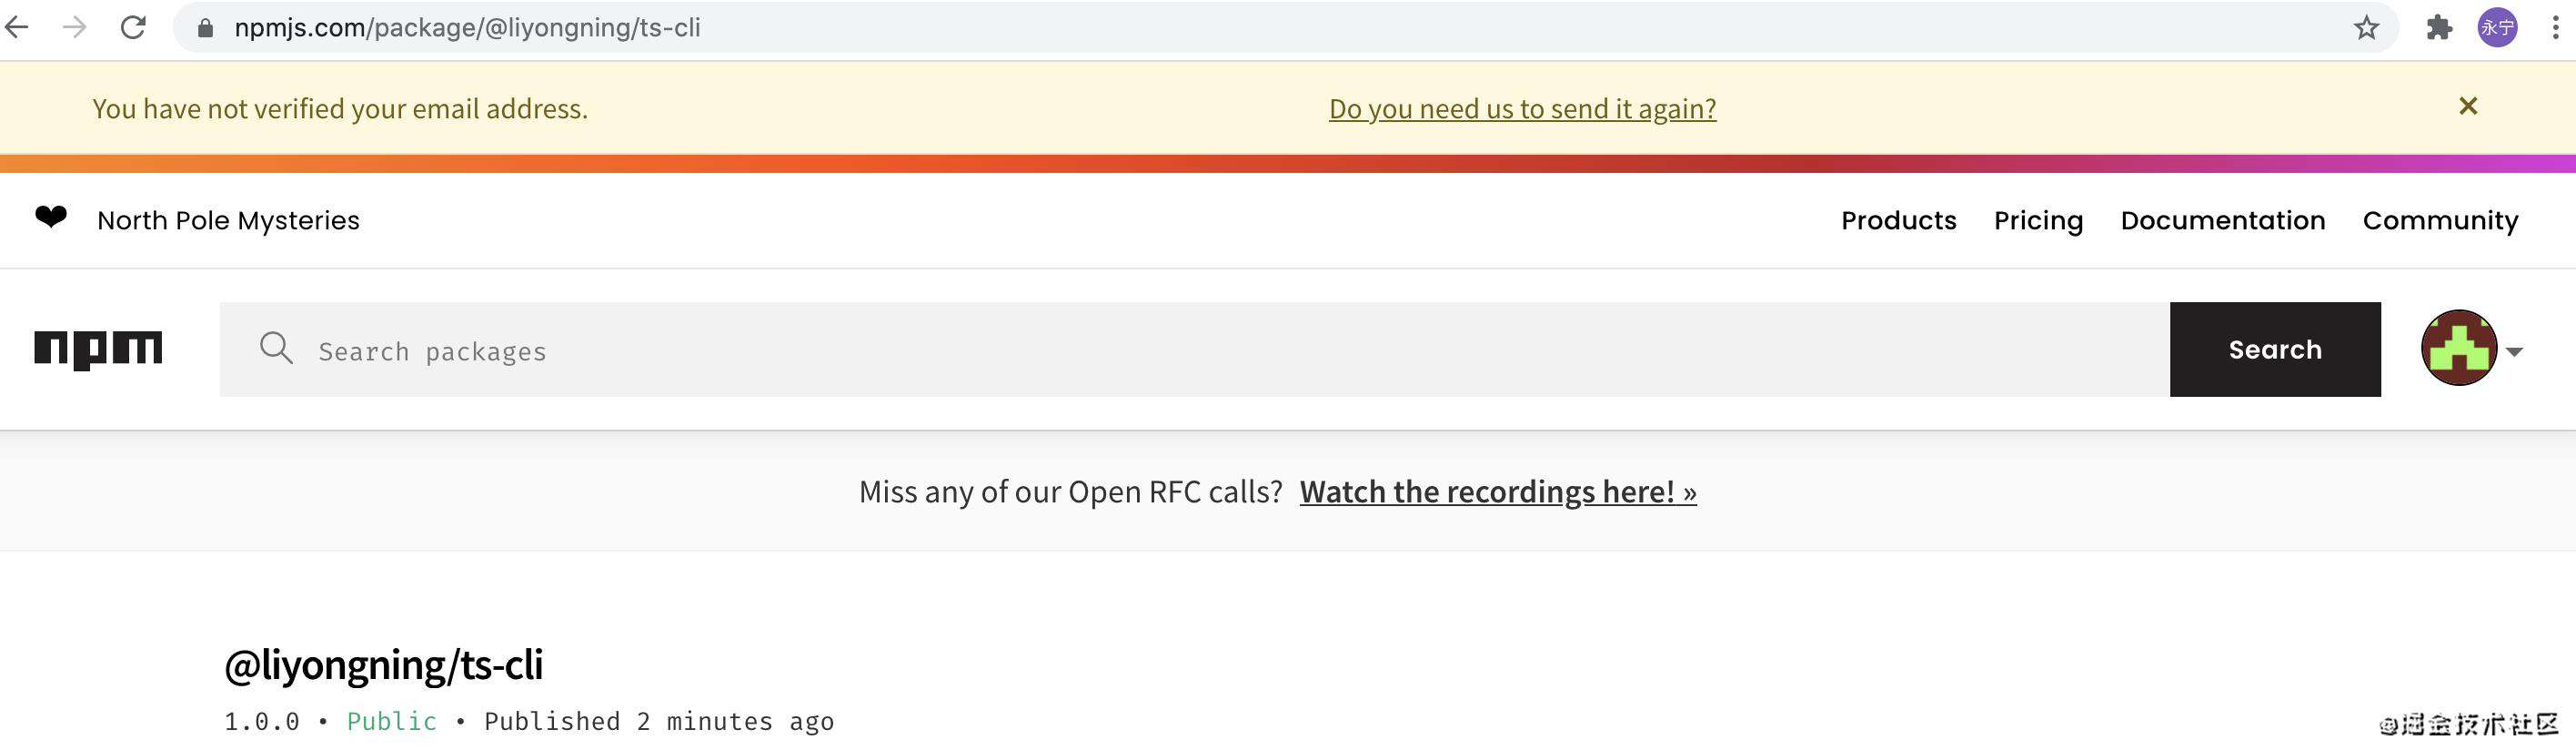
源码已经上传到 github,脚手架也发布到 npm 了
参考
快速搭建一个 TypeScript 项目
从零开始配置 TypeScript 项目
commitizen/cz-cli
Cz工具集使用介绍 - 规范Git提交说明
leoforfree/cz-customizable
Frikki/validate-commit-message
TypeScript 入门教程 - 代码检查
ESLint 在中大型团队的应用实践
TypeScript
standard/eslint-config-standard
常见问题FAQ
- 免费下载或者VIP会员专享资源能否直接商用?
- 本站所有资源版权均属于原作者所有,这里所提供资源均只能用于参考学习用,请勿直接商用。若由于商用引起版权纠纷,一切责任均由使用者承担。更多说明请参考 VIP介绍。
- 提示下载完但解压或打开不了?
- 找不到素材资源介绍文章里的示例图片?
- 模板不会安装或需要功能定制以及二次开发?


发表评论
还没有评论,快来抢沙发吧!