1.简介
Electron 可以让你使用纯 JavaScript 调用丰富的原生 APIs 来创造桌面应用。你可以把它看作是专注于桌面应用而不是 web 服务器的,io.js 的一个变体。
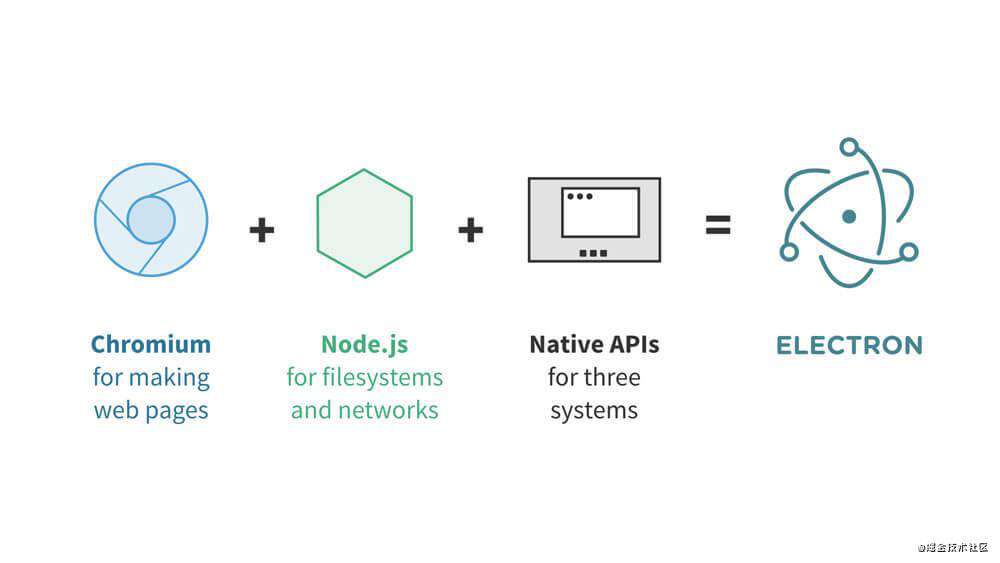
这不意味着 Electron 是绑定了 GUI 库的 JavaScript。相反,Electron 使用 web 页面作为它的 GUI,所以你能把它看作成一个被 JavaScript 控制的,精简版的 Chromium 浏览器,它结合了 Chromium、Node.js 和用于调用操作系统本地功能的 APIs(如打开文件窗口、通知、图标等)。
 Electron 通俗点讲就是用 HTML、CSS、JavaScript 开发跨平台桌面应用程序的一个框架。
2.进程
主进程
在 Electron 里,运行 package.json 里 main 脚本的进程被称为主进程。主进程控制整个应用的生命周期,在主进程中可以创建 Web 形式的 GUI,而且整个 Node API 是内置其中。
渲染进程
由于 Electron 使用 Chromium 来展示页面,所以 Chromium 的多进程结构也被充分利用。每个 Electron 的页面都在运行着自己的进程,这样的进程我们称之为渲染进程。
主进程与渲染进程的联系及区别
主进程使用 BrowserWindow 实例创建网页。每个 BrowserWindow 实例都在自己的渲染进程里运行着一个网页。当一个 BrowserWindow 实例被销毁后,相应的渲染进程也会被终止。
主进程管理所有页面和与之对应的渲染进程。每个渲染进程都是相互独立的,并且只关心他们自己的网页。
在 electron 中,页面不直接调用底层 APIs,而是通过主进程进行调用。所以如果你想在网页里使用 GUI 操作,其对应的渲染进程必须与主进程进行通讯,请求主进程进行相关的 GUI 操作。
在 Electron,我们提供用于在主进程与渲染进程之间通讯的 ipc 模块。并且也有一个远程进程调用风格的通讯模块 remote。
electron的运行流程
大体上,一个 Electron 应用的目录结构如下:
your-app/
├── package.json
├── main.js
└── index.html
流程:
- 1.读取package.json文件中的入口文件,这里就是我们的main.js
- 2.main.js中我们引入 electron 创建了渲染进程
- 3.index.html就是应用页面的布局和样式
- 4.使用IPC在主进程执行任务并获取信息
可能上面的前三点都能明白,但是第四点不知道是什么,没事我们现在只要知道他的运行流程即可内部实现先不做深究。
现在我们只需要知道main.js是主进程,index.html是渲染进程即可。
3.打造你第一个 Electron 应用
设置淘宝源
注:安装 electron 之前,需要安装 Node.js。如果没有安装,推荐使用 nvm 等 Node.js 版本管理工具进行安装
npm 的淘宝源:
npm config set registry https://registry.npm.taobao.org
electron 的国内源:
npm config set ELECTRON_MIRROR http://npm.taobao.org/mirrors/electron/
安装electron
局部安装:npm install --save-dev electron
或全局安装:npm install -g electron
{
  "name"    : "your-app", //应用名称,会显示在窗口顶部
  "version" : "0.1.0",
  "main"    : "main.js" //应用入口点,没有的话会默认尝试加载index.js文件
  "devDependencies": {
    "electron": "^12.0.2"
  }
}
const {
  app, // 控制应用生命周期的模块
  BrowserWindow, // 创建原生浏览器窗口的模块
} = require('electron');

// 保持一个对于 window 对象的全局引用,如果不这样做,
// 当 JavaScript 对象被垃圾回收, window 会被自动地关闭
let mainWindow;

function createWindow() {
  // 创建浏览器窗口。
  mainWindow = new BrowserWindow({width: 800, height: 600
  ,webPreferences: {
            nodeIntegration: true, // 注入node
            enableRemoteModule: true, // 允许remote
            contextIsolation: false, // 解决html的require
        }
  });

  // 加载应用的 index.html。
  // 这里使用的是 file 协议,加载当前目录下的 index.html 文件。
  // 也可以使用 http 协议,如 mainWindow.loadURL('http://nodejh.com')。
  mainWindow.loadURL(`file://${__dirname}/index.html`);

  // 启用开发工具。
  mainWindow.webContents.openDevTools();

  // 当 window 被关闭,这个事件会被触发。
  mainWindow.on('closed', () => {
    // 取消引用 window 对象,如果你的应用支持多窗口的话,
    // 通常会把多个 window 对象存放在一个数组里面,
    // 与此同时,你应该删除相应的元素。
    mainWindow = null;
  });
}

// Electron 会在初始化后并准备
// 创建浏览器窗口时,调用这个函数。
// 部分 API 在 ready 事件触发后才能使用。
app.on('ready', createWindow);

// 当全部窗口关闭时退出。
app.on('window-all-closed', () => {
  // 在 macOS 上,除非用户用 Cmd + Q 确定地退出,
  // 否则绝大部分应用及其菜单栏会保持激活。
  if (process.platform !== 'darwin') {
    app.quit();
  }
});

app.on('activate', () => {
  // 在 macOS 上,当点击 dock 图标并且该应用没有打开的窗口时,
  // 绝大部分应用会重新创建一个窗口。
  if (mainWindow === null) {
    createWindow();
  }
});
BrowserWindow 对象和实例的更多用法可参考 electron 的文档: appBrowserWindow
<!DOCTYPE html>
<html>
  <head>
    <meta charset="utf-8">
    <title>Hello World!</title>
    <style media="screen">
      .version {
        color: red;
      }
    </style>
  </head>
  <body>
    <h1>Hello World!</h1>
    We are using Node.js
    <span class="version">
    and Electron
    </span>
  </body>
</html>
运行
electron .
ipcMain 和 ipcRenderer (主程序和渲染程序间通信)
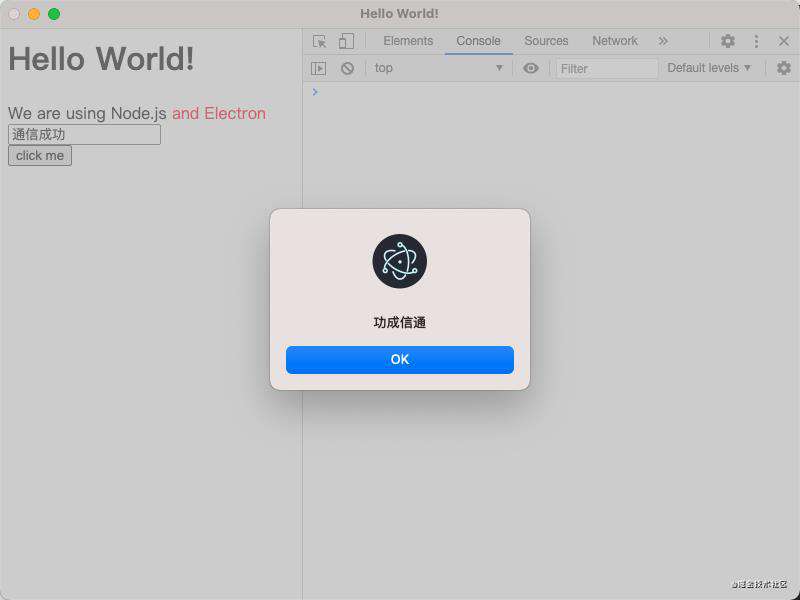
首先在渲染进程中添加一个输入框和一个按钮,并实现点击按钮获取输入框的内容。然后使用 ipcRenderer 发送消息。主进程接收到消息并处理之后,会返回处理结果。所以渲染进程中还需要接收主进程的消息。
修改 index.html,添加下面的代码:
<div>
  <input type="text" id="message" name="" value="">
  <br/>
  <button type="button" id="button" name="button">click me</button>
</div>

<script type="text/javascript">
  // 添加下面的代码。
  // 引入 ipcRenderer 模块。
  var ipcRenderer = require('electron').ipcRenderer;
  document.getElementById('button').onclick = function () {
    var message = document.getElementById('message').value;
    // 使用 ipcRenderer.send 向主进程发送消息。
    ipcRenderer.send('asynchronous-message', message);
  }

  // 监听主进程返回的消息
  ipcRenderer.on('asynchronous-reply', function (event, arg) {
    alert(arg);
  });
</script>
接下来在主进程中接收渲染进程的消息,并进行处理(翻转字符串),然后将处理结果发送给主进程。修改 main.js 如下:
const ipcMain = require('electron').ipcMain;
// 监听渲染进程发送的消息
ipcMain.on('asynchronous-message', (event, arg) => {
  const reply = arg.split('').reverse().join('');
  console.log('reply: ', reply);
  // 主进程通过event.sender发送消息到渲染程序
  event.sender.send('asynchronous-reply', reply);
});
然后重新运行项目。在页面的输入框内输入字符,点击按钮,就能弹出如下的弹出框,说明渲染进程与主进程通信成功:
4.其他应用
node 读写
我们在render目录下创建一个test.txt文件,里面写上 被读取到啦。
接着在render中创建一个js文件夹在js文件夹内创建index.js文件。
在index.html中添加一个按钮,添加一个div标签(用于显示内容),并且引入 index.js。
接着在 index.js中获取按钮元素,读取test.txt文件内容
─package-lock.json
├─package.json
├─src
|  ├─main.js
|  ├─render
|  |   ├─index.html
|  |   ├─text.txt
|  |   ├─js
|  |   | ├─index.js
const { app, BrowserWindow } = require("electron");
let mainWindow = null;

app.on("ready", () => {
    mainWindow = new BrowserWindow({
        width: 800,
        height: 600,
        webPreferences: {
            nodeIntegration: true,
            enableRemoteModule: true,
            contextIsolation: false,
        },
    });
    mainWindow.loadFile(require('path').join(__dirname, './render/index.html')).then(r => console.log(r));
    mainWindow.on("close", () => {
        mainWindow = null;
    });
    mainWindow.webContents.openDevTools();
});
<!DOCTYPE html>
<html lang="en">
<head>
    <meta charset="UTF-8">
    <meta name="viewport" content="width=device-width, initial-scale=1.0">
    <title>Document</title>
</head>
<body>
<button id="btn1">点击获取文件信息</button>
<div id="filesData"></div>
<button id="btn2">添加1111</button>
<script src="./js/index.js"></script>
</body>
</html>
// read
const fs = require('fs');
const path = require('path')

const btnRead = document.querySelector('#btn1');
const filesDaata = document.querySelector('#filesData');
const btnWrite = document.querySelector('#btn2');

window.onload = () => {
    btnRead.onclick = () => {
        fs.readFile(path.join(__dirname, 'text.txt'), (err, data) => {
            console.log(data);
            filesDaata.innerHTML = data.toString()
        })
    }
    btnWrite.onclick = () => {
        fs.writeFile(path.join(__dirname, 'text.txt'), ' 添加1111 ', {
            flag: 'a'
        }, err => {
            console.log(err)
        })
    }
}
remote模块的使用
说Remote之前我们要明确一点,当我们知道了Electron是分主进程、渲染进程后,还需要知道Electron的API方法和模块也是分主进程、渲染进程。
- 回到我们Remote的使用
Remote是渲染进程(web页面)和主进程通信(IPC)提供一种简单的方法。
1.在index.html中写上一个按钮,通过点击事件创建一个新的窗口
2.创建一个 yellow.html用作新建窗口的渲染进程:
<!DOCTYPE html>
<html lang="en">
<head>
    <meta charset="UTF-8">
    <meta name="viewport" content="width=device-width, initial-scale=1.0">
    <title>Document</title>
</head>
<body>
    <button id="btn">
        打开新窗口
    </button>
    <script src="./js/index.js"></script>
</body>
</html>
<!DOCTYPE html>
<html lang="en">
<head>
    <meta charset="UTF-8">
    <meta name="viewport" content="width=device-width, initial-scale=1.0">
    <title>Document</title>
</head>
<body>
    我是新建的窗口
</body>
</html>
// 创建新窗口
// remote
const BrowserWindow = require('electron').remote.BrowserWindow;
const btn = document.querySelector('#btn');
window.onload = ()=>{

    btn.onclick = ()=>{
        newWindow = new BrowserWindow({
            width: 300,
            height:300,
        })
        newWindow.loadFile(require("path").join(__dirname, 'yellow.html'));
        newWindow.on('close',()=>{
            newWindow = null;
        })
    }
}
const { app, BrowserWindow } = require("electron");
let mainWindow = null;

app.on("ready", () => {
  mainWindow = new BrowserWindow({
    width: 800,
    height: 600,
    webPreferences: {
      nodeIntegration: true,
      enableRemoteModule: true,
    },
  });
  mainWindow.loadFile(require('path').join(__dirname, './render/index.html'));
  mainWindow.on("close", () => {
    mainWindow = null;
  });
});
创建菜单以及基本使用
1.新建main文件夹,在文件夹新建menu.js
2.在主线程中银日menu.jsm
注意 Menu属于主线程下的模块,所以只能在主线程下使用
const { Menu, BrowserWindow } = require("electron");

const template = [
    {
        label: "第一项",
        submenu: [
            {
                label: "1.1",
                accelerator:`ctrl+n`,//快捷键
                click: () => {
                    let win = new BrowserWindow({
                        width: 300,
                        height: 300,
                    });
                    win.loadFile(require('path').join(__dirname, '../render/yellow.html')).then(r => console.log(r));
                    win.on('close',()=>{
                        win = null;
                    })
                },
            },
            { label: "1.2" },
        ],
    },
    {
        label: "第二项",
        submenu: [{ label: "2.1" }, { label: "2.2" }],
    },
];

const menu = Menu.buildFromTemplate(template);
Menu.setApplicationMenu(menu);
const { app, BrowserWindow } = require("electron");
let mainWindow = null;
require('./main/menu')

app.on("ready", () => {
    mainWindow = new BrowserWindow({
        width: 800,
        height: 600,
        webPreferences: {
            nodeIntegration: true,
            enableRemoteModule: true,
            contextIsolation: false,
        },
    });
    mainWindow.loadFile(require('path').join(__dirname, './render/index.html')).then(r => console.log(r));
    mainWindow.on("close", () => {
        mainWindow = null;
    });
    mainWindow.webContents.openDevTools()
});
右键菜单
右键是在渲染进程进行点击的,因此写在渲染进程中,且要用到remote模块
<!DOCTYPE html>
<html lang="en">
<head>
    <meta charset="UTF-8">
    <meta name="viewport" content="width=device-width, initial-scale=1.0">
    <title>Document</title>
</head>
<body>
    <button id="btn">
        打开新窗口
    </button>
    <script src="./js/index2.js"></script>
</body>
</html>
// 复制粘贴
const { remote } = require('electron');

const rightTemplate = [
    {label:'粘贴'},
    {label:'复制'},
]
const menu = remote.Menu.buildFromTemplate(rightTemplate);

window.addEventListener('contextmenu',(e)=>{
    // 阻止当前窗口默认事件
    e.preventDefault();
    //把菜单模板添加到右键菜单
    menu.popup({window:remote.getCurrentWindow()})
})
使用shell 在浏览器打开
<!DOCTYPE html>
<html lang="en">
<head>
    <meta charset="UTF-8">
    <meta name="viewport" content="width=device-width, initial-scale=1.0">
    <title>原窗口</title>
</head>
<body>
<button id="btn">
    打开新窗口
</button>
<a id="aHref" href="https://www.baidu.com">123(shell)</a>
<script src="./js/index3.js"></script>
</body>
</html>
// 通过链接打开浏览器
const { shell } = require('electron');

const aHref = document.getElementById('aHref');

aHref.onclick = (e)=>{
    // 阻止默认事件 因为默认是在应用中打开;
    e.preventDefault();
    // 获取链接
    const href = aHref.getAttribute('href');
    // 浏览器中打开
    shell.openExternal(href).then(r => console.log(r))
}
嵌入网页和打开子窗口
BrowserView嵌入网页到应用
const {app, BrowserWindow, BrowserView} = require("electron");
let mainWindow = null;
require('./main/menu')

app.on("ready", () => {
    mainWindow = new BrowserWindow({
        width: 800,
        height: 600,
        webPreferences: {
            nodeIntegration: true,
            enableRemoteModule: true,
            contextIsolation: false,
        },
    });
    mainWindow.loadFile(require('path').join(__dirname, './render/index.html')).then(r => console.log(r));
    mainWindow.on("close", () => {
        mainWindow = null;
    });
    mainWindow.webContents.openDevTools()

    const viewWindow = new BrowserView(); // 定义实例
    mainWindow.setBrowserView(viewWindow); // 主窗口设置viewWindw可用
    viewWindow.setBounds({x: 0, y: 150, width: 600, height: 600});
    viewWindow.webContents.loadURL('https://www.baidu.com')
});
window.open子窗口和父窗口之间的通信
window.opener.postMessage(message,targetOrigin),是将消息发送给指定来源的父窗口,如果未指定来源则发送给*,即所有窗口。
1.创建了 child.html index4、5.js
<!DOCTYPE html>
<html lang="en">
<head>
    <meta charset="UTF-8">
    <meta name="viewport" content="width=device-width, initial-scale=1.0">
    <title>原窗口</title>
</head>
<body>
<button id="btn2">
    打开新窗口2
</button>
<script src="./js/index4.js"></script>
</body>
</html>
<!DOCTYPE html>
<html lang="en">
<head>
    <meta charset="UTF-8">
    <meta name="viewport" content="width=device-width, initial-scale=1.0">
    <title>Document</title>
</head>
<body>
    <div>我是子窗口</div>
    <button id="btn3">传递数据</button>
    <script src="./js/index5.js"></script>
</body>
</html>
// 创建子窗口
const btn2 = document.getElementById('btn2');
btn2.onclick = ()=>{
    window.open('child.html')
}

// 子窗口与父窗口通信
const message = document.getElementById('message')
window.addEventListener('message',msg => {
    console.log(msg)
    message.innerHTML = msg.data
})
// 子窗口发来信息
const btn3 = document.getElementById('btn3');
btn3.onclick = ()=>{
    window.opener.postMessage('子窗口发来信息')
}
选择文件对话框
我们看看打开文件对话框的API是什么dialog.showOpenDialog(), 这个方法可以接收两个参数,一个是基本的属性设置,一个是回调函数,如果异步可以使用then基本设置有:
- title:对话框名字
- defaultPath: 默认打开路径
- buttonLabel: 确认按钮的自定义标签、若为空则使用默认标签
- filters: 文件选择器,定义后可以对文件类型进行筛选
- properties: 打开文件的属性,如:能否多选,选择文件的类型等
<!DOCTYPE html>
<html lang="en">
<head>
    <meta charset="UTF-8">
    <meta name="viewport" content="width=device-width, initial-scale=1.0">
    <title>Document</title>
</head>
<body
    <!-- 打开文件 -->
    <button id="btn4">打开文件</button>
    <script src="./js/index6.js"></script>
</body>
</html>
// 选择文件对话框
var {dialog} = require('electron').remote;
const btn = document.getElementById('btn')

btn.onclick = () =>{
    dialog.showOpenDialog({
        title:'请选择你需要的文件',   // 对话框标题
        defaultPath: '默认路径',     // 默认打开路径
        filters:[                   // 文件选择过滤
            {
                name:'jpg',
                extensions:['jpg']
            }
        ],
        buttonLabel:'是否确认',
        properties: ['openFile', 'multiSelections']   // 对话框使用的功能,允许选择文件、允许多选
    }).then(res => {
        console.log(res)
    }).catch(err=>{
        console.log(err)
    })
}
保存对话框的操作
<!DOCTYPE html>
<html lang="en">
<head>
    <meta charset="UTF-8">
    <meta name="viewport" content="width=device-width, initial-scale=1.0">
    <title>Document</title>
</head>
<body>
    <!-- 保存对话框 -->
    <button id="btn5">保存对话框</button>
    <script src="./js/index7.js"></script>
</body>
</html>
// 选择文件
const btn5 = document.getElementById('btn5');
const fs = require('fs');
var {dialog} = require('electron').remote;
btn.onclick = ()=>{
    dialog.showSaveDialog({
        title: '选择文件'
    }).then(res => {
        console.log(res);
        fs.writeFileSync(res.filePath, '你好啊');
    }).catch(err =>{
        console.log(err)
    })
}
消息对话框(制作一个确认对话框)
<!DOCTYPE html>
<html lang="en">
<head>
    <meta charset="UTF-8">
    <meta name="viewport" content="width=device-width, initial-scale=1.0">
    <title>Document</title>
</head>
<body>
    <!-- 消息对话框 -->
    <button id="btn6">打开消息对话框</button>
    <script src="./js/index8.js"></script>
</body>
</html>
// 消息对话框
const btn = document.getElementById("btn");
const { dialog } = require('electron').remote

btn.onclick = () => {
    dialog.showMessageBox({
    type: "warning",
    title: "警告",
    message: "这是一个警告对话框",
    buttons: ["知道了", "无所谓"],
  }).then(res => {
      console.log(res)
  });
};
断网提醒
通过window.addEventListener进行监听online offline判断网络是否正常
// 断网提醒
window.addEventListener('online',()=>{
    alert('网络正常,放心使用')
})

window.addEventListener('offline',()=>{
    alert('网络异常,请检查网络是否连接')
})
注意:运行electon后不会有反应,先进行断网,在对网络进行连接即可看到效果
底部通知消息提醒
<!DOCTYPE html>
<html lang="en">
<head>
    <meta charset="UTF-8">
    <meta name="viewport" content="width=device-width, initial-scale=1.0">
    <title>Document</title>
</head>
<body>
    <!-- 底部通知消息提醒 -->
    <button id="btn">通知消息</button>
    <script src="./js/index10.js"></script>
</body>
</html>
// 底部消息提醒
const btn = document.getElementById('btn')

const option = {
    title: '新消息提醒',
    body: '你有新的消息提醒'
}
btn.onclick = ()=>{
    new window.Notification(option.title,option)
}
注册全局快捷键
全局快捷加的注册是使用globalShortcut,globalShortcut是主线程的模块,因此写在main.js中
const {app, BrowserWindow, BrowserView, globalShortcut} = require("electron");
let mainWindow = null;
require('./main/menu')

app.on("ready", () => {
    mainWindow = new BrowserWindow({
        width: 800,
        height: 600,
        webPreferences: {
            nodeIntegration: true,
            enableRemoteModule: true,
            contextIsolation: false,
        },
    });
    mainWindow.loadFile(require('path').join(__dirname, './render/index.html')).then(r => console.log(r));
    mainWindow.webContents.openDevTools()
    // 注册全局快捷键
    globalShortcut.register('ctrl+y',()=>{
        // let isRegister = globalShortcut.isRegistered(`ctrl+y`)?'true':'false'
        // console.log(isRegister)
        mainWindow.loadURL('https://www.baidu.com').then(r => console.log(r+'快捷键1'))
    })
    globalShortcut.register('ctrl+z',()=>{
        mainWindow.loadFile(require('path').join(__dirname, './render/index.html')).then(r => console.log(r+'快捷键2'))
    })
    // 通过BrowserView嵌入窗口
    const viewWindow = new BrowserView(); // 定义实例
    mainWindow.setBrowserView(viewWindow); // 主窗口设置viewWindow可用
    viewWindow.setBounds({x: 0, y: 150, width: 300, height: 800});
    viewWindow.webContents.loadURL('https://www.baidu.com').then(r => console.log(r))
    mainWindow.on("close", () => {
        mainWindow = null;
    });
});
注销快捷键
因为是全局快捷键所以页面关闭记得注销快捷键
下面是注册快捷键、 判断快捷键是否注册成功、注销快捷键:
app.on('will-quie',()=>{
  globalShortcut.unregister('ctrl+y');
  globalShortcut.unregister('ctrl+z');
  globalShortcut.unregisterAll()

})
剪切板事件使用
通过 clipboard模块实现
<!DOCTYPE html>
<html lang="en">
<head>
    <meta charset="UTF-8">
    <meta name="viewport" content="width=device-width, initial-scale=1.0">
    <title>Document</title>
</head>
<body>
    <div>
        复制信息: <span id="message2">被复制的信息</span><button id="btn7">点击复制</button>
    </div>
    <script src="./js/index11.js"></script>
</body>
</html>
5.打包桌面应用
Electron 应用开发完成之后,还需要将其打包成对应平台的客户端。常用的打包工具有 electron-packager 和 asar。
这里以 electron-packager 为例。首先安装 electron-packager:
先全局安装npm install electron-packager -g
再在项目中安装npm install electron-builder --save-dev
安装完成以后在package.json文件中的scrit内添加一个属性"build": "electron-packager . electron_demo3 "
执行 npm run build 即可进行打包
常见问题FAQ
- 免费下载或者VIP会员专享资源能否直接商用?
- 本站所有资源版权均属于原作者所有,这里所提供资源均只能用于参考学习用,请勿直接商用。若由于商用引起版权纠纷,一切责任均由使用者承担。更多说明请参考 VIP介绍。
- 提示下载完但解压或打开不了?
- 找不到素材资源介绍文章里的示例图片?
- 模板不会安装或需要功能定制以及二次开发?


发表评论
还没有评论,快来抢沙发吧!