开始
搭建vite项目
# NPM
npm init @vitejs/app

# YARN
yarn create @vitejs/app
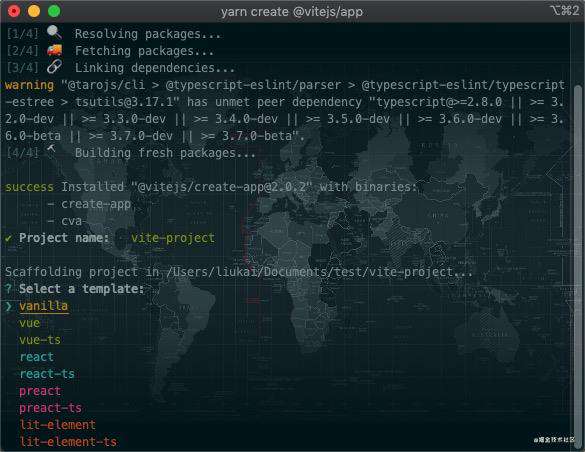 然后按照操作,选择你想要的模板执行就行。
我们可以通过附加的命令行选项直接指定项目名称和你想要使用的模板,可以直接生成项目
# npm 6.x
npm init @vitejs/app my-vue-app --template vue

# npm 7+, 需要额外的双横线:
npm init @vitejs/app my-vue-app -- --template vue

# yarn
yarn create @vitejs/app my-vue-app --template vue
配置项目
首先看下项目结构:
# my-vue-app

├── index.html
├── package.json
├── public
│   └── favicon.ico
├── src
│   ├── App.vue
│   ├── assets
│   │   └── logo.png
│   ├── components
│   │   └── HelloWorld.vue
│   └── main.js
├── tree.md
└── vite.config.js
打开项目,我们看到结构还是cli4结构类似的,就是简单了好多了。
vite2现在还没有开箱即用的模板,供我们使用,不过文档还是比较全面的。vite中文文档,
下面我们配置下:
1. vue-router
 # vue-router4.0正式版已经发布,我们使用4.0版本
 # 如果你想下载最新版本 yarn add vue-router@4. 会让你选择4.0所有版本,你选择想要的版本即可

 # NPM
 npm install vue-router@4.0.4

 # YARN
 yarn add vue-router@4.0.4
1. 在src创建router文件夹,新建index.js文件
   ```javascript
    import { createRouter, createWebHashHistory } from 'vue-router'
    import Home from '../views/Home.vue'

    const routes = [
      {
        path: '/',
        name: 'Home',
        component: Home
      },
      {
        path: '/about',
        name: 'About',
        component: ()=>import('@/views/About.vue') // @/views设置的别名
      },
    ]

    const router = createRouter({
      history: createWebHashHistory(import.meta.env.BASE_URL),
      routes
    })

    export default router
   ```
2. 在main.js引入router
   ```js
    import { createApp } from 'vue'
    import router from './router'
    import App from './App.vue'

    createApp(App).use(router).mount('#app')
   ```
3. 修改App.vue文件
   ```vue
     <template>
       <router-view />
     </template>

     <script setup>
     </script>

     <style></style>
   ```
-
src添加Home.vue
 <template>
   <router-link to="/">Home</router-link>
   <router-link to="/about">About</router-link>
 </template>

 <script>
 export default {

 }
 </script>

 <style>
 </style>
5. src添加About.vue
   ```vue
    # About.vue
    <template>
      <div>About</div>
    </template>

    <script>
    export default {

    }
    </script>

    <style>
    </style>
   ```
  在链接中输入http://localhost:8000/#/about 内容显示about,那么恭喜你已经配置成功了。
6. 模块化
  > **如果你想把项目模块化,可以按照下面的结构和方式配置(vuex类似),如果不是,请跳过此步骤**

   ```
    ├── index.html
    ├── package.json
    ├── public
    │   └── favicon.ico
    ├── src
    │   ├── App.vue
    │   ├── assets
    │   │   └── logo.png
    │   ├── components
    │   │   └── HelloWorld.vue
    │   ├── main.js
    │   ├── router
    │   │   └── index.js
    │   └── views
    │       ├── Home.vue
    │       ├── about
    │       │   ├── index.vue
    │       │   └── router
    │       │       └── index.js
    │       └── indo
    │           ├── index.vue
    │           └── router
    │               └── index.js
    ├── tree.md
    ├── vite.config.js
    └── yarn.lock
   ```
   每一个模块都包含一个router文件夹,我们可以通过动态引入的方式引入模块中的路由,[了解详情](https://cn.vitejs.dev/guide/features.html#glob-%E5%AF%BC%E5%85%A5) 不用一个一个去引入,在src/router中设置

   ```
  // src/router/index.js
  import { createRouter, createWebHashHistory } from 'vue-router'
  import Home from '../views/Home.vue'

  const routesModules = import.meta.globEager('../views/**/*.js')
  const modules = []
  Object.keys(routesModules).forEach(key => {
    modules.push(...routesModules[key].default)
  })
  console.log('modules: ', modules);

  const routes = [
    {
      path: '/',
      name: 'Home',
      component: Home
    },
    ...modules
  ]

  const router = createRouter({
    history: createWebHashHistory(import.meta.env.BASE_URL),
    routes
  })

  export default router
  ```
  在链接中输入http://localhost:8000/#/info 内容显示Info,那么恭喜你已经配置成功了。
2. 安装scss
# NPM
npm install scss -D

# YARN
yarn add scss -D
一般我们都是设置公用的scss文件,统一设置公用的样式,方便统一修改统一的样式
1. 我们可以在src新建styles文件夹,新建common.scss文件
  ```css
  $themeColor: #f4364c;
  ```
2. 在vite.config.js中设置公用的引入common.scss就可以直接在vue文件中使用公用的样式了
  ```js
  import { defineConfig } from 'vite'
  const {resolve} = require('path')
  import vue from '@vitejs/plugin-vue'

  // https://vitejs.dev/config/
  export default defineConfig({
    plugins: [vue()],
    server: {
      port: 8000 // 配置启用的端口号
    },
    resolve:{
      // 设置别名
      alias:{
        '@/views': resolve(__dirname, 'src/views/'),
        '@/styles': resolve(__dirname, 'src/styles/')
      }
    },
    css: {
      preprocessorOptions: {
        // 引入公用的样式
        scss: {
          additionalData: `@import "@/styles/common.scss";`
        }
      }
    }
  })

  ```

 测试:
 ```
 # About.vue
 <template>
  <div class="about">About</div>
 </template>

 <script>
 export default {

 }
 </script>

 <style lang="scss" scoped>
 .about {
   color: themeColor;
  }
 </style>

 ```
3. vuex
 # vuex正式版已经发布,我们使用4.0版本,
 # 如果你想下载最新版本 yarn add vuex@4. 会让你选择4.0所有版本,你选择想要的版本即可

 # NPM
 npm install vuex@4.0.0

 # YARN
 yarn add vuex@4.0.0
1. src下添加store文件夹,新建index.js
 ```js
  import {createStore} from 'vuex'

  const store = createStore({
    state: {
      count: 0
    },
    mutations: {
      increment (state) {
        state.count++
      }
    },
    getters: { },
    actions: { }
  })

  export default store
 ```
2. 在main.js引入vuex
 ```js
  import { createApp } from 'vue'
  import router from './router'
  import store from './store'
  import App from './App.vue'

  createApp(App).use(router).use(store).mount('#app')
 ```
3. 持久化,需要下载vuex-persistedstate
```
 # NPM
 npm installvuex-persistedstate@4.0.0

 # YARN
 yarn add vuex-persistedstate@4.0.0
```
4. store/index.js 中配置
```
  import { createStore } from 'vuex'
  import createPersistedState from 'vuex-persistedstate'

  const store = createStore({
    ...

    plugins: [
      createPersistedState({
        storage: window.sessionStorage // 修改存储的状态
      })
    ] // 状态持久化
  })

  export default store
```
5. 如果想模块化,可以参考 详情
其他功能正在开发,敬请期待!!!
常见问题FAQ
- 免费下载或者VIP会员专享资源能否直接商用?
- 本站所有资源版权均属于原作者所有,这里所提供资源均只能用于参考学习用,请勿直接商用。若由于商用引起版权纠纷,一切责任均由使用者承担。更多说明请参考 VIP介绍。
- 提示下载完但解压或打开不了?
- 找不到素材资源介绍文章里的示例图片?
- 模板不会安装或需要功能定制以及二次开发?


发表评论
还没有评论,快来抢沙发吧!