看看效果:
可以在 TIY 编辑器中调试(这里的 TIY 是我开发的一个在线代码编辑器):
TIY Cursor
也可以在我的博客主页预览.
本文同步发布于我的博客,或许更好的阅读体验:
如何打造一款乖巧的鼠标指针特效 | Xecades 的博客
0x01 设置实体指针
为了让页面所有的元素都有这个效果,直接对 * 设置就好了.
CSS 代码如下:
* {
    cursor: url("data:image/svg+xml,<svg xmlns='http://www.w3.org/2000/svg' viewBox='0 0 8 8' width='8px' height='8px'><circle cx='4' cy='4' r='4' opacity='.5'/></svg>") 4 4, auto
}
这里的 url 是个内置的 svg 图片,长宽 8 像素,颜色为 #000 再加上 0.5 的透明度.
0x02 生成跟随的圆圈
我们用一个类来封装这个指针:
class Cursor {...}
在这个类里面创建好这个圆圈:
if (!this.cursor) {
    this.cursor = document.createElement("div");
    this.cursor.id = "cursor";
    this.cursor.classList.add("hidden"); // 这个 hidden 类会在后面说到
    document.body.append(this.cursor);
}
然后,我们要确定用户会有哪些鼠标操作:
- 移上元素:用
document.onmouseover实现 - 移出元素:用
document.onmouseout实现 - 移动鼠标:用
document.onmousemove实现 - 移入页面:用
document.onmouseenter实现 - 移出页面:用
document.onmouseleave实现 - 按下左键:用
document.onmousedown实现 - 松开左键:用
document.onmouseup实现
给圆圈设置好一些样式,以供使用:
#cursor {
position: fixed;
width: 16px;
height: 16px;
background: #000;
border-radius: 8px;
opacity: 0.25;
z-index: 10086;
pointer-events: none;
transition: 0.2s ease-in-out;
transition-property: background, opacity, transform;
}
#cursor.hidden { /* 隐藏 */
opacity: 0;
}
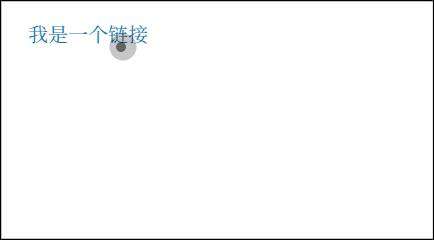
#cursor.hover { /* 指针移上特定元素(按钮、链接等) */
opacity: 0.1;
transform: scale(2.5);
}
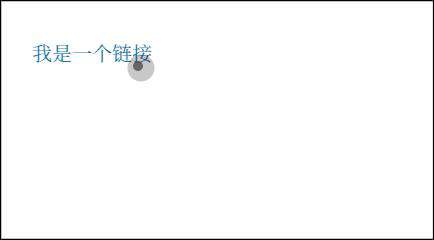
#cursor.active { /* 鼠标左键按下 */
opacity: 0.5;
transform: scale(0.5);
}
然后,我按照难易程度依次说一下各鼠标操作的实现方法
按下 / 松开左键
两行代码搞定.
document.onmousedown  = e => this.cursor.classList.add("active");
document.onmouseup    = e => this.cursor.classList.remove("active");
移入 / 移出页面
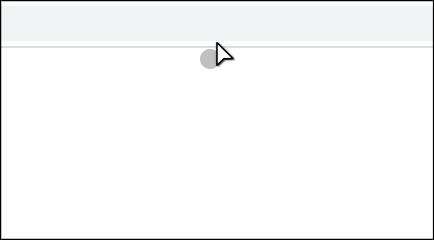
(啊……上面灰色的是浏览器搜索框,鼠标移出去,圆圈自动消失)
document.onmouseenter = e => this.cursor.classList.remove("hidden");
document.onmouseleave = e => this.cursor.classList.add("hidden");
移上 / 移出元素
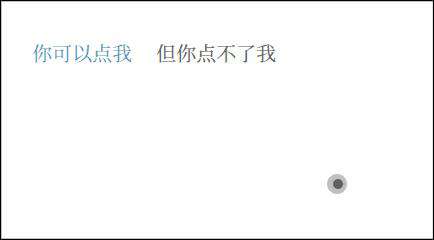
首先明确一个概念:“元素” 是什么?
在这里 “元素” 指 “可以点击的 DOM 对象”.
那到底怎么教会计算机区分 “可以点击的” 和 “不可以点击的” 呢?
思考这个问题的时候,我第一个想到的是判断元素标签是不是 <a>、<button> 等,但这样做有个很大的弊端,请考虑下面这个元素:
<span onclick="window.location='/'" style="cursor:pointer">Click ME!</span>
这种设计的 “按钮” 在前端十分常见,但刚刚的方法不能起作用,这样我们不得不换一个思路:
一般而言,网页设计者会把能点击的元素加上 cursor: pointer 的样式,来提醒用户 “这是个按钮”,所以,只需要检测这个元素是否有 cursor: pointer 属性即可.
显然,我们不能用 el.style["cursor"] == pointer 来判断,因为有些元素是 ”天生自带“ pointer 样式的,网页设计者不会再加额外的 CSS 属性(例如 <a> 标签).
所以,我们要使出必杀技,window.getComputedStyle() 函数(MDN 文档). 这个函数返回元素最终渲染的样式.
考虑到低版本浏览器的兼容性,和一些奇奇怪怪的报错,我写了这样一个函数:
const getStyle = (el, attr) => {
    try {
        return window.getComputedStyle
            ? window.getComputedStyle(el)[attr]
            : el.currentStyle[attr];
    } catch (e) {}
    return "";
};
这样,getStyle(el, "cursor") == "pointer" 就可以判断是否该有 hover 效果了.
只不过,这样又引发了另一个问题:我既然已经设置好了全局 cursor,再 getStyle() 得到的不就是刚刚设置的 cursor 属性了吗?
的确,所以我们得换一个方式:页面加载完成后,在更改全局 cursor 前,先枚举每一个 DOM 元素,看看是否满足 cursor: pointer,如果满足,加入列表当中. 然后再通过 js 插入 CSS 代码的方式设置全局 cursor.
这样做有个意外的收获,考虑这样一个结构:
<a href="/">
    <div>I'm a block</div>
    <div>I'm also a block</div>
</a>
鼠标移上第一个 <div> 的时候,浏览器会认为移上的元素标签是 <div>,而不是 <a>,如果用 <a> 标签的形式判断,这样无法引发 hover 特效.
采用 getStyle() 的方式判断,<a> 标签里面的所有元素都会有 cursor: pointer 属性,所以不会出现问题.
预处理部分的代码:
var el = document.getElementsByTagName('*');
for (let i = 0; i < el.length; i++)
    if (getStyle(el[i], "cursor") == "pointer")
        this.pt.push(el[i].outerHTML); // pt: pointer(s)

this.scr = document.createElement("style");
document.body.appendChild(this.scr);

this.scr.innerHTML = `* {cursor: url("data:image/svg+xml,<svg xmlns='http://www.w3.org/2000/svg' viewBox='0 0 8 8' width='8px' height='8px'><circle cx='4' cy='4' r='4' opacity='.5'/></svg>") 4 4, auto !important}`;
最终移上 / 移出特效的代码:
document.onmouseover  = e => this.pt.includes(e.target.outerHTML) && this.cursor.classList.add("hover");
document.onmouseout   = e => this.pt.includes(e.target.outerHTML) && this.cursor.classList.remove("hover");
// 这里采用位运算 ”&&“ 压缩代码(同时提高速度)
移动鼠标
浅色圆圈总是 ”跟不上“ 深色指针,这里我们简单地使用插值来实现,记录指针 ”上一步“ 的位置 this.pos.prev 和 ”这一步“ 的位置 this.pos.curr,在其间使用线性插值,实现一种 ”滞后“ 的效果.
线性插值函数:
Math.lerp = (a, b, n) => (1 - n) * a + n * b;
(为了好看直接给它写道 Math 库里去了,好孩子别学)
它返回从数字 a 到数字 b 之间比例为 n 的那个值(是不是异常简单).
然后我们还要注意一个点,cursor 默认位置是页面左上角,执行第一次鼠标移动时,当然不希望圆圈从左上角移动到鼠标的位置,所以要特殊判断一下:
document.onmousemove = e => {
    if (this.pos.curr == null)
        this.move(e.clientX - 8, e.clientY - 8); // move 函数在后面
    this.pos.curr = {x: e.clientX - 8, y: e.clientY - 8};
    this.cursor.classList.remove("hidden");
};
其中的 move() 函数(就是拿来移动 cursor 元素的):
move(left, top) {
    this.cursor.style["left"] = `${left}px`;
    this.cursor.style["top"] = `${top}px`;
}
整个动画的核心是 render() 函数:
render() {
    if (this.pos.prev) {
        this.pos.prev.x = Math.lerp(this.pos.prev.x, this.pos.curr.x, 0.15);
        this.pos.prev.y = Math.lerp(this.pos.prev.y, this.pos.curr.y, 0.15);
        this.move(this.pos.prev.x, this.pos.prev.y);
    } else {
        this.pos.prev = this.pos.curr;
    }
    requestAnimationFrame(() => this.render());
}
整合一下
用 init() 函数初始化鼠标事件:
init() {
    document.onmouseover  = e => this.pt.includes(e.target.outerHTML) && this.cursor.classList.add("hover");
    document.onmouseout   = e => this.pt.includes(e.target.outerHTML) && this.cursor.classList.remove("hover");
    document.onmousemove  = e => {(this.pos.curr == null) && this.move(e.clientX - 8, e.clientY - 8); this.pos.curr = {x: e.clientX - 8, y: e.clientY - 8}; this.cursor.classList.remove("hidden");};
    document.onmouseenter = e => this.cursor.classList.remove("hidden");
    document.onmouseleave = e => this.cursor.classList.add("hidden");
    document.onmousedown  = e => this.cursor.classList.add("active");
    document.onmouseup    = e => this.cursor.classList.remove("active");
}
一直压行一直爽,后期维护火葬场(划掉)
0x03 加一些功能
有些时候,页面的 DOM 被重新渲染了一遍(例如说 vue router 的页面跳转)或加了些元素,这样的 hover 效果就不起作用了,这时候,我们需要使用 refresh() 函数来重新获取要有 hover 效果的列表:
refresh() {
    this.scr.remove();
    this.cursor.classList.remove("hover");
    this.cursor.classList.remove("active");
    this.pos = {curr: null, prev: null};
    this.pt = [];

    this.create(); // 拿来生成需要的对象(例如添加 CSS)
    this.init();   // 初始化鼠标事件
    this.render(); // 产生动画
}
0x04 最终代码
Javascript 部分:
var CURSOR;

Math.lerp = (a, b, n) => (1 - n) * a + n * b;

const getStyle = (el, attr) => {
    try {
        return window.getComputedStyle
            ? window.getComputedStyle(el)[attr]
            : el.currentStyle[attr];
    } catch (e) {}
    return "";
};

class Cursor {
    constructor() {
        this.pos = {curr: null, prev: null};
        this.pt = [];
        this.create();
        this.init();
        this.render();
    }

    move(left, top) {
        this.cursor.style["left"] = `${left}px`;
        this.cursor.style["top"] = `${top}px`;
    }

    create() {
        if (!this.cursor) {
            this.cursor = document.createElement("div");
            this.cursor.id = "cursor";
            this.cursor.classList.add("hidden");
            document.body.append(this.cursor);
        }

        var el = document.getElementsByTagName('*');
        for (let i = 0; i < el.length; i++)
            if (getStyle(el[i], "cursor") == "pointer")
                this.pt.push(el[i].outerHTML);

        document.body.appendChild((this.scr = document.createElement("style")));
        this.scr.innerHTML = `* {cursor: url("data:image/svg+xml,<svg xmlns='http://www.w3.org/2000/svg' viewBox='0 0 8 8' width='8px' height='8px'><circle cx='4' cy='4' r='4' opacity='.5'/></svg>") 4 4, auto}`;
    }

    refresh() {
        this.scr.remove();
        this.cursor.classList.remove("hover");
        this.cursor.classList.remove("active");
        this.pos = {curr: null, prev: null};
        this.pt = [];

        this.create();
        this.init();
        this.render();
    }

    init() {
        document.onmouseover  = e => this.pt.includes(e.target.outerHTML) && this.cursor.classList.add("hover");
        document.onmouseout   = e => this.pt.includes(e.target.outerHTML) && this.cursor.classList.remove("hover");
        document.onmousemove  = e => {(this.pos.curr == null) && this.move(e.clientX - 8, e.clientY - 8); this.pos.curr = {x: e.clientX - 8, y: e.clientY - 8}; this.cursor.classList.remove("hidden");};
        document.onmouseenter = e => this.cursor.classList.remove("hidden");
        document.onmouseleave = e => this.cursor.classList.add("hidden");
        document.onmousedown  = e => this.cursor.classList.add("active");
        document.onmouseup    = e => this.cursor.classList.remove("active");
    }

    render() {
        if (this.pos.prev) {
            this.pos.prev.x = Math.lerp(this.pos.prev.x, this.pos.curr.x, 0.15);
            this.pos.prev.y = Math.lerp(this.pos.prev.y, this.pos.curr.y, 0.15);
            this.move(this.pos.prev.x, this.pos.prev.y);
        } else {
            this.pos.prev = this.pos.curr;
        }
        requestAnimationFrame(() => this.render());
    }
}

(() => {
    CURSOR = new Cursor();
    // 需要重新获取列表时,使用 CURSOR.refresh()
})();
CSS 部分:
#cursor {
    position: fixed;
    width: 16px;
    height: 16px;
    background: #000;
    border-radius: 8px;
    opacity: 0.25;
    z-index: 10086;
    pointer-events: none;
    transition: 0.2s ease-in-out;
    transition-property: background, opacity, transform;
}

#cursor.hidden {
    opacity: 0;
}

#cursor.hover {
    opacity: 0.1;
    transform: scale(2.5);
}

#cursor.active {
    opacity: 0.5;
    transform: scale(0.5);
}
本代码可以直接使用,无须考虑任何版权.
只不过建议在评论区回复一下(来增强还是高中生的我的满足感 ?)
常见问题FAQ
- 免费下载或者VIP会员专享资源能否直接商用?
- 本站所有资源版权均属于原作者所有,这里所提供资源均只能用于参考学习用,请勿直接商用。若由于商用引起版权纠纷,一切责任均由使用者承担。更多说明请参考 VIP介绍。
- 提示下载完但解压或打开不了?
- 找不到素材资源介绍文章里的示例图片?
- 模板不会安装或需要功能定制以及二次开发?


发表评论
还没有评论,快来抢沙发吧!