前言:笔者把学习的webpack知识从基础到原理写个系列,以便回顾。希望能帮助到更多正在学习webpack的小伙伴。
webpack系列学习-初体验
webpack系列学习-基本用法一
webpack系列学习-各种loader使用
webpack系列学习-热更新和压缩
webpack系列学习-使用eslint和发布npm包
webpack系列学习-构建webpack配置
前言:实现一个如下功能的简易webpack
1.将ES6语法转换成ES5的语法
- 通过 Babylon 生成AST
- 通过 babel-core 将AST 重新生成源码
2.分析模块之间的依赖关系
- 通过 babel-traverse 的 ImportDeclaration方法获取依赖属性
3.生成的js文件可以在浏览器运行
现在开始:
初始化项目
mkdir simple_webpack
cd simple_webpack
npm init -y
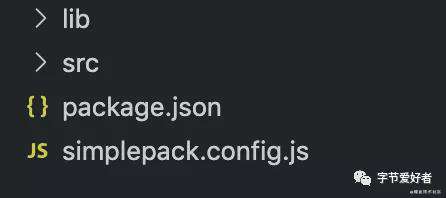
新建项目目录
-
目录解释:
- lib:simple_webpack的源码
- src:业务代码的入口
- simplepack.config.js:相当于webpack.config.js
-
首先在simplepack.config.js中配置输入和输出
const path = require('path');

module.exports = {
  entry: path.join(__dirname, './src/index.js'),
  output: {
    path: path.join(__dirname, './dist'),
    filename: 'main.js',
  },
};
- 在src目录下创建index.js和greeting.js
// index.js
import { greeting } from './greeting';

document.write(greeting('curry'));

// greeting.js
// 使用ES6语法
export function greeting(name) {
  return `hello ${name}`;
}
在lib目录下创建文件
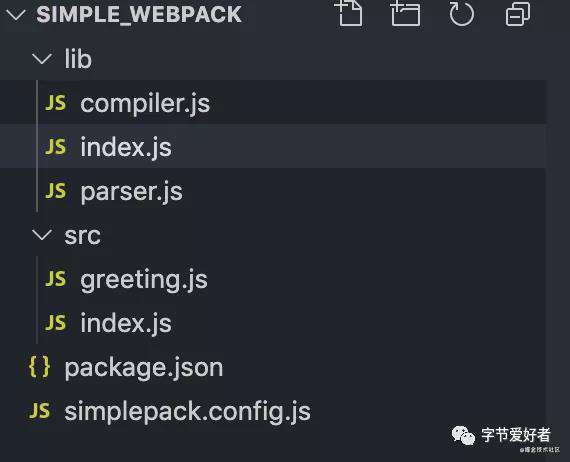
- 目录解释:
- index.js:入口文件
- parser.js:解析AST语法树,转换成源码,将ES6转换成ES5,分析依赖
- compiler.js:执行最后文件的输出
开始源码编写
- 首先在compiler.js输出一个Compiler类,包括下面的属性和方法
// compiler.js
module.exports = class Compiler {
  constructor(options) {
    // 这里的options就是simplepack导出的配置项
    const { entry, output } = options;
    this.entry = entry;
    this.output = output;
  }

  run() {}

  // 模块构建
  buildModule() {}

  // 输出文件
  emitFiles() {}
};
- 在index.js中实例化Compiler类
const Compiler = require('./compiler');
const options = require('../simplepack.config');

new Compiler(options);
- 然后编写parser.js,这里做的是转换成AST树,将ES6转换成ES5,分析依赖
// parser.js

module.exports = {
  // 生成AST树,根据文件路径生成
  getAST: path => {

  }
}
- 生成AST树,需要借助babylon,先安装下。
npm i babylon -S
- 继续编写getAST方法
const babylon = require('babylon'); // 引入babylon
const fs = require('fs');  // 引入node中fs模块

module.exports = {
  // 生成AST树
  getAST: path => {
    // 同步读取文件
    const source = fs.readFileSync(path, 'utf-8');
    // 使用babylon的parse方法进行生成AST
    return babylon.parse(source, {
      sourceType: 'module',
    });
  },
};
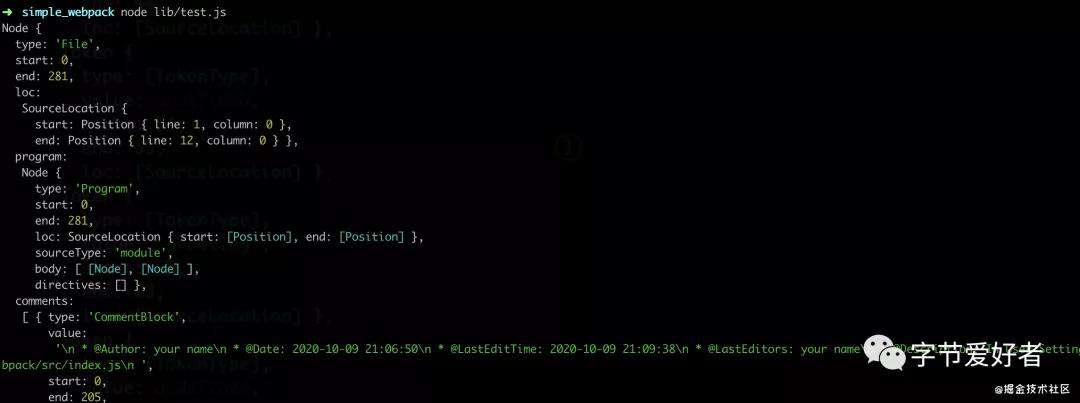
- 现在getAST方法写好了,我们来测试下。在lib目录下创建test.js
// lib/test.js

const { getAST } = require('./parser');
const path = require('path');

console.log(getAST(path.join(__dirname, '../src/index.js')));
- 执行node lib/test.js看下转换效果
- 下面接着写 分析依赖的方法:
// lib/parser.js

module.exports = {
  // ...
  getDependencies: () => {},
}
- 进行依赖分析,需要借助babel-traverse,这里安装下。
npm i babel-traverse -S
- 接着回来写分析依赖的方法
const traverse = require('babel-traverse').default;

module.exports = {
  // ...
  getDependencies: ast => {
    const dependencies = [];
    traverse(ast, {
      // ImportDeclaration:分析import语句
      ImportDeclaration: ({ node }) => {
        // 将依赖push到dependencies中
        dependencies.push(node.source.value);
      },
    });
    // 将依赖返回
    return dependencies;
  },
};
- 接下来,测试下这个方法
// lib/test.js
const { getAST, getDependencies } = require('./parser');
const path = require('path');

const ast = getAST(path.join(__dirname, '../src/index.js'));
console.log(getDependencies(ast));
- 执行 node lib/test.js,可以看到出现了依赖文件

- 现在把ES6转成了AST树,接下来将AST树转换成源码,也就是ES5
// lib/parser.js

module.exports = {
  // 将AST树转换成ES5
  transform: (ast) => {},
}
- 将AST树转换成ES5,需要借助babel-core,先安装下
npm i babel-core -S
- 回来写transform方法
const { transformFromAst } = require('babel-core');
module.exports = {
  transform: ast => {
    const { code } = transformFromAst(ast, null, {
      presets: ['env'],
    });
    return code;
  },
}
- 此时安装下env
npm i @babel/preset-env babel-preset-env -S
- 在根目录下创建.babelrc
{
    "presets": ["@babel/preset-env"]
}
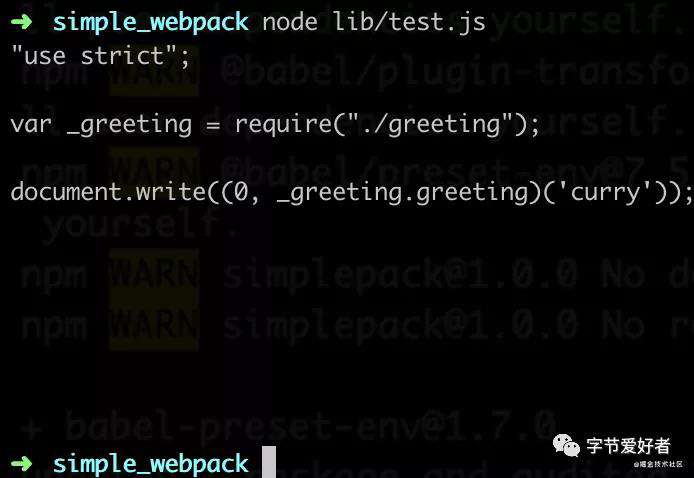
- 测试下transform方法
// lib/test.js
const { getAST, getDependencies, transform } = require('./parser');
const path = require('path');

const ast = getAST(path.join(__dirname, '../src/index.js'));
const dep = getDependencies(ast);
const source = transform(ast);
console.log(source);
- 执行 node lib/test.js , 可以看到打印出了源码
- 到此就写完了parser.js中的方法。
接下来开始写compiler.js中的方法
- 首先需要在index.js中执行run方法
// lib/index.js
const Compiler = require('./compiler');
const options = require('../simplepack.config');

new Compiler(options).run();
- 开始写compiler.js中的buildModule
module.exports = class Compiler {
  constructor(options) {
    const { entry, output } = options;
    this.entry = entry;
    this.output = output;
  }
  run() {
    const entryModule = this.buildModule(this.entry, true);
  }

  // 模块构建
  buildModule(filename, isEntry) {
    let ast;
    if (isEntry) {
      ast = getAST(filename);
    } else {
      // 这里需要找到绝对路径,通过path转换下
      const absolutePath = path.join(process.cwd(), './src', filename);
      ast = getAST(absolutePath);
    }
    return {
      filename,
      dependencies: getDependencies(ast),
      source: transform(ast),
    };
  }

  // 输出文件
  emitFiles() {}
};
- 接着写run方法,此时我们先可以打印下entryModule,查看结果,是在buildModule中返回的。
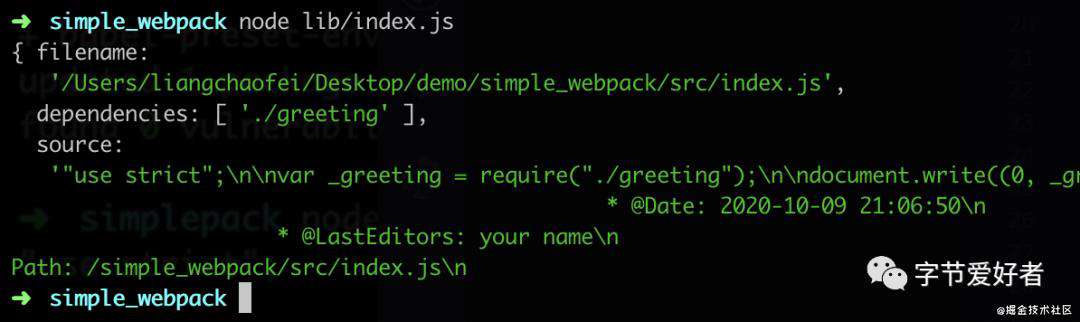
- 我们需要把依赖全部放到一个数组中,定义this.modules来填充依赖。
// lib/compiler.js
const { getAST, getDependencies, transform } = require('./parser');
const path = require('path');
module.exports = class Compiler {
  constructor(options) {
    const { entry, output } = options;
    this.entry = entry;
    this.output = output;
    this.modules = [];
  }
  run() {
    const entryModule = this.buildModule(this.entry, true);
    // 把依赖全部push到modules中
    this.modules.push(entryModule);
    // 遍历递归
    this.modules.map(_module => {
      _module.dependencies.map(dependency => {
        this.modules.push(this.buildModule(dependency));
      });
    });
    console.log(this.modules)
  }

  // 模块构建
  buildModule(filename, isEntry) {
    let ast;
    if (isEntry) {
      ast = getAST(filename);
    } else {
      const absolutePath = path.join(process.cwd(), './src', filename);
      ast = getAST(absolutePath);
    }
    return {
      filename,
      dependencies: getDependencies(ast),
      source: transform(ast),
    };
  }

  // 输出文件
  emitFiles() {}
};
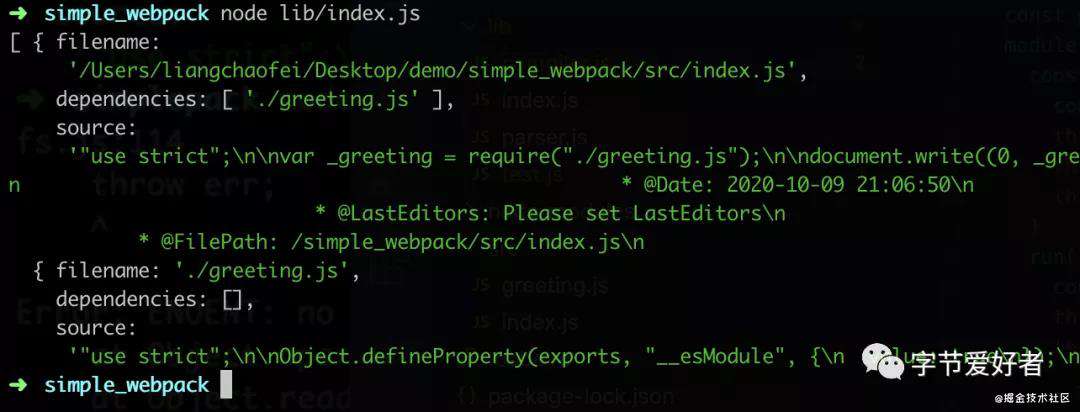
- 打印下modules
- 接下来,拿到所有依赖后,就要输出文件,在run方法中执行this.emitFiles方法
modules.exports = {
  run(){
    // ...
    this.emitFiles()
  },
  emitFiles() {
    const outputPath = path.join(this.output.path, this.output.filename);
    //
    let modules = '';
    this.modules.map(_module => {
      modules += `'${_module.filename}': function(require,module,exports){${_module.source}},`;
    });
    // 自执行
    const bundle = `(function(modules){
        function require(filename){
            var fn = modules[filename];
            var module = { exports: {}};
            fn(require, module, module.exports)
            return module.exports;
        }
        require('${this.entry}')
    })({${modules}})`;

    console.log('bundle', bundle);
    fs.writeFileSync(outputPath, bundle, 'utf-8');
  }
}
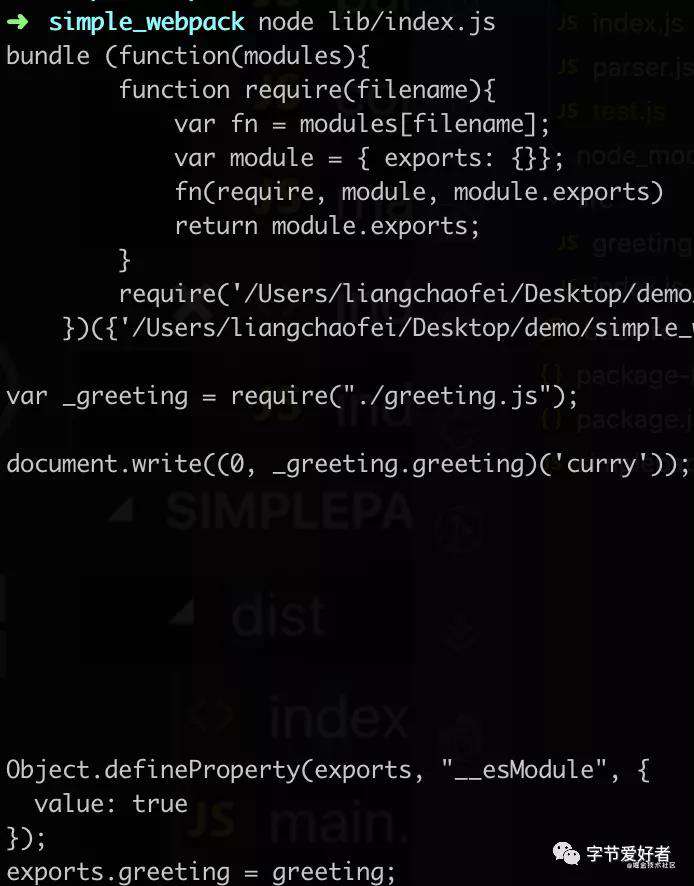
- 打印下最后的bundle,如下:
- 手动创建下dist目录,执行node lib/index.js。可以看到dist目录下就有了打包好的文件

- 在dist创建index.html,并引入main.js,在浏览器中打开index.html查看效果

- 至此完成了一个简易的webpack
以上代码放到了github
可以下载调试。
常见问题FAQ
- 免费下载或者VIP会员专享资源能否直接商用?
- 本站所有资源版权均属于原作者所有,这里所提供资源均只能用于参考学习用,请勿直接商用。若由于商用引起版权纠纷,一切责任均由使用者承担。更多说明请参考 VIP介绍。
- 提示下载完但解压或打开不了?
- 找不到素材资源介绍文章里的示例图片?
- 模板不会安装或需要功能定制以及二次开发?


发表评论
还没有评论,快来抢沙发吧!